Installing Jekyll on Windows: building a personal blog
I previously wrote about setting up a personal blog on GitHub, but left out Jekyll installation. After getting a new computer, I took the opportunity to record the Windows setup in detail.
Step 1: install Ruby
Jekyll is built with Ruby, so prepare Ruby first.
- Visit the Ruby websiteDownload the appropriate RubyInstaller.
- I chose the rubyinstaller-devkit-3.4.7-1-x64 release.
- Choose a version appropriate for your system.
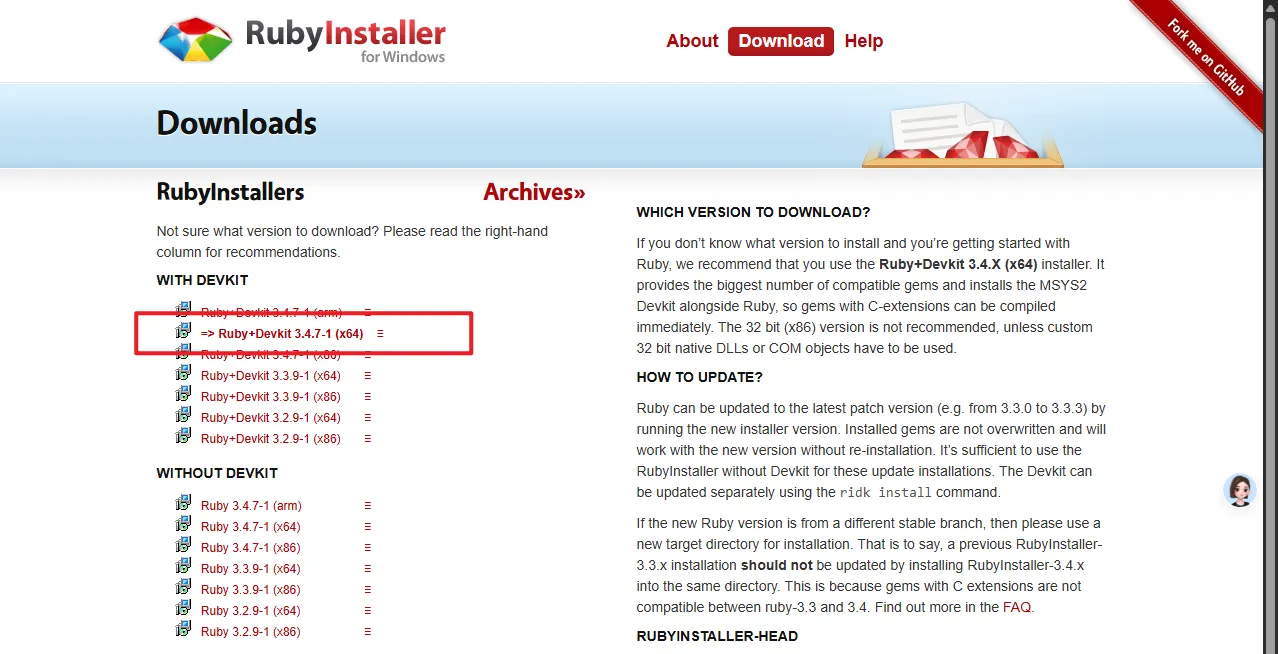
Important installation steps:
- Run the downloaded installer and follow its instructions.
- Important: enable “Add to PATH” so the commands can be used from a terminal.
- Install the MSYS2 components offered by the installer; they provide the build tools needed by some gems.
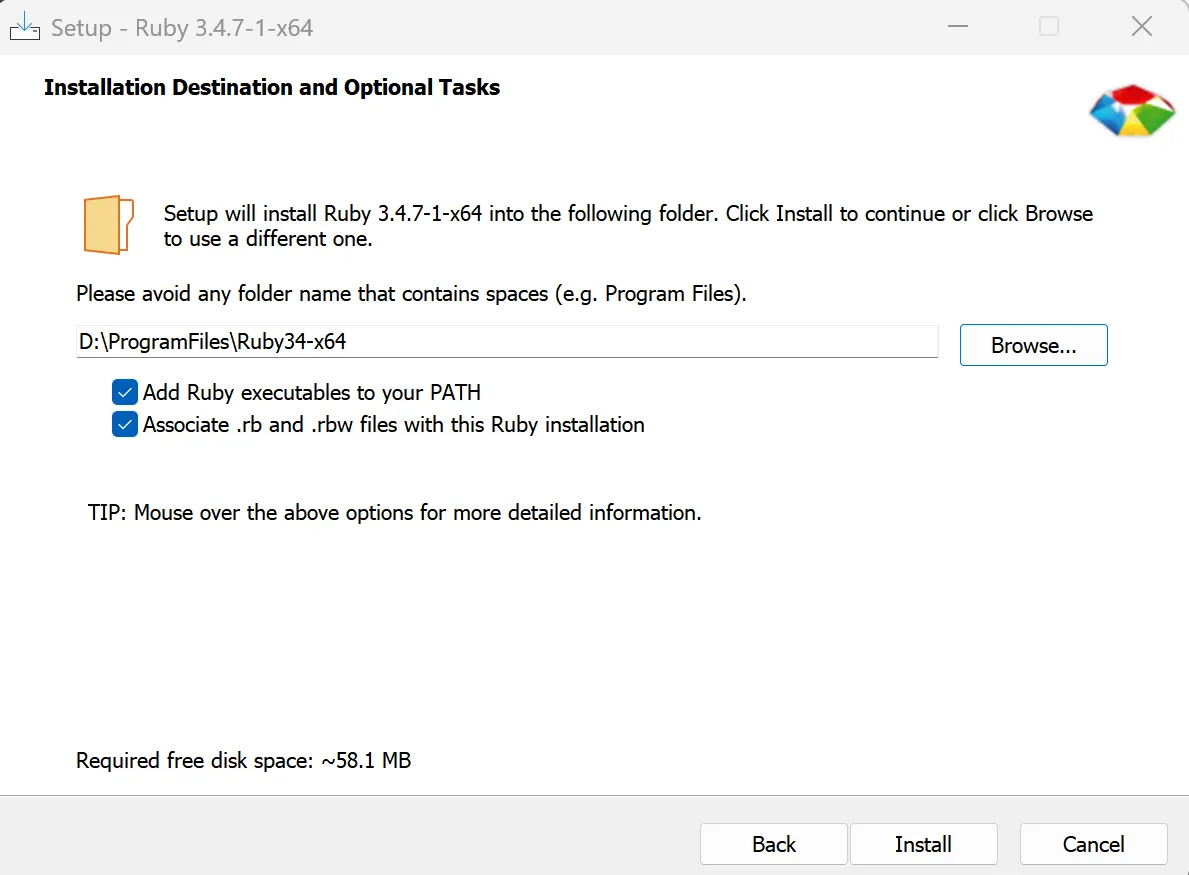
After installation, open a command prompt and check Ruby:
ruby -v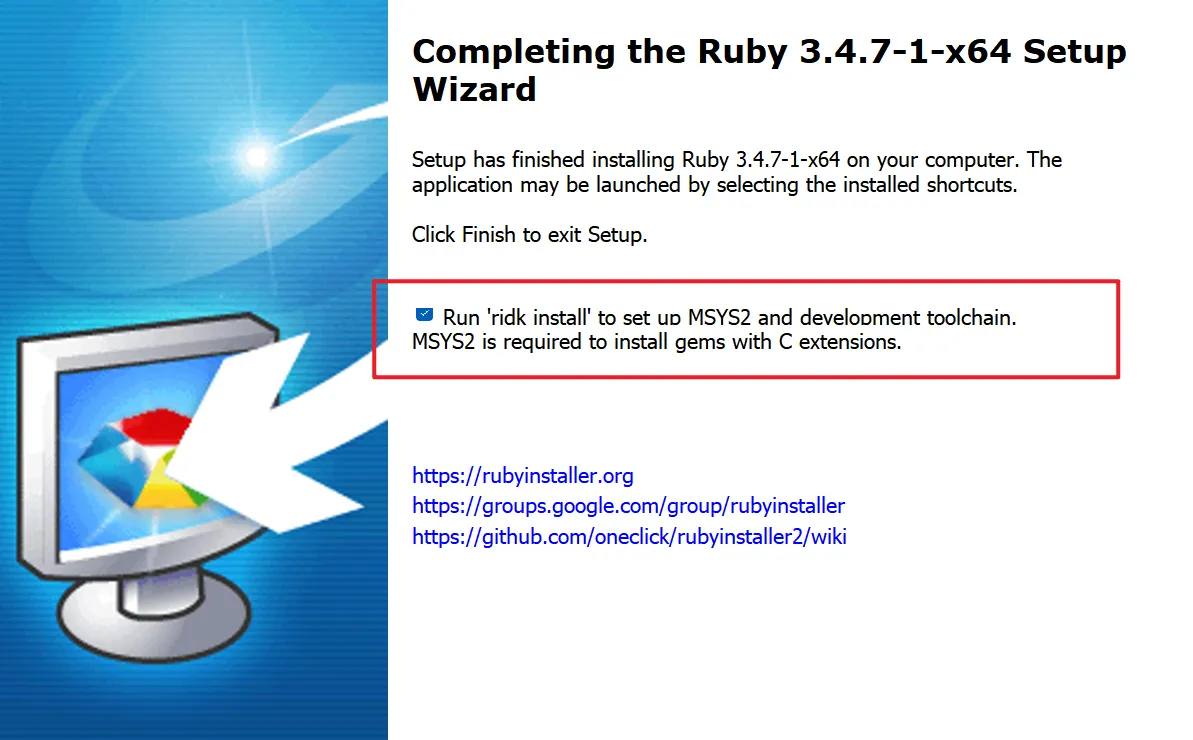
Step 2: install RubyGems
RubyGems manages Ruby packages, including Jekyll.
- Visit the RubyGems download page
- Download the ZIP archive.
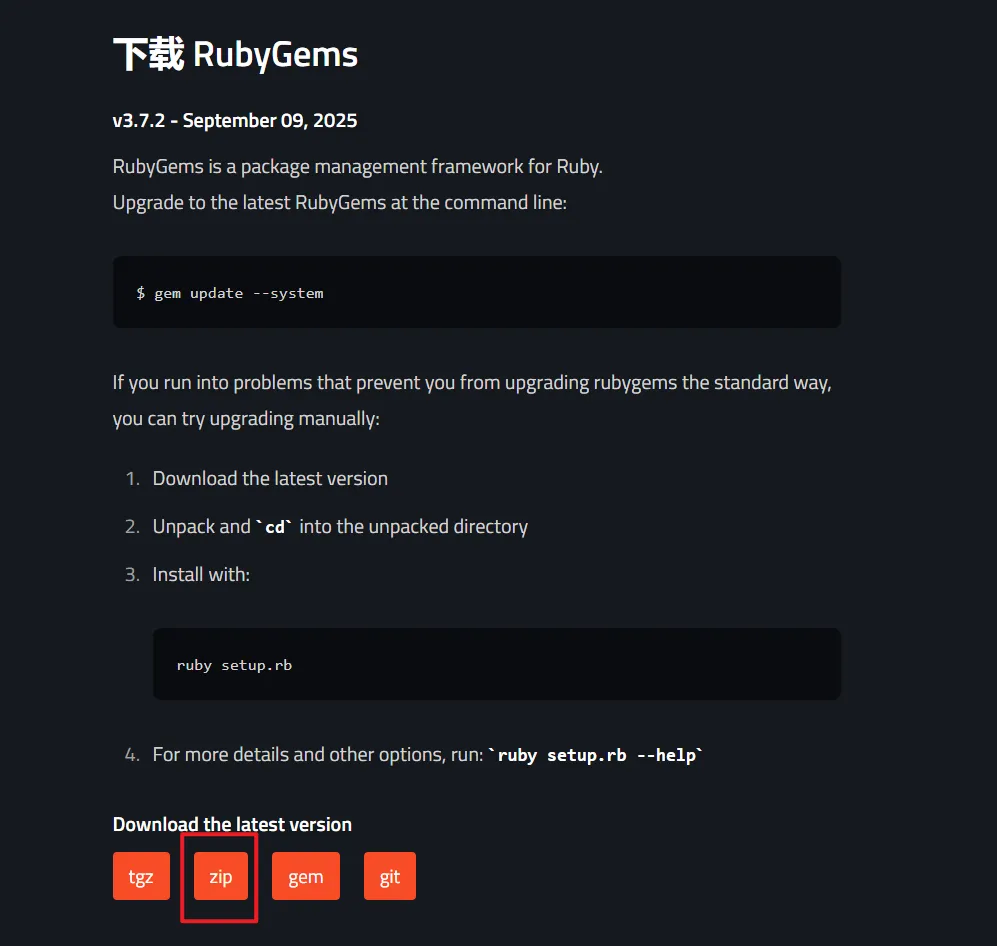
Installation steps:
- Extract the ZIP into a suitable directory.
- Open a command prompt in that directory.
- Run the installation command:
ruby setup.rb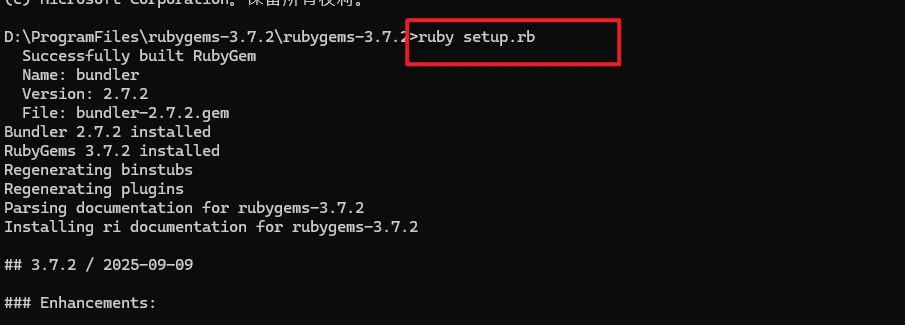
Step 3: install Jekyll and related components
Now install Jekyll.
Install Jekyll itself:
gem install jekyllInstall the pagination plugin used by many themes:
gem install jekyll-paginateCheck the installation:
jekyll -vStep 4: test locally
From your Jekyll blog directory, start the local server:
bundle exec jekyll serverIf a plugin is missing, install the dependency indicated by the error:
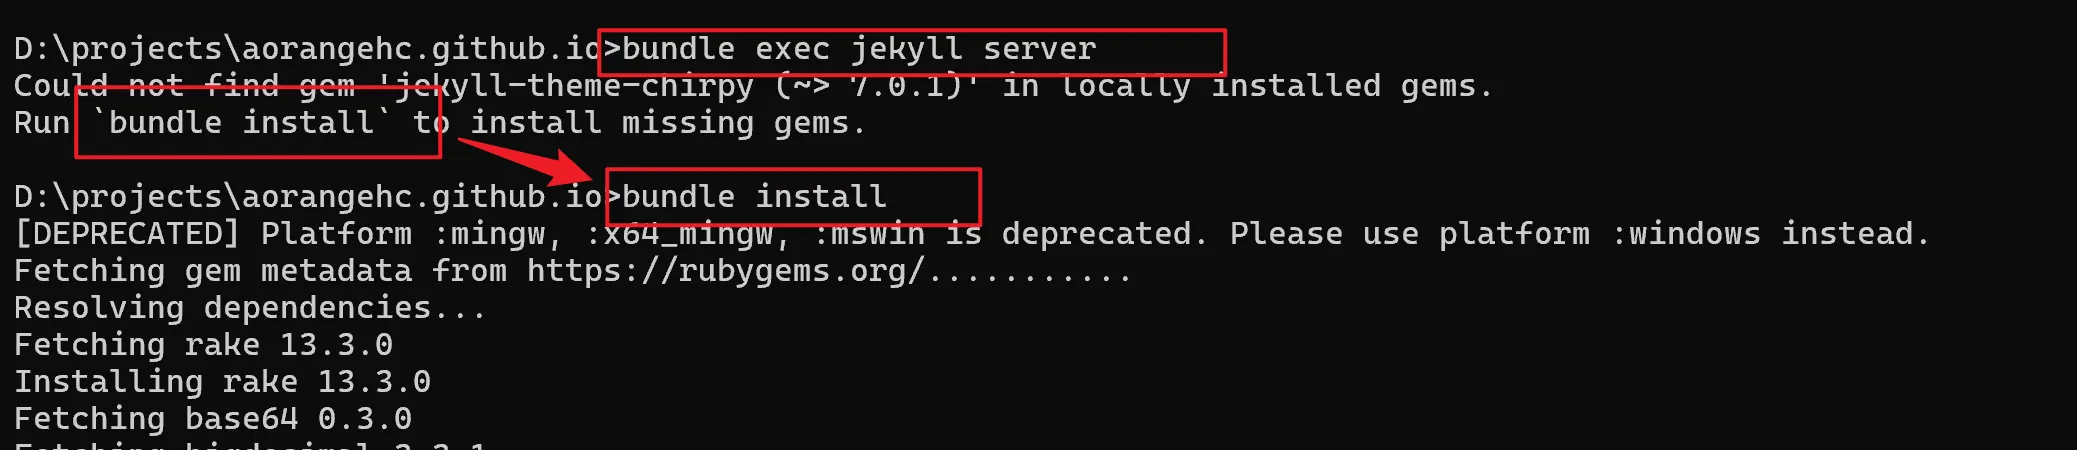
Run the server again after installation; you should see a successful startup:
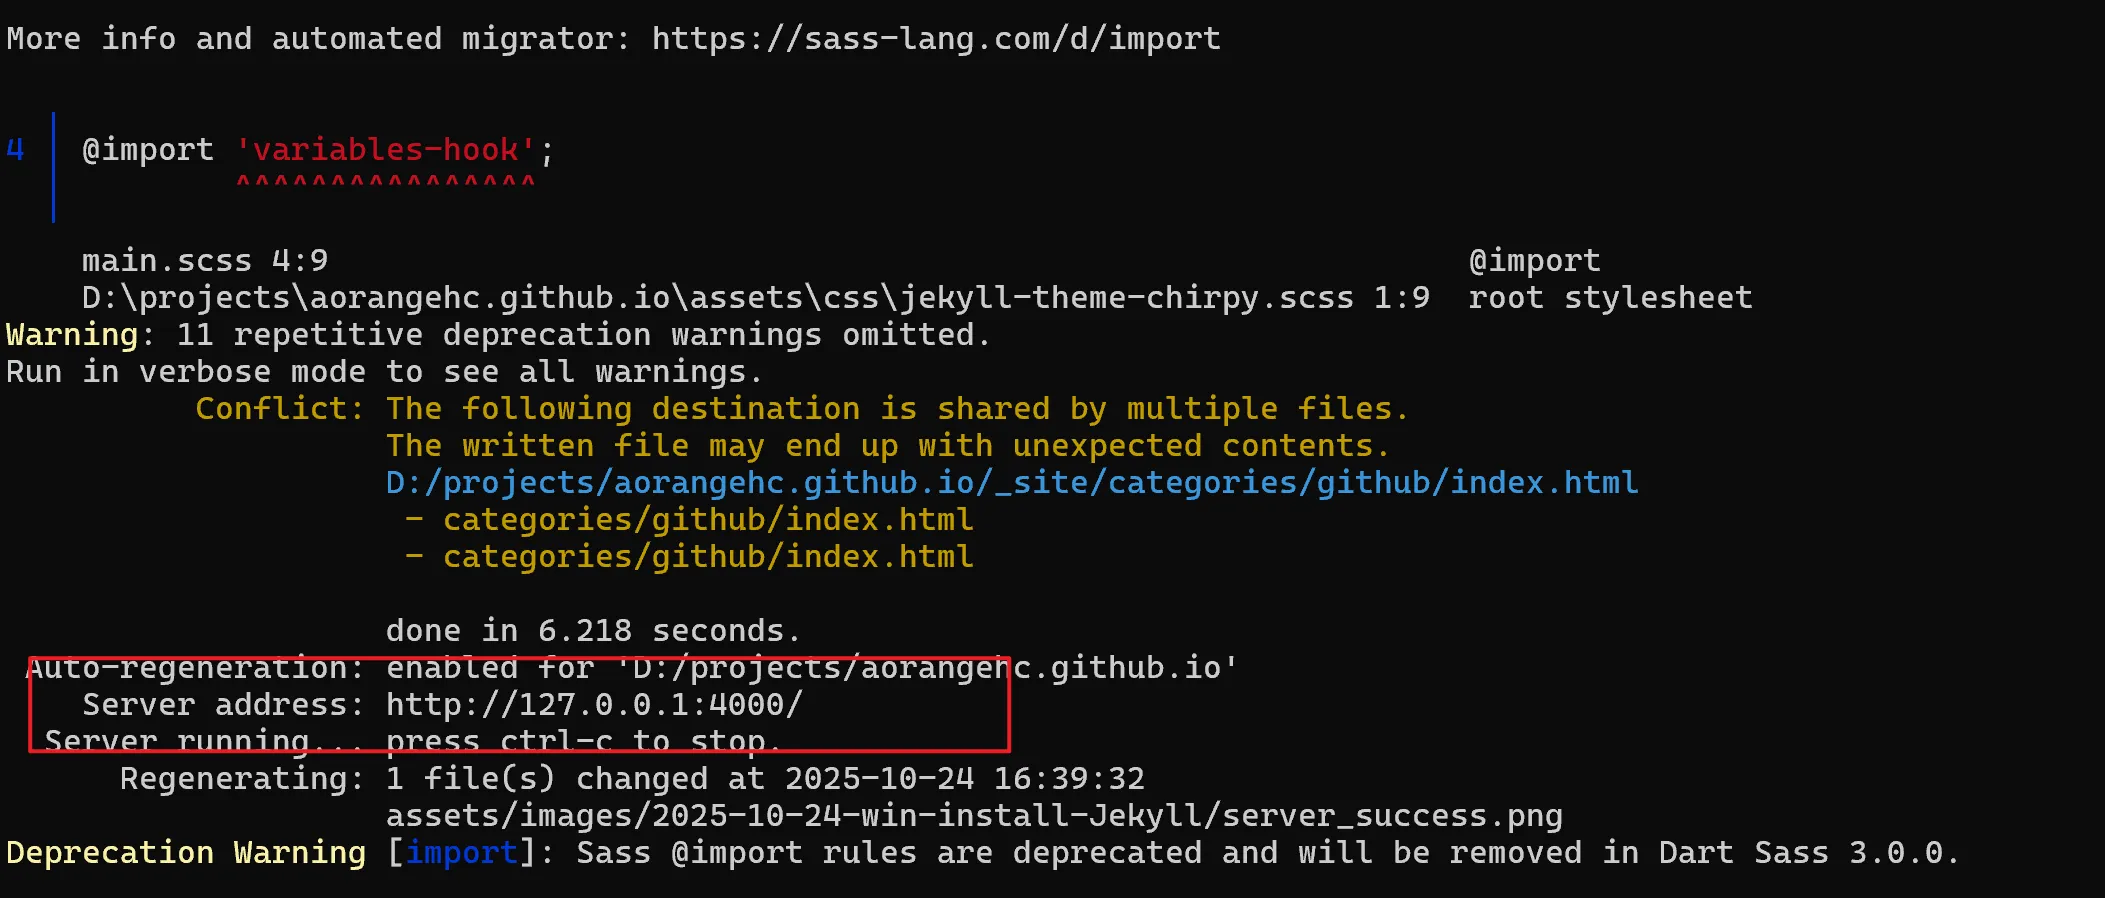
Open http://localhost:4000 in your browser to view the blog locally.
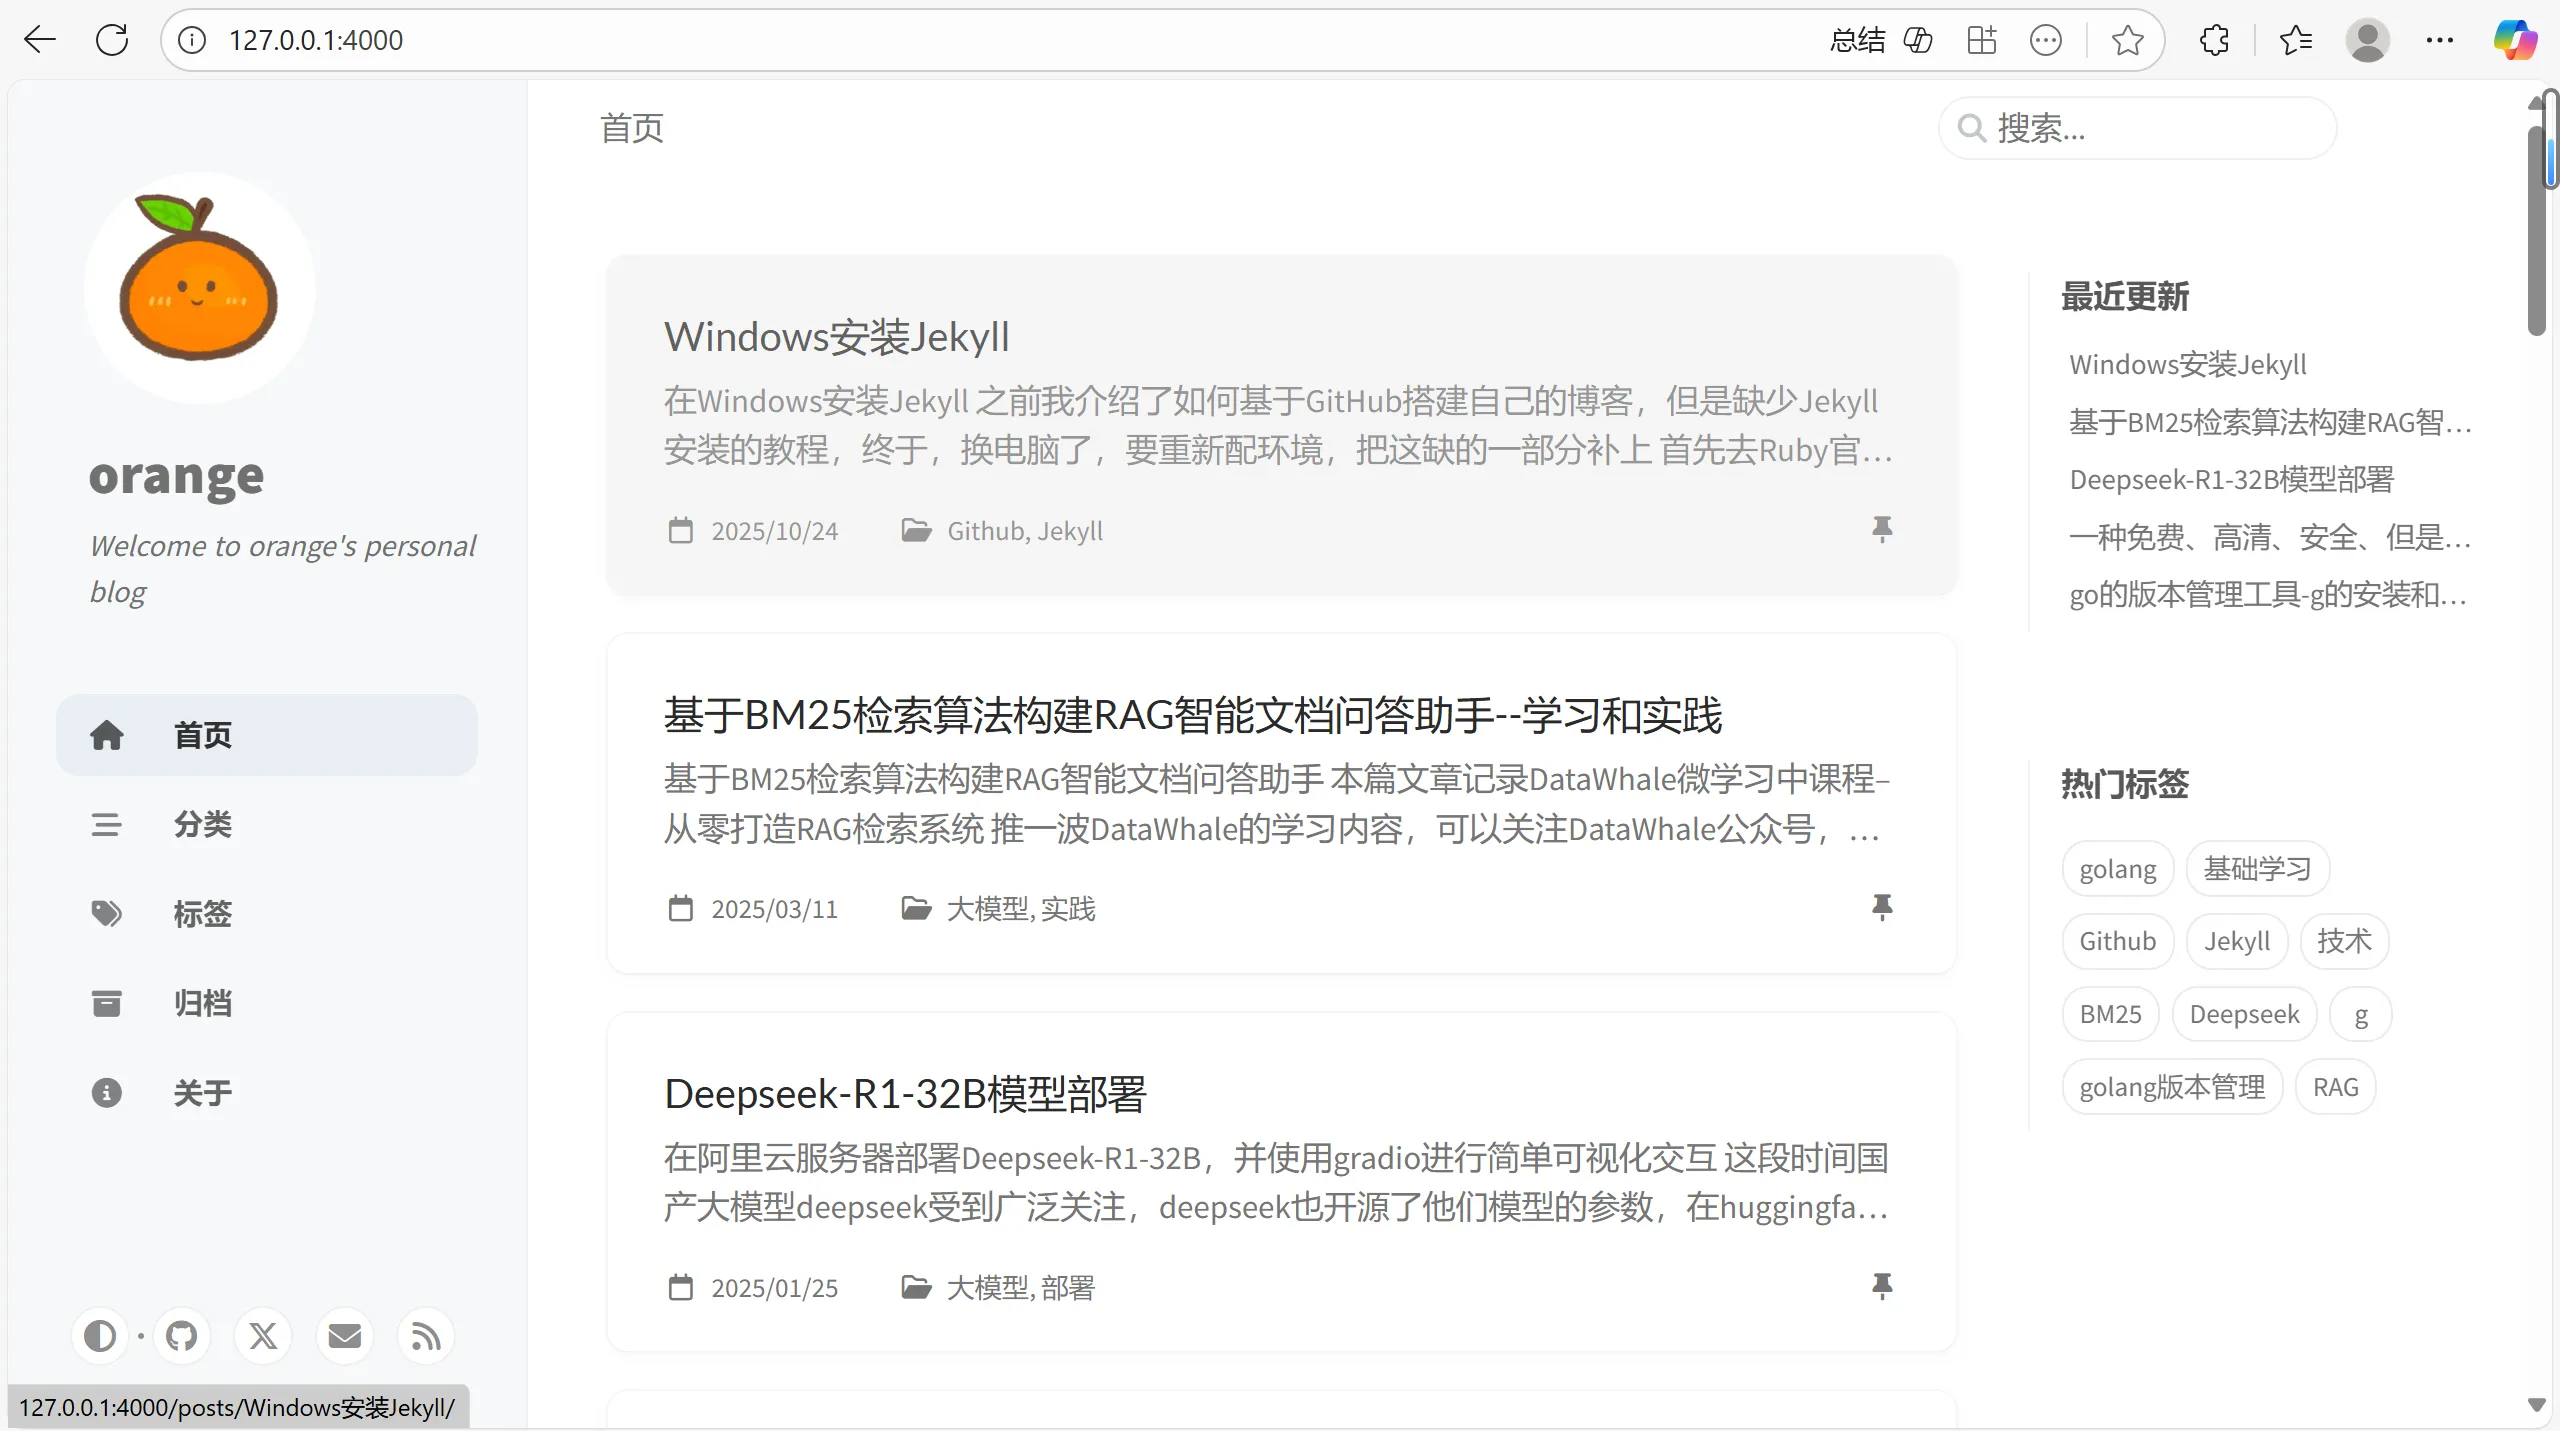
Installation complete! 🎉
Jekyll is now installed on Windows, ready for local blog development and testing. If you run into an installation problem, record the error so it can be discussed and diagnosed.
A useful habit: write down the setup process so that moving to another computer or reinstalling the system is easier.
References:Jekyll on Windows
About the author I write about web development and open-source tools, sharing what I learn through practical work. I hope these notes help other developers solve similar problems and provide a place to keep learning together.