This article mainly explains how to use Jekyll and GitHub to create a personal website of your own. Through the site you can record your study notes and technical takeaways, and at the same time present yourself better and develop the good habit of taking notes (build a good habit in 21 days, easily, haha).
0. A few things at the beginning
Ruby installation tutorial Because the article was written afterwards, it does not cover installing Ruby; for the installation guide you can refer to the link above.
The purpose of installing Ruby is to run the code locally and see how the site looks; if you don’t need to run it locally, you can skip setting up a Ruby environment.
Jekyll theme site http://jekyllthemes.org/ The site contains many static-site templates that you can choose from freely. This article uses the chirpy theme; the configuration process is much the same for all templates.
1. Create your own repository with GitHub
step 1
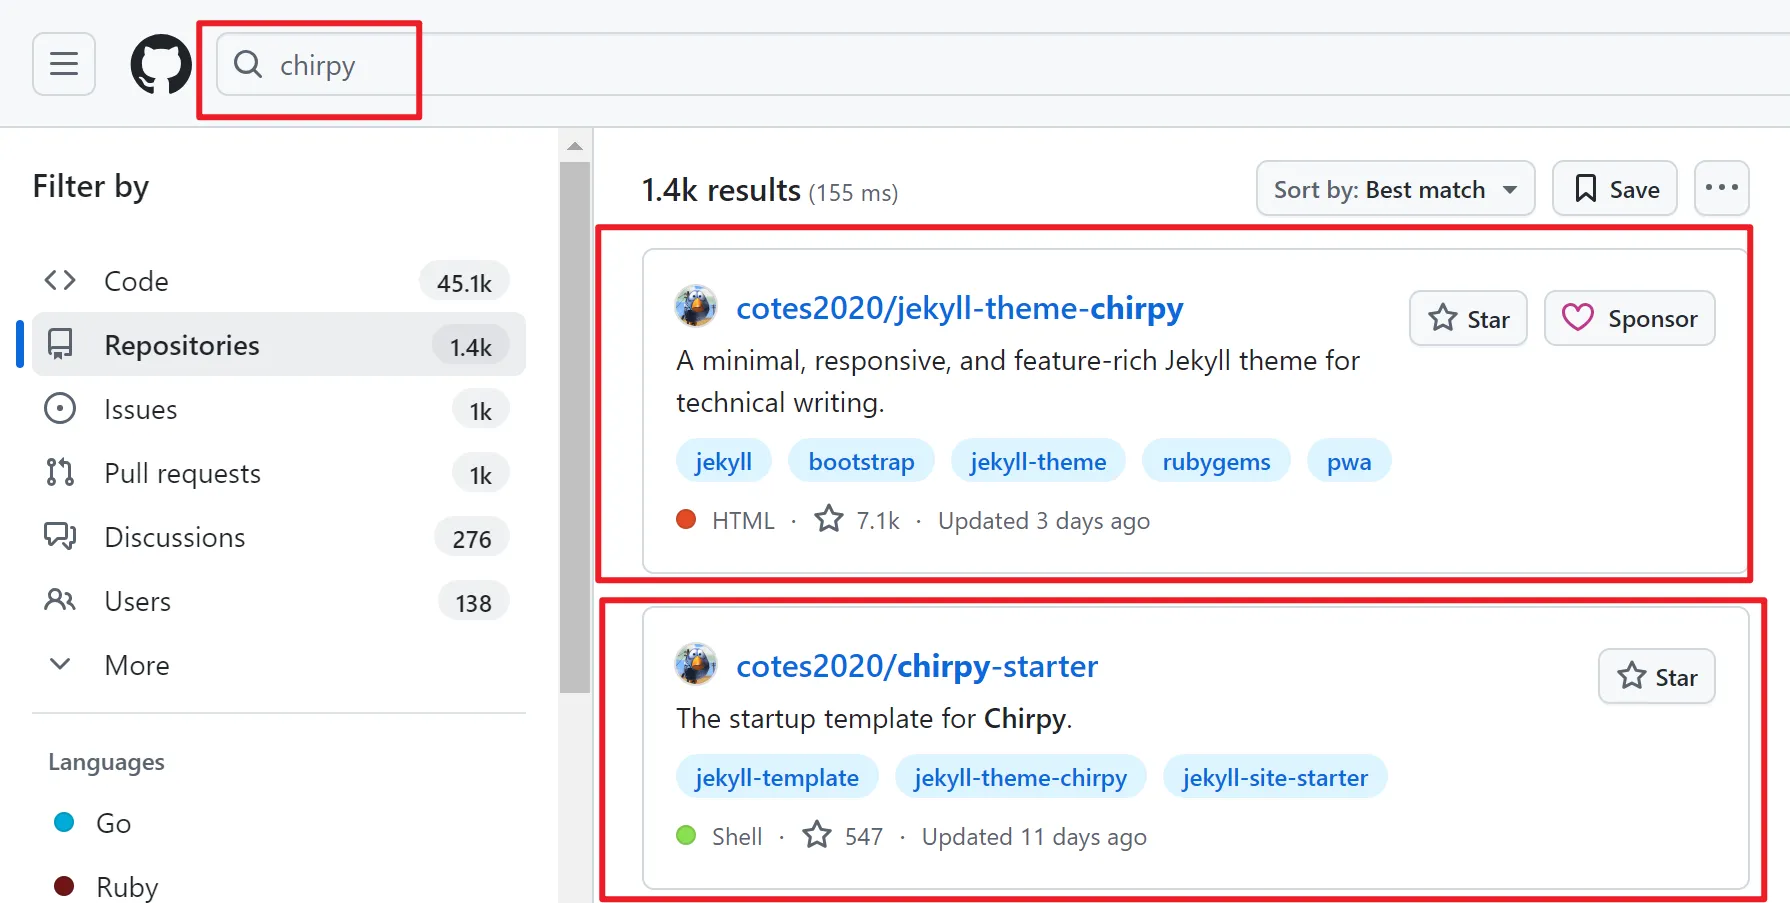
Type chirpy in GitHub to find the template used in this tutorial. The upper template can be modified as you like — experienced users can read the source code and create their own homepage; the repository below is simpler to operate. This article uses the template below, makes no changes to it, and uses it after some basic configuration.
step 2
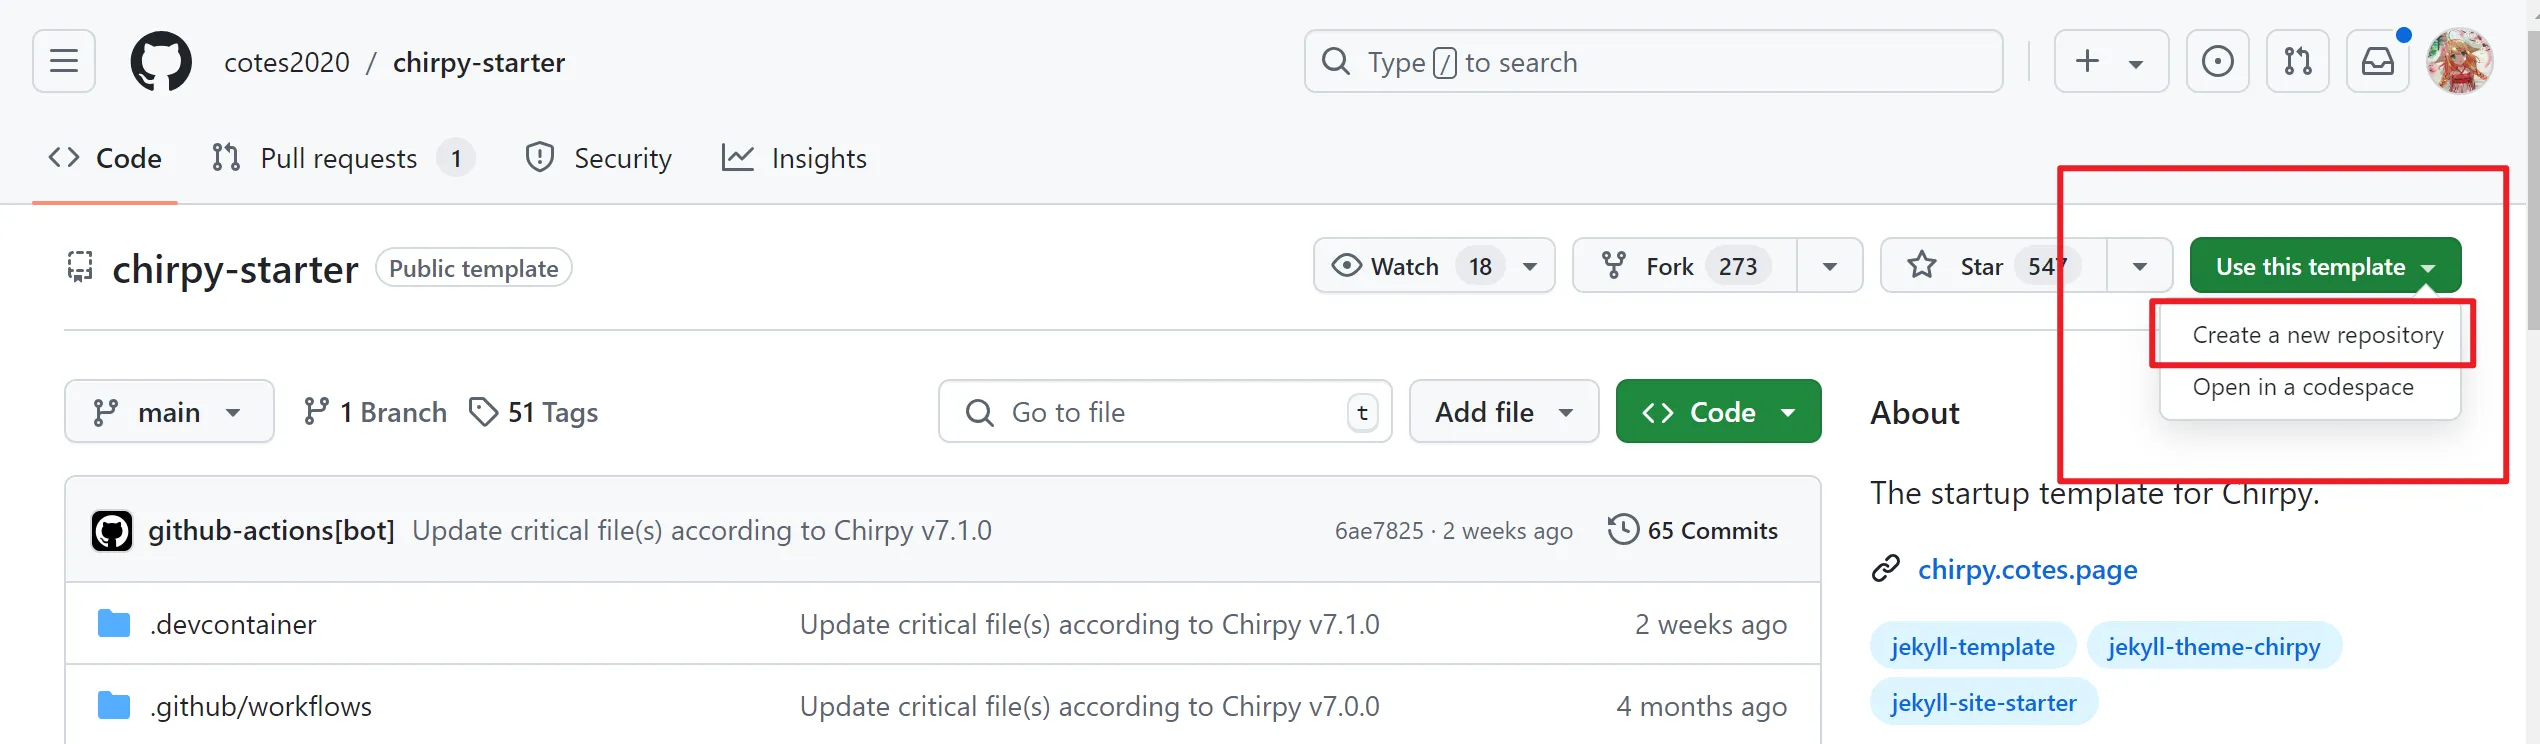
First locate the GitHub repository where the template lives, click “use this template” in the top-left corner, then select “Create a new repository” to build your own repository from the template.
step 3
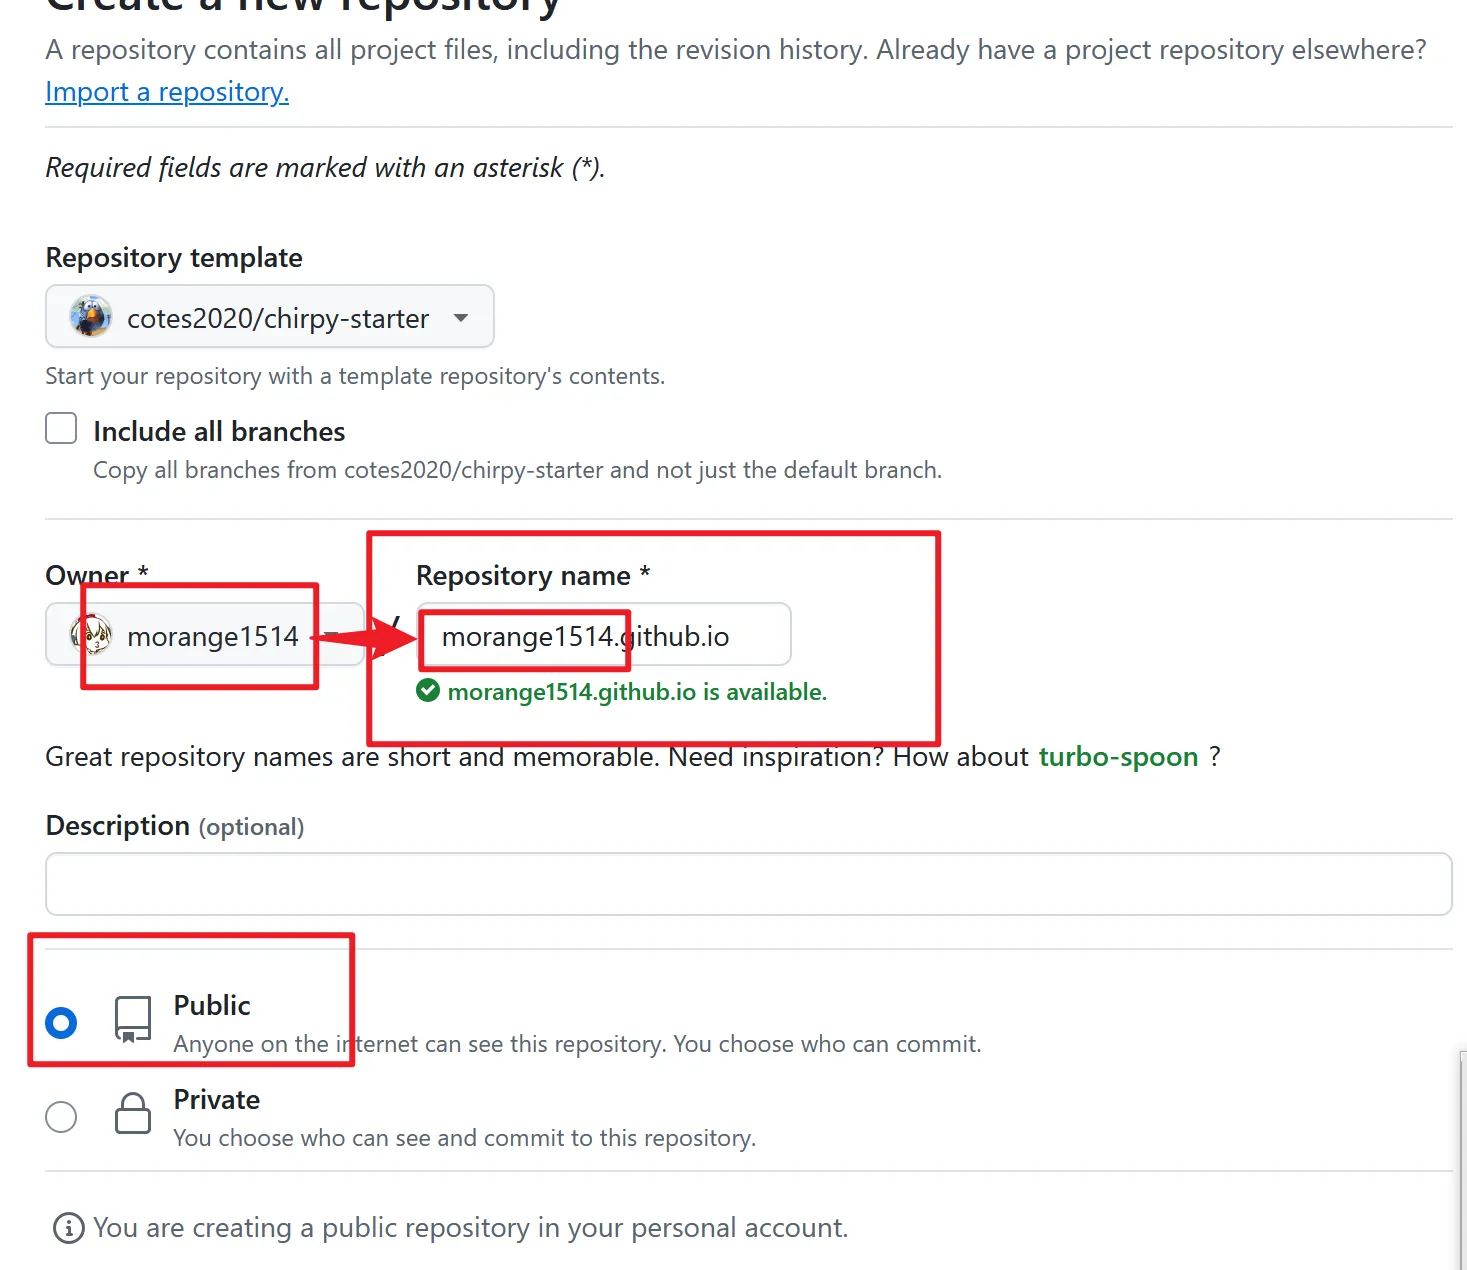
Configure the repository. First, name your repository: so that it can later serve as your personal homepage, the name must be set to “your username”+“.github.io”, which lets you access it directly at https://username.github.io. Then set the repository’s visibility to Public (it is Public by default, so no change is needed).
step 4
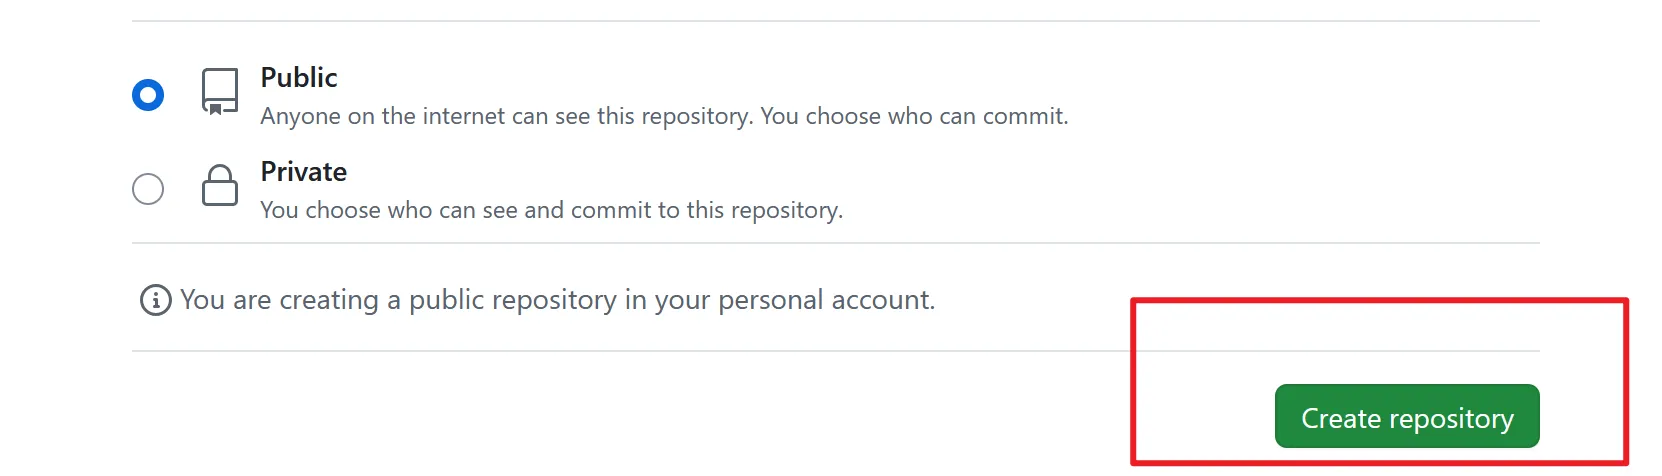
Click “Create repository” to create your own repository.
step 5
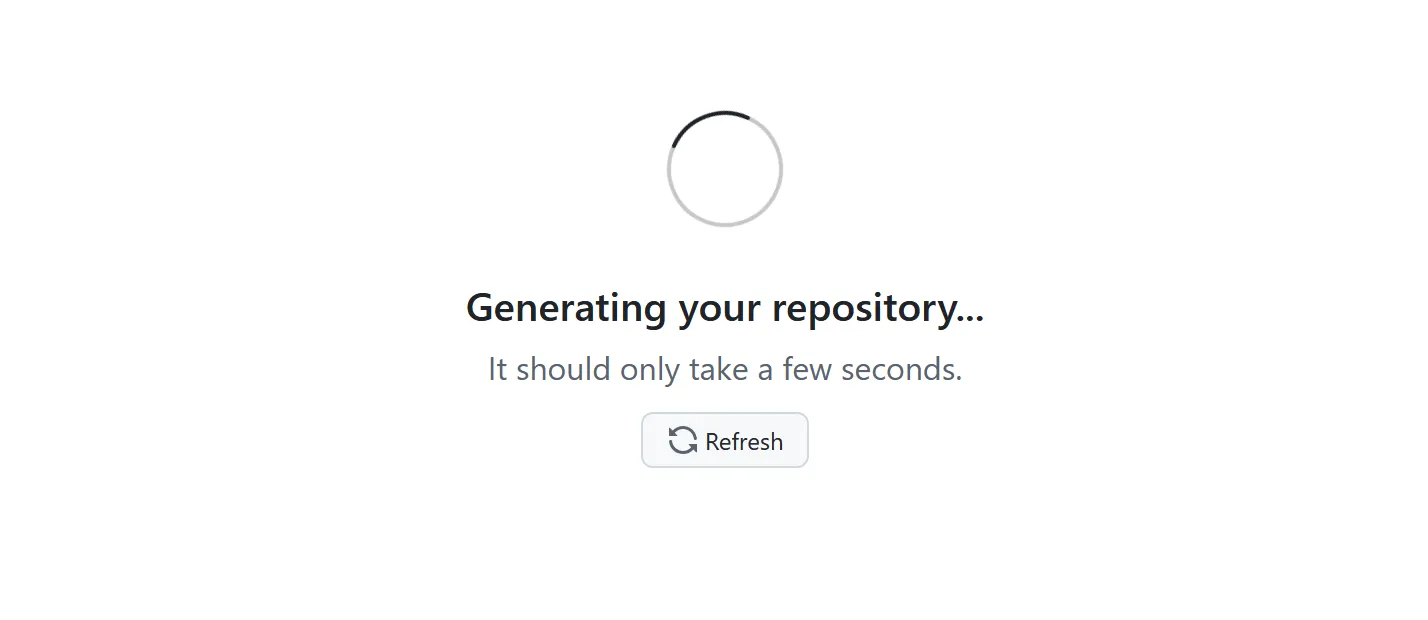
Wait for the repository to be created.
step 6
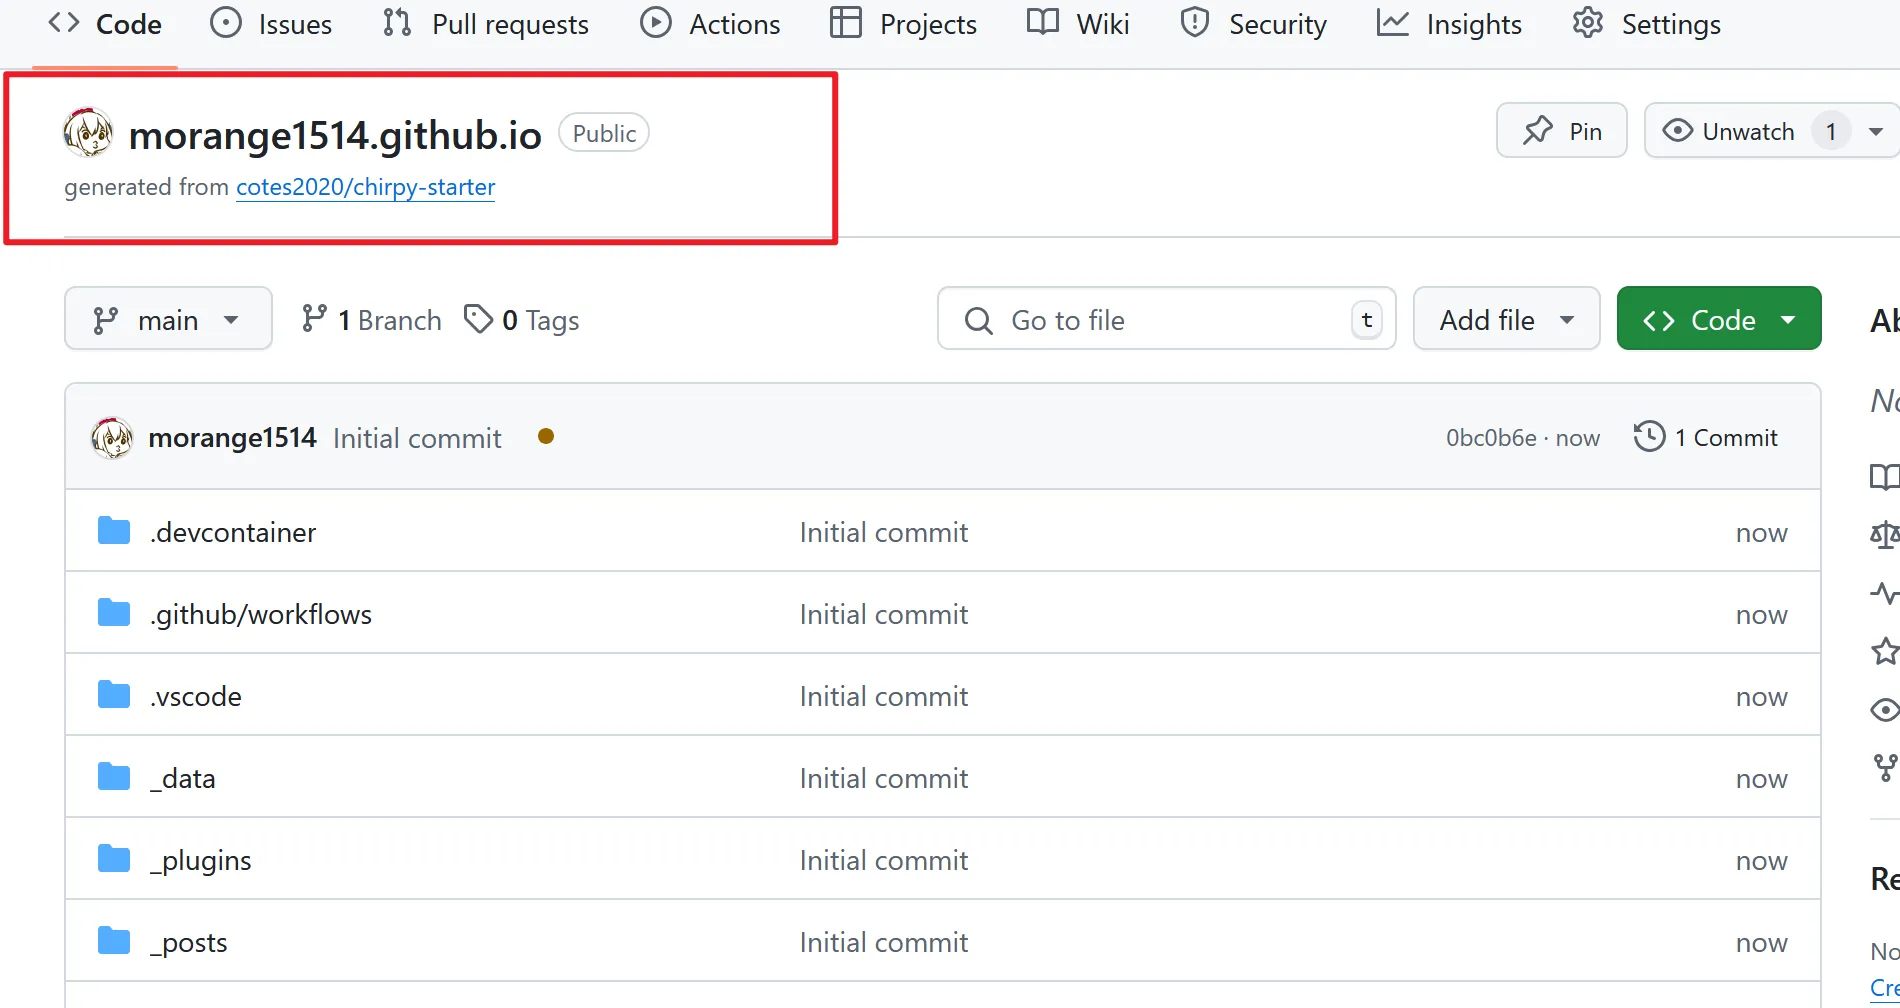
The repository has been created. At this point you can check that the repository name is correct, to avoid the web page failing to display later.
step 7
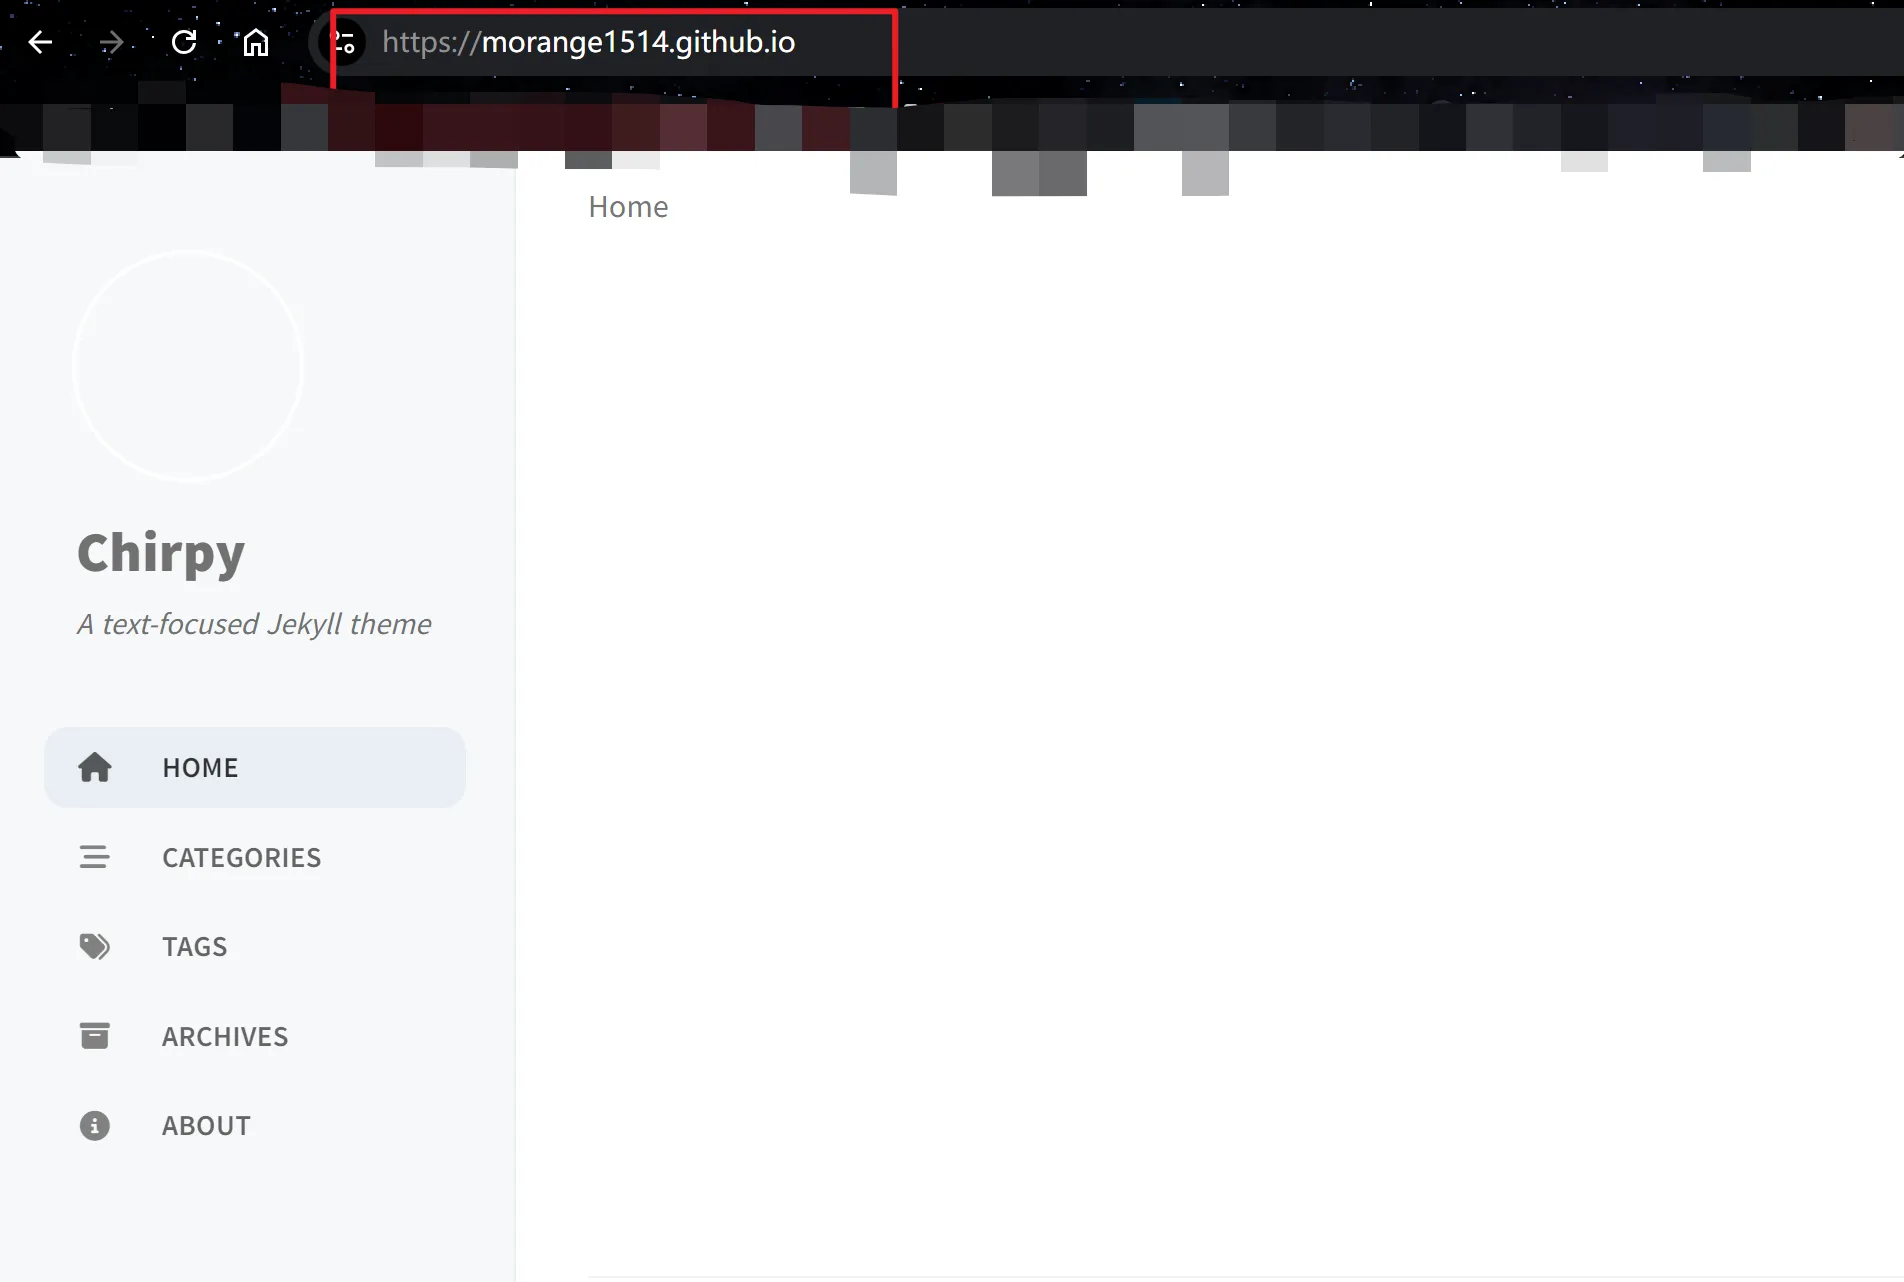
After waiting a while for GitHub to finish configuring, enter “username.github.io” in your browser to get a first look at the page. At this point there is only one page and much of the configuration is not done yet; if it displays correctly, that is an initial success.
2. Clone the repository to your local machine
To configure the site better, test the results, and later configure and upload posts, you can git the project to your local machine and configure it there.
Running the Jekyll template locally requires a Ruby environment; for the setup process you can refer to the link above.
Of course, you can also make changes directly on GitHub.
Get the git link
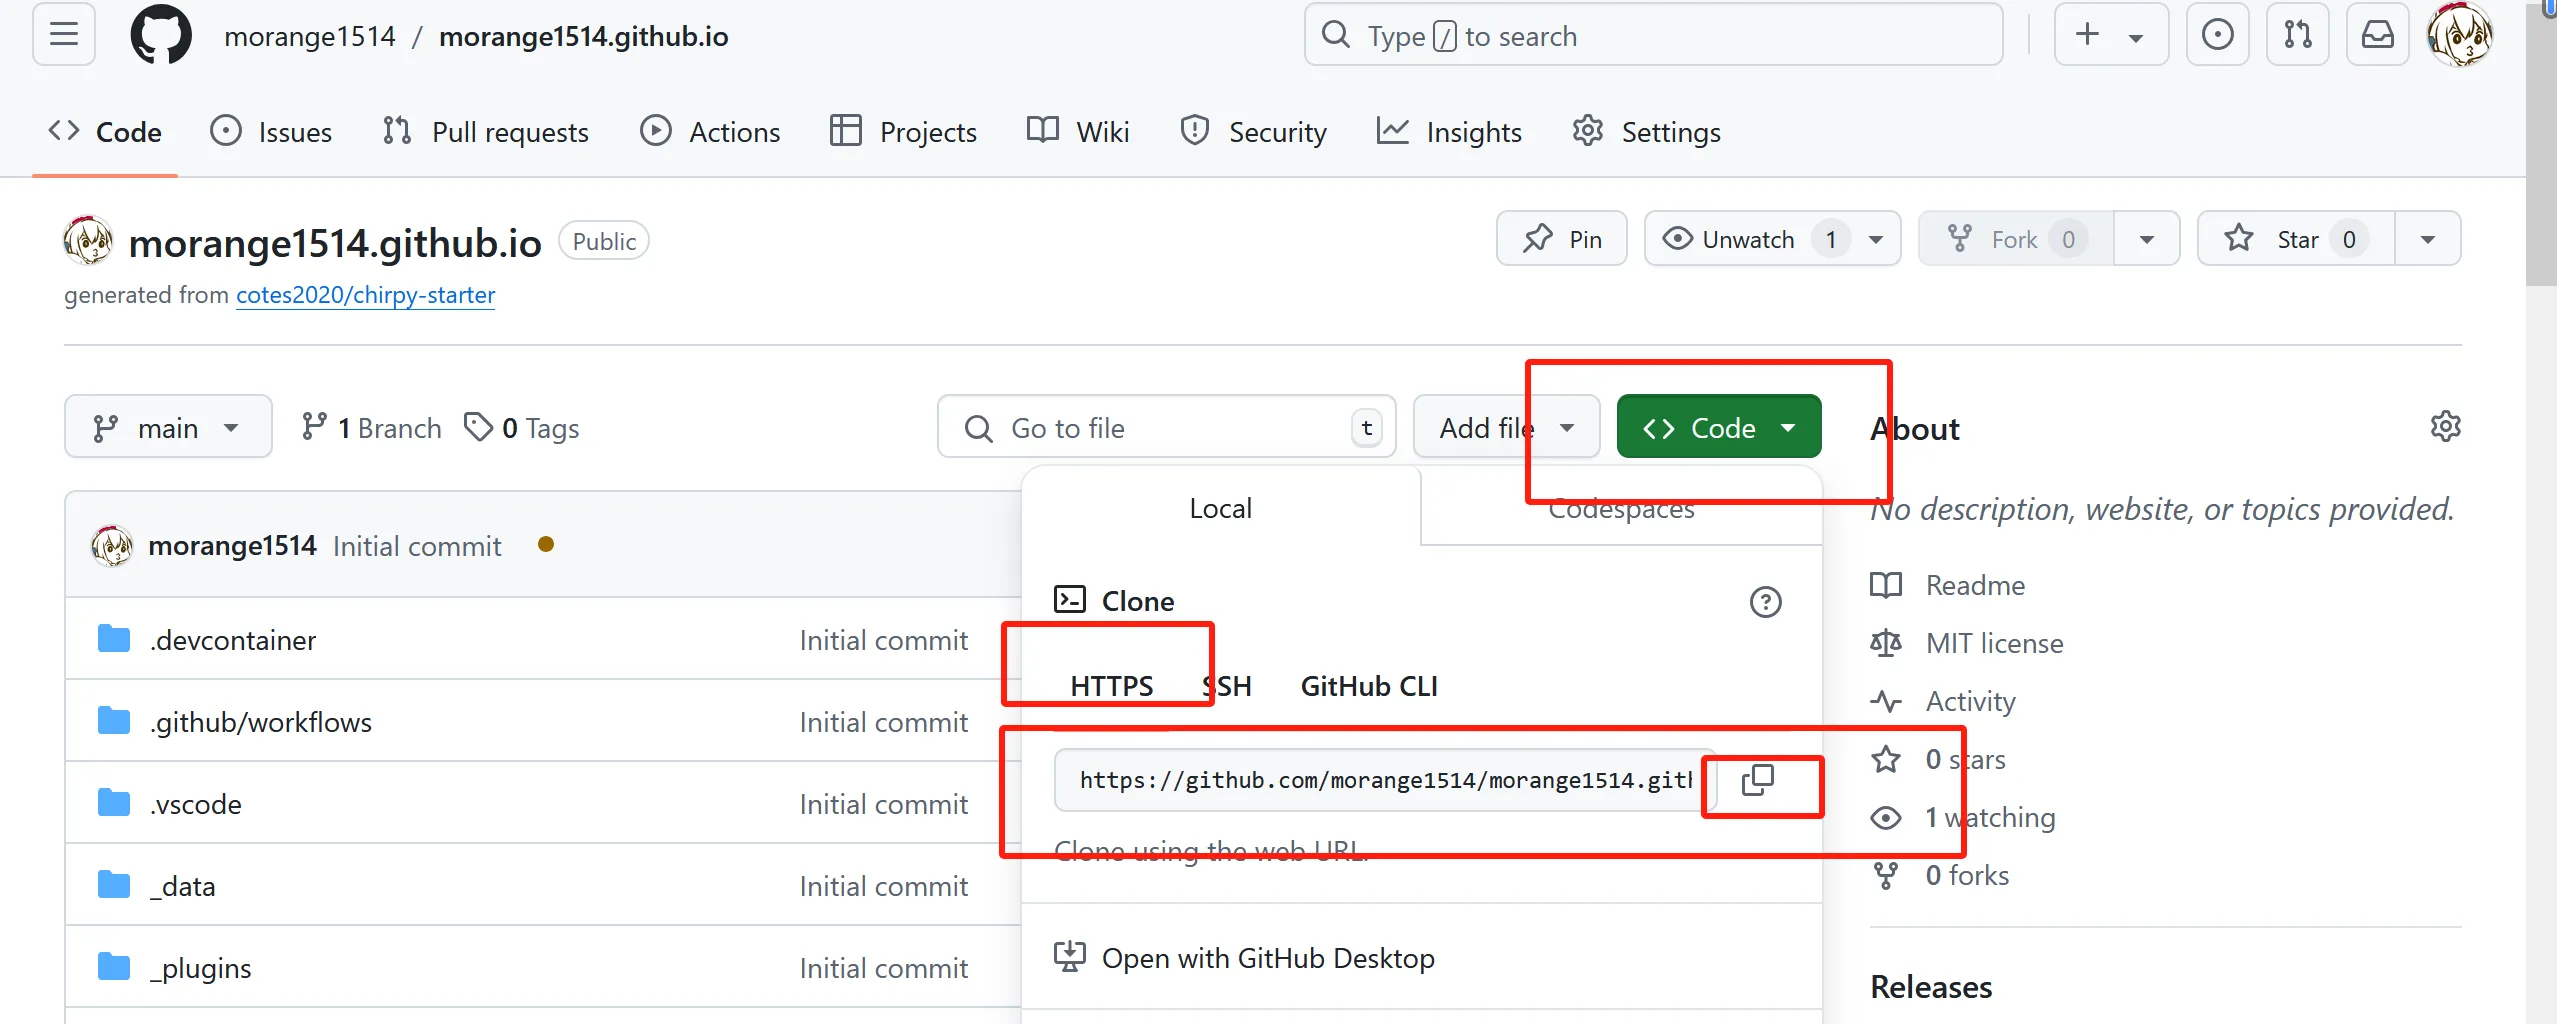
On the page of the repository you created, click “code” in the top-right corner, select HTTPS, and copy the git link.
Clone it locally
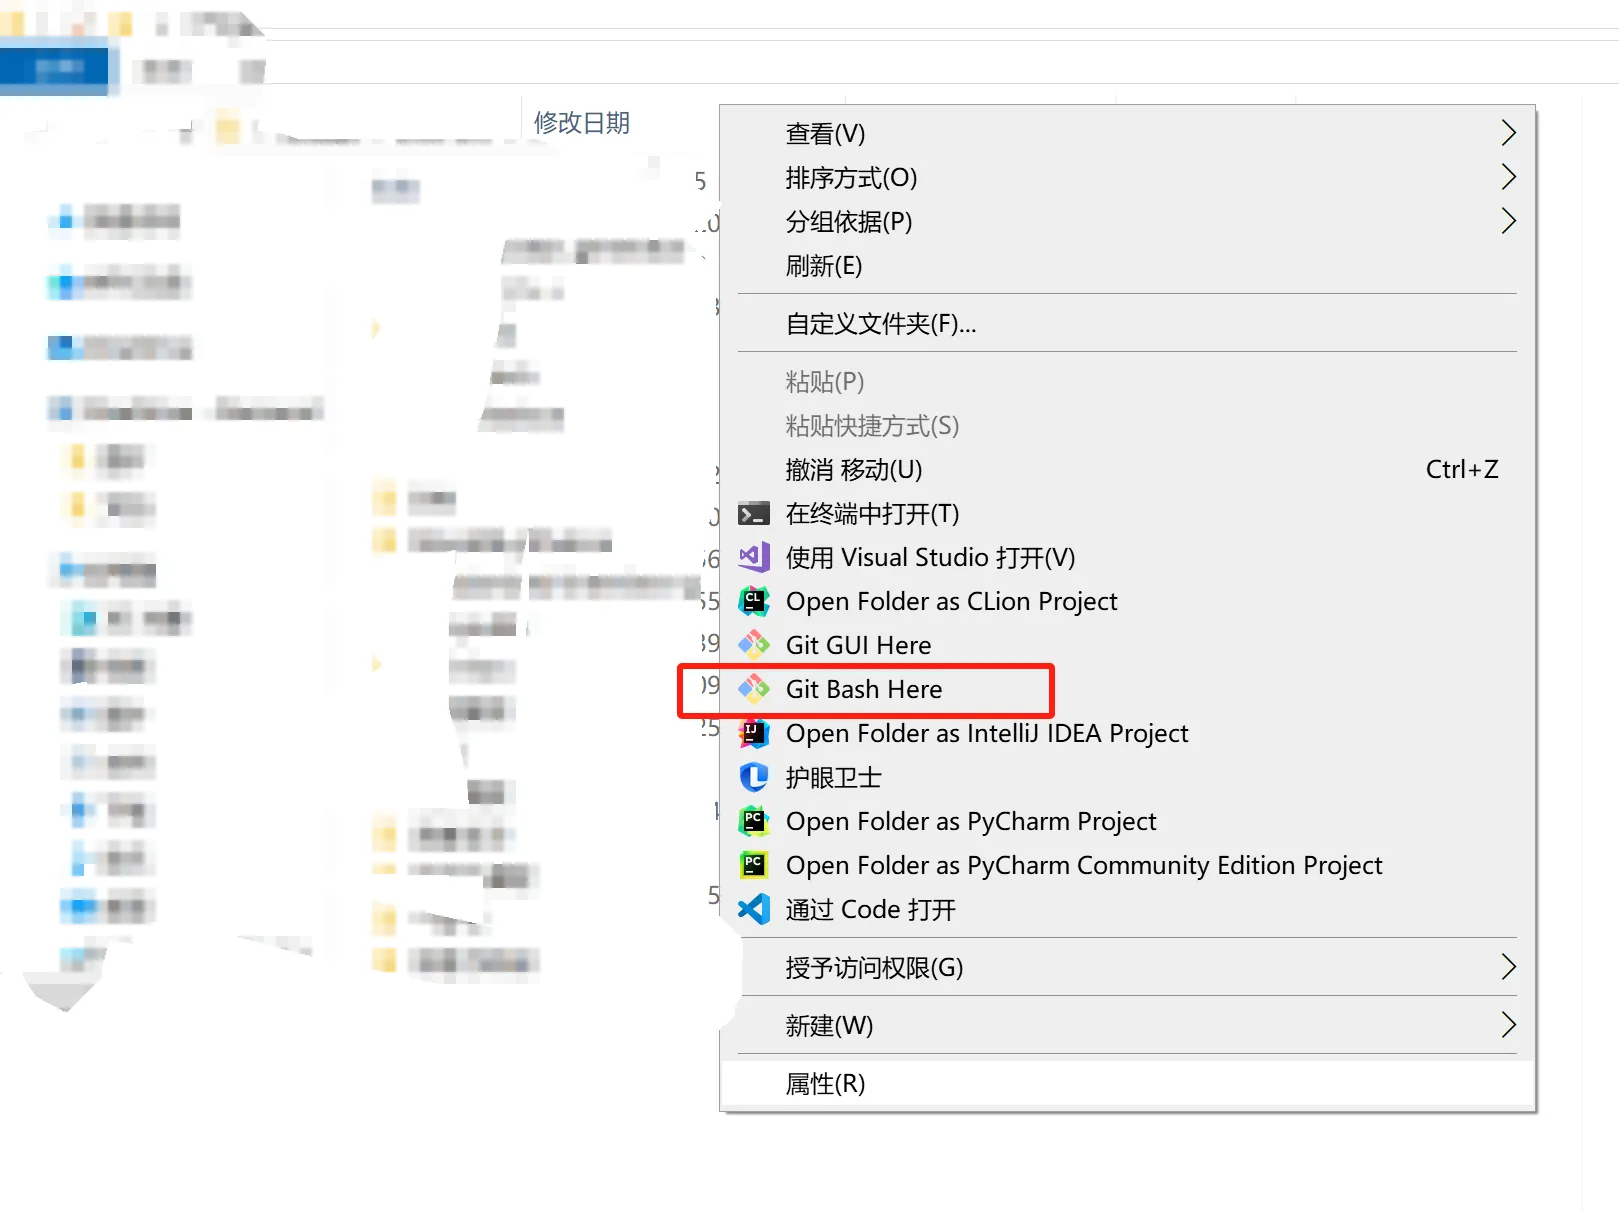
Go into the folder where you want to download it, right-click and choose “Git Bash Here”.
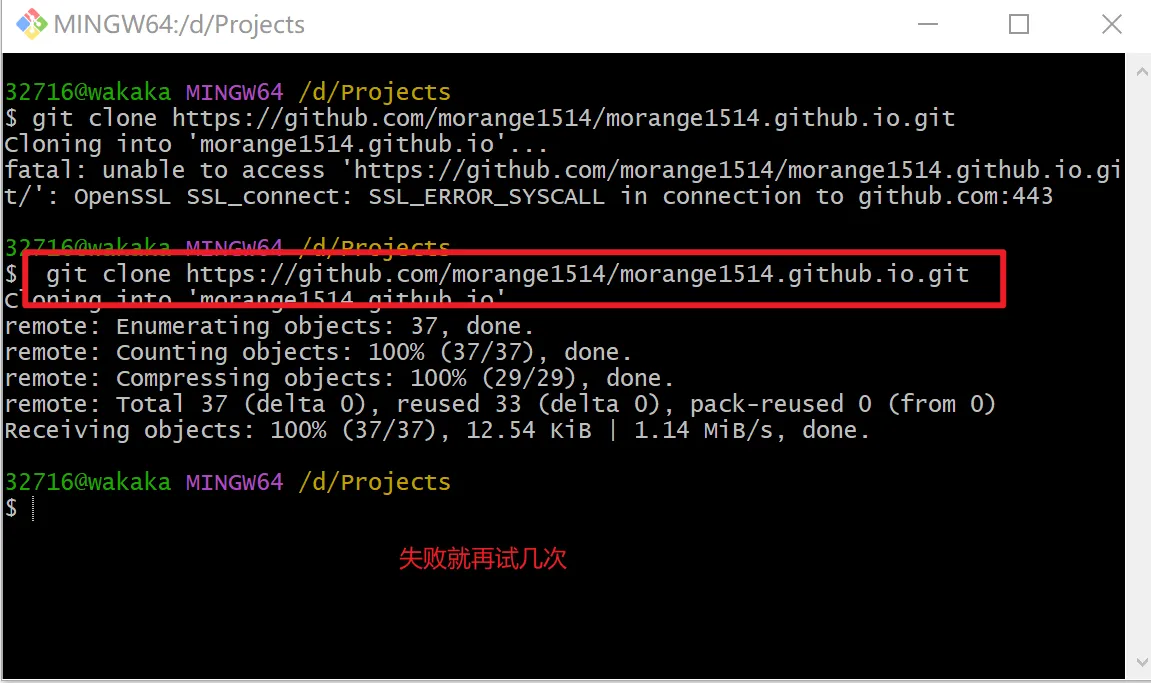
Enter “git clone” followed by the git link you just copied to git the repository to your local machine. If it fails, just try a few more times; if you need to configure git, find a post about it — they are all much the same and easy to set up.
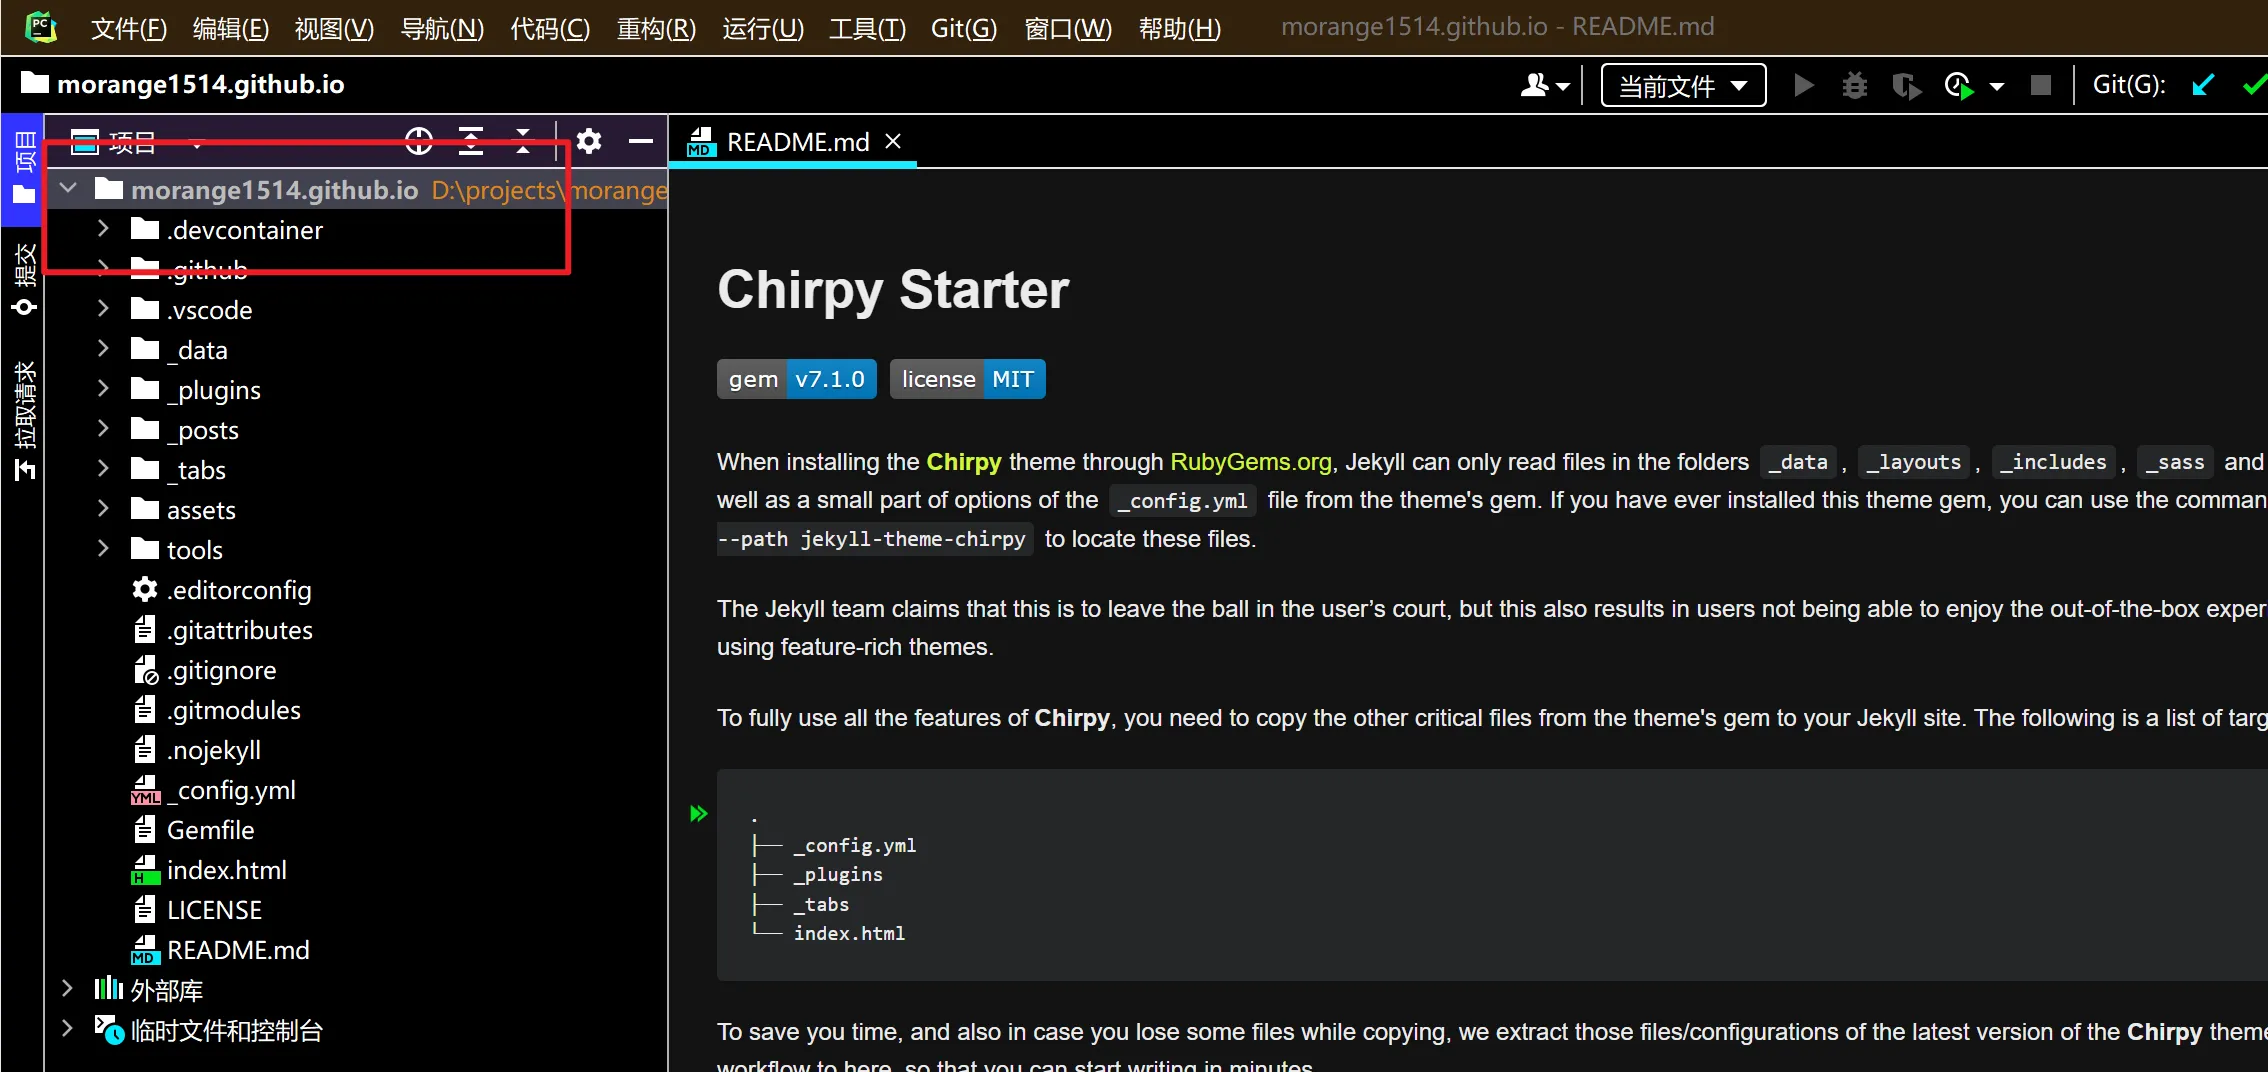
Open the project in an IDE
This article opens the project with PyCharm.
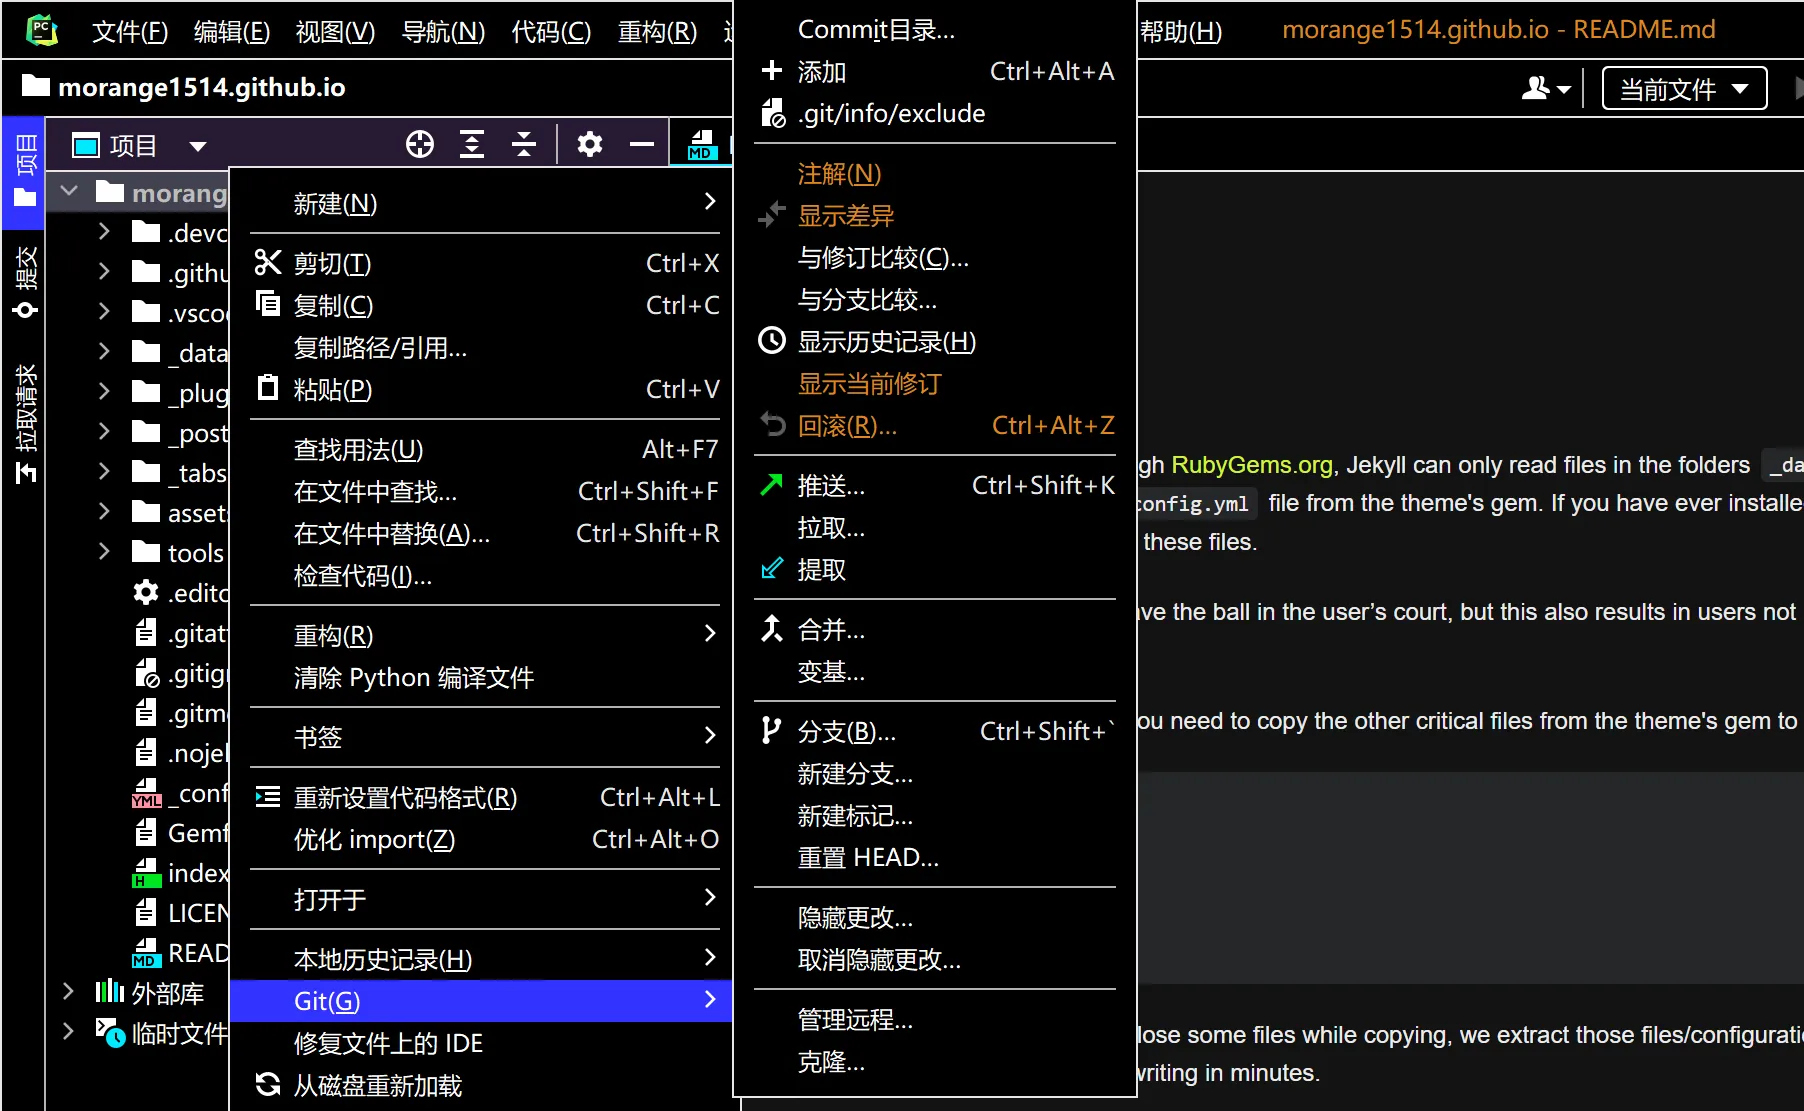
After opening the project, right-click and you can see git options in the project; this is because PyCharm recognized the project we cloned with git. With a few clicks you can add, commit, and push the project.
3. Configure the site locally
Installation and configuration
Run the command below to set up the runtime environment automatically
bundle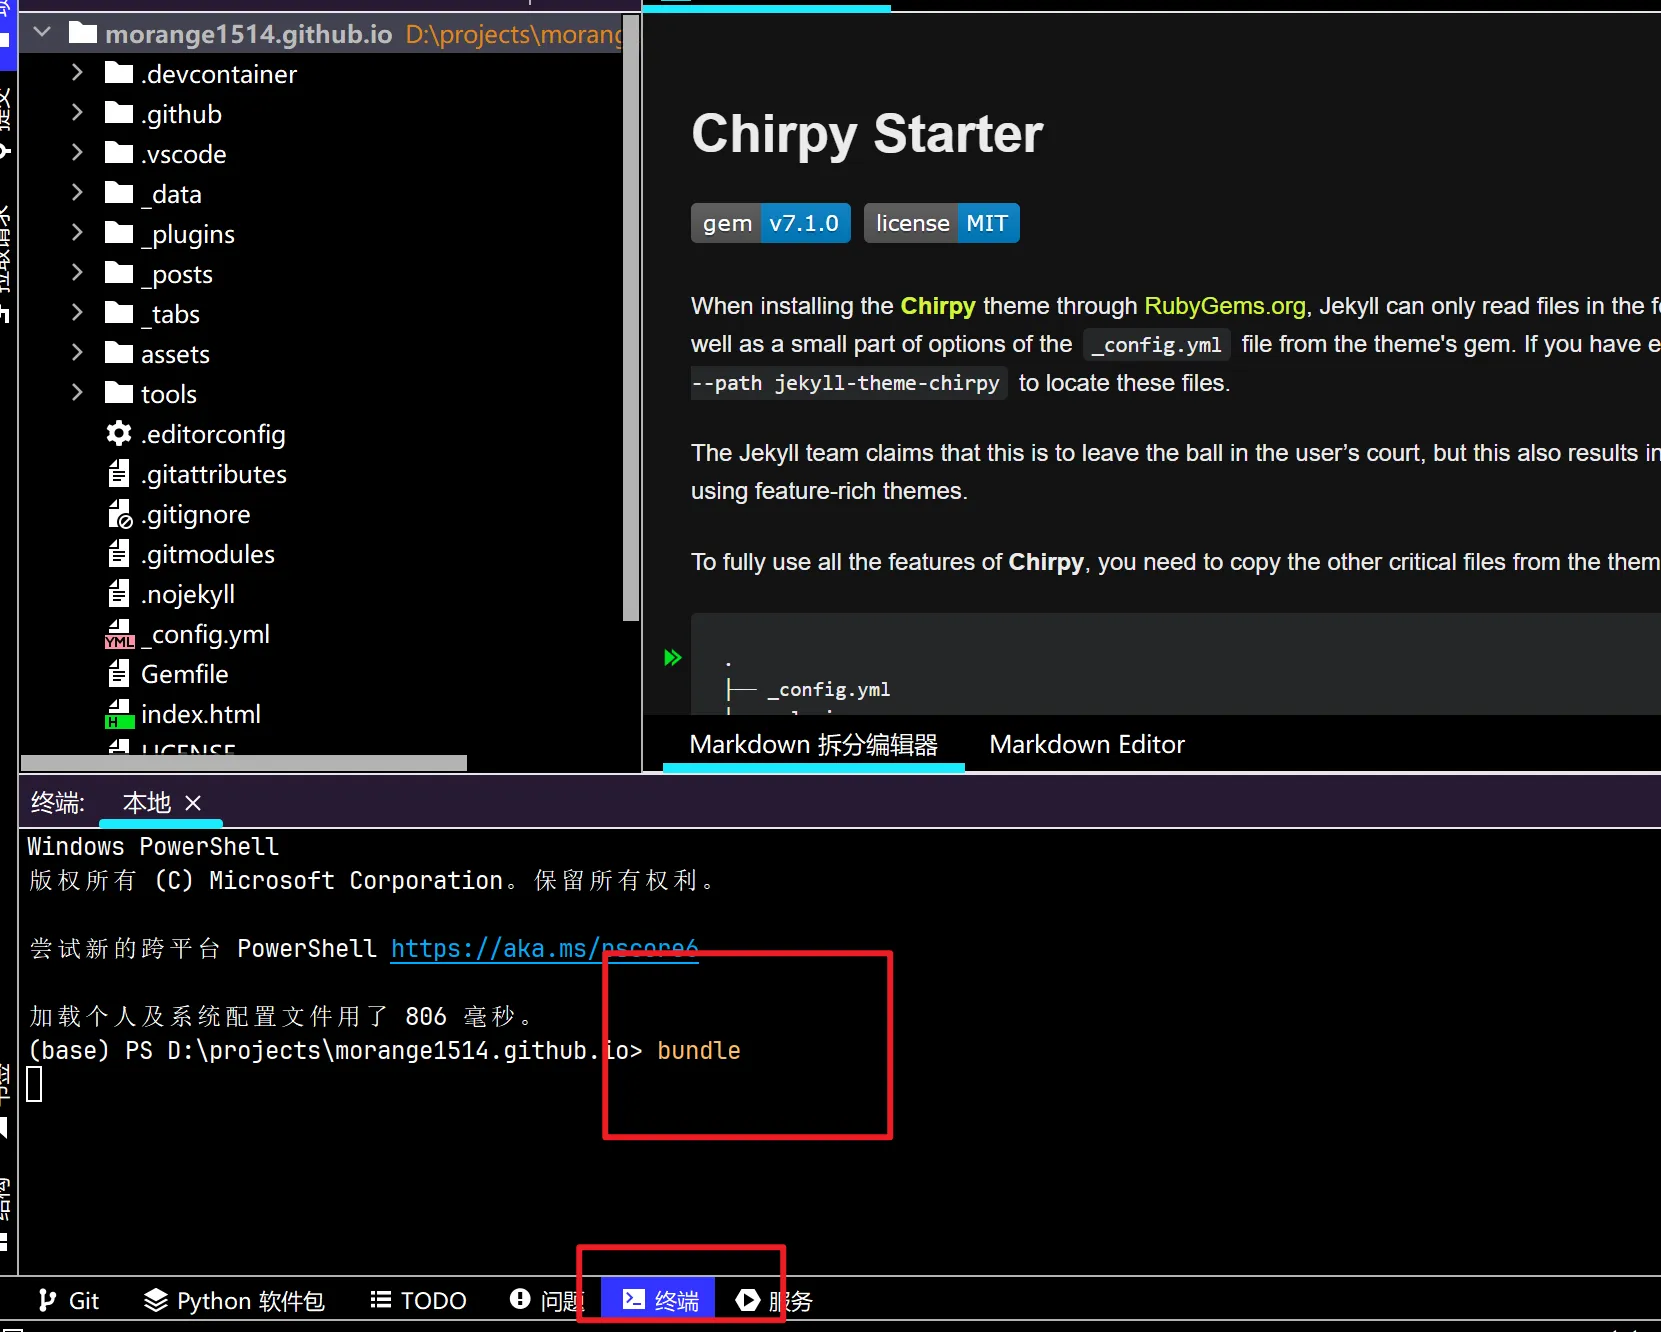
Errors may occur during setup; while configuring, this article showed that the wdm plugin was missing.
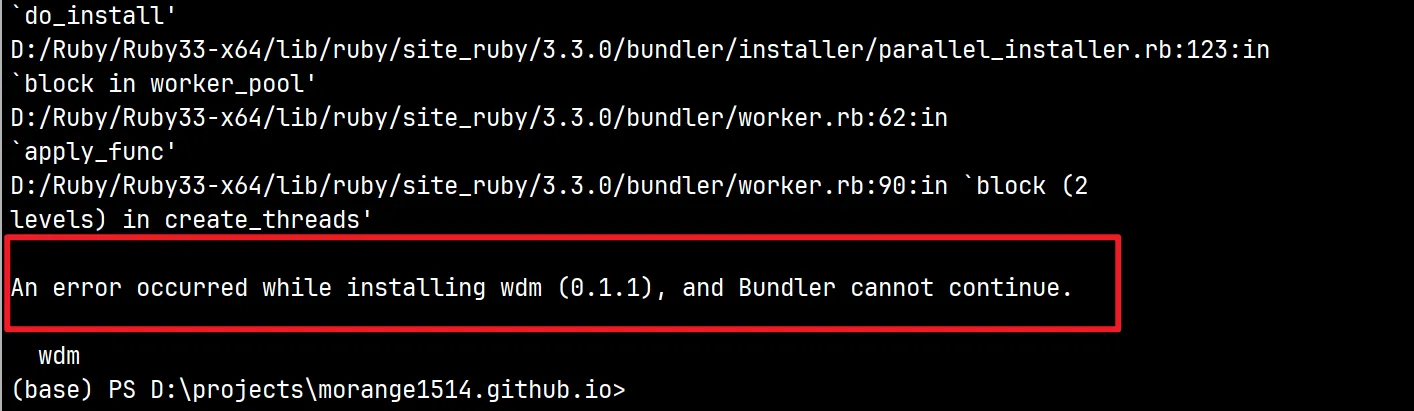
Install wdm
gem install wdm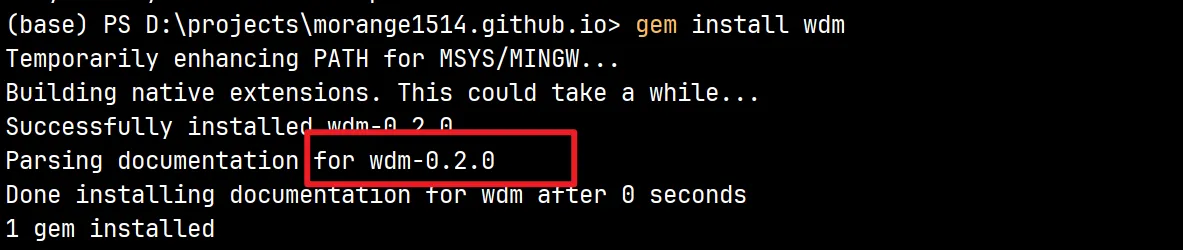
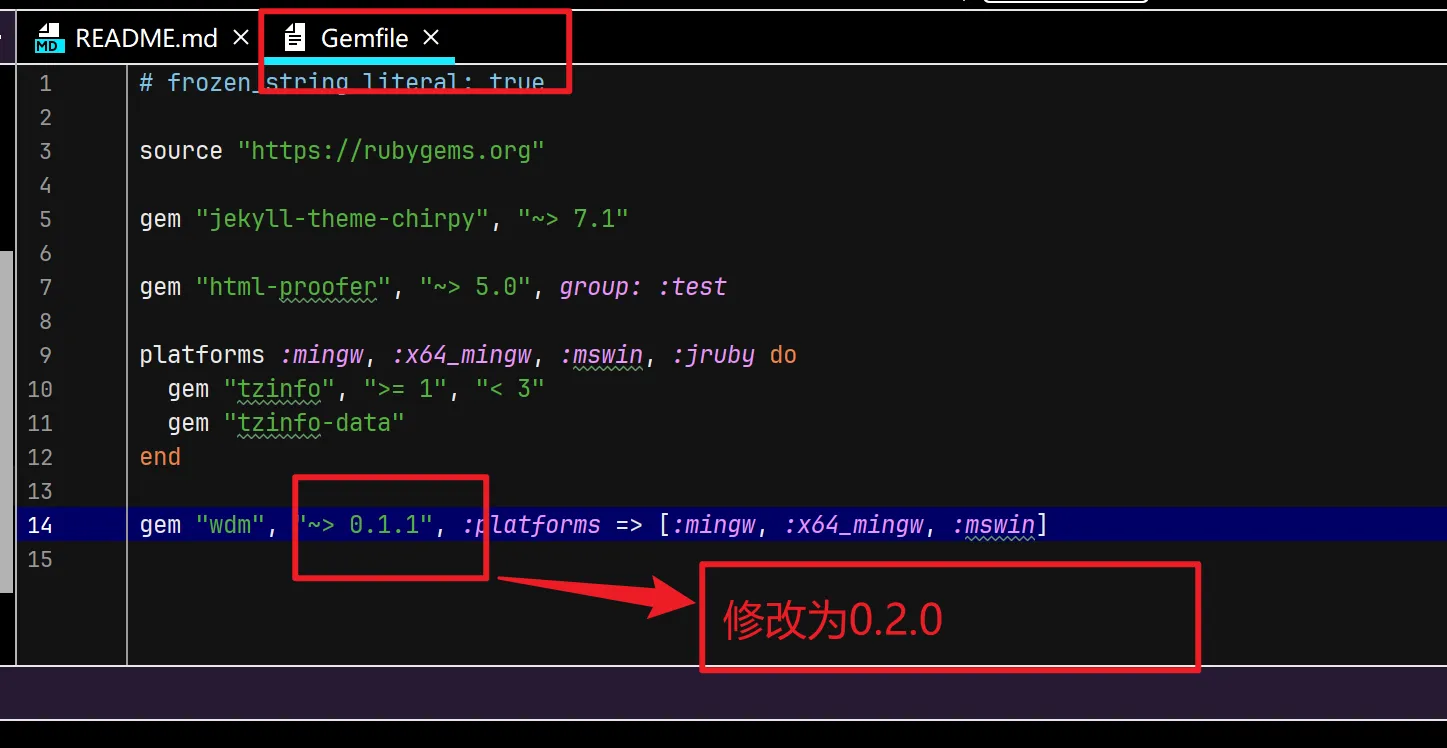
According to the image, version 0.2.0 was installed, while 0.1.1 was required. Check the Gemfile and change the wdm version it requires.
Add an avatar
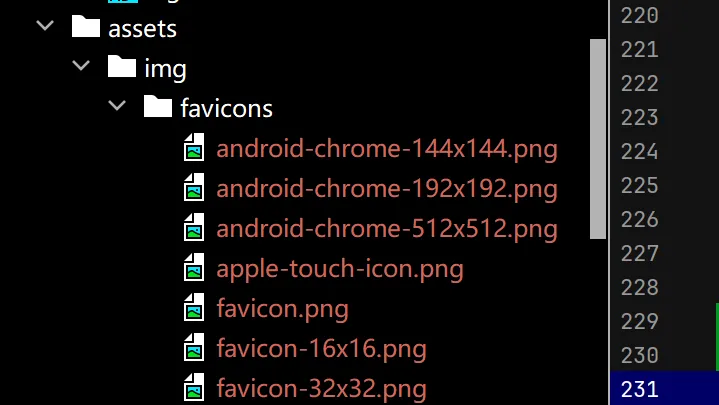
Resource files in the project are generally placed in assets; just create a folder in assets and put the avatar there. Displaying the avatar requires adding the path in the configuration file — just remember the path from this step.
Modify the configuration file
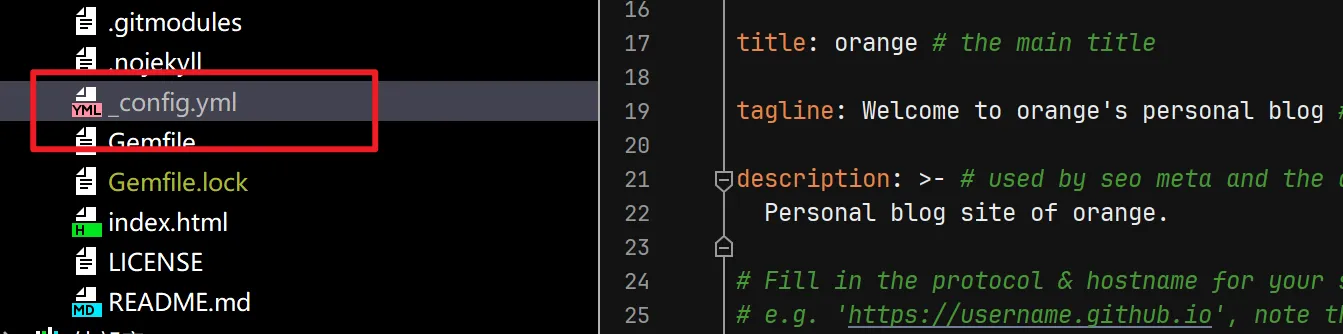
The project’s basic configuration is all in the “_config.yml” file; read the file and configure it as needed. A few of them are particularly important
lang: sets the displayed language; language configurations can be found here, just add the filename.
description: the site description.
url: change it to your site address “https://username.github.io”
github:username: change it to your own username
social: links to social platforms; modify as needed
avatar: the avatar address; change it to the address from the previous step
comments: comment system configuration; described in detail later
Run the project locally
Once configured, run the following command to start the project, then view the result at 127.0.0.1:4000.
bundle exec jekyll server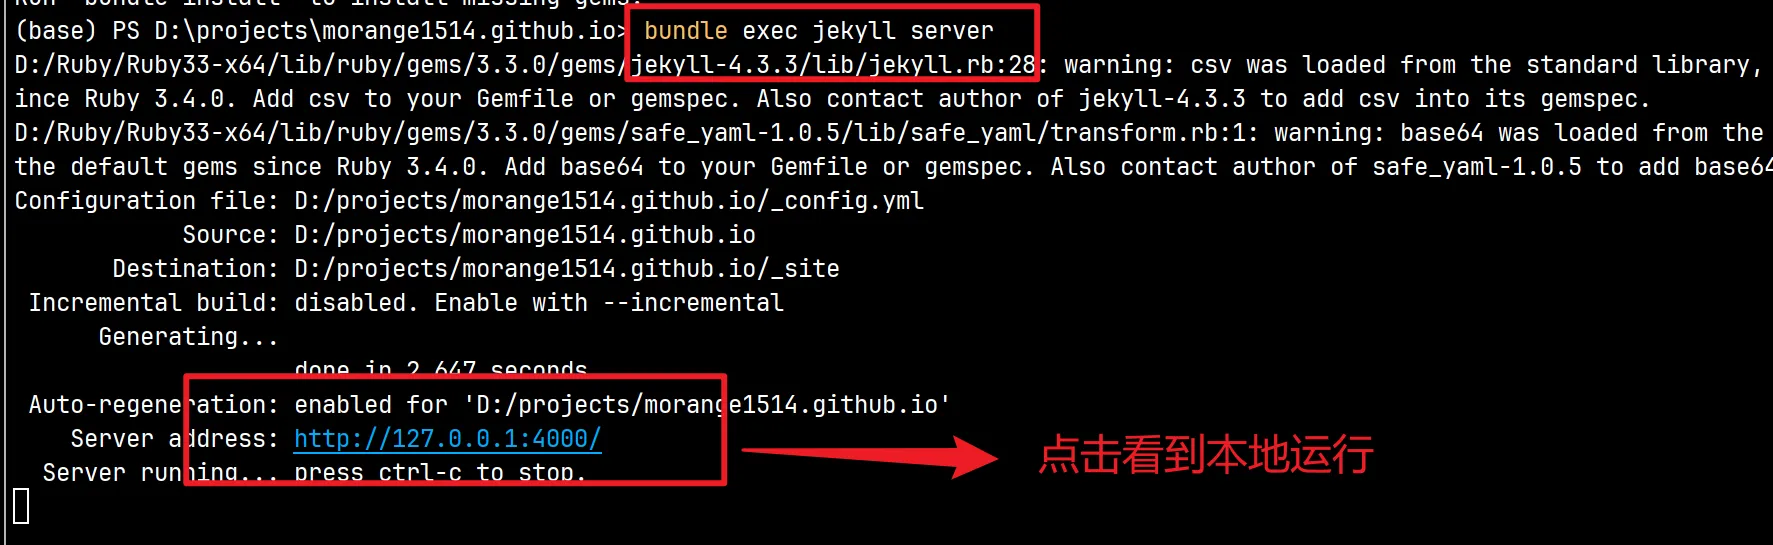 Errors may also occur while running; they are basically missing plugins or plugin version issues. Fix whatever reports an error and add whatever is missing — copy the error message and just search for it, and you will basically find a solution.
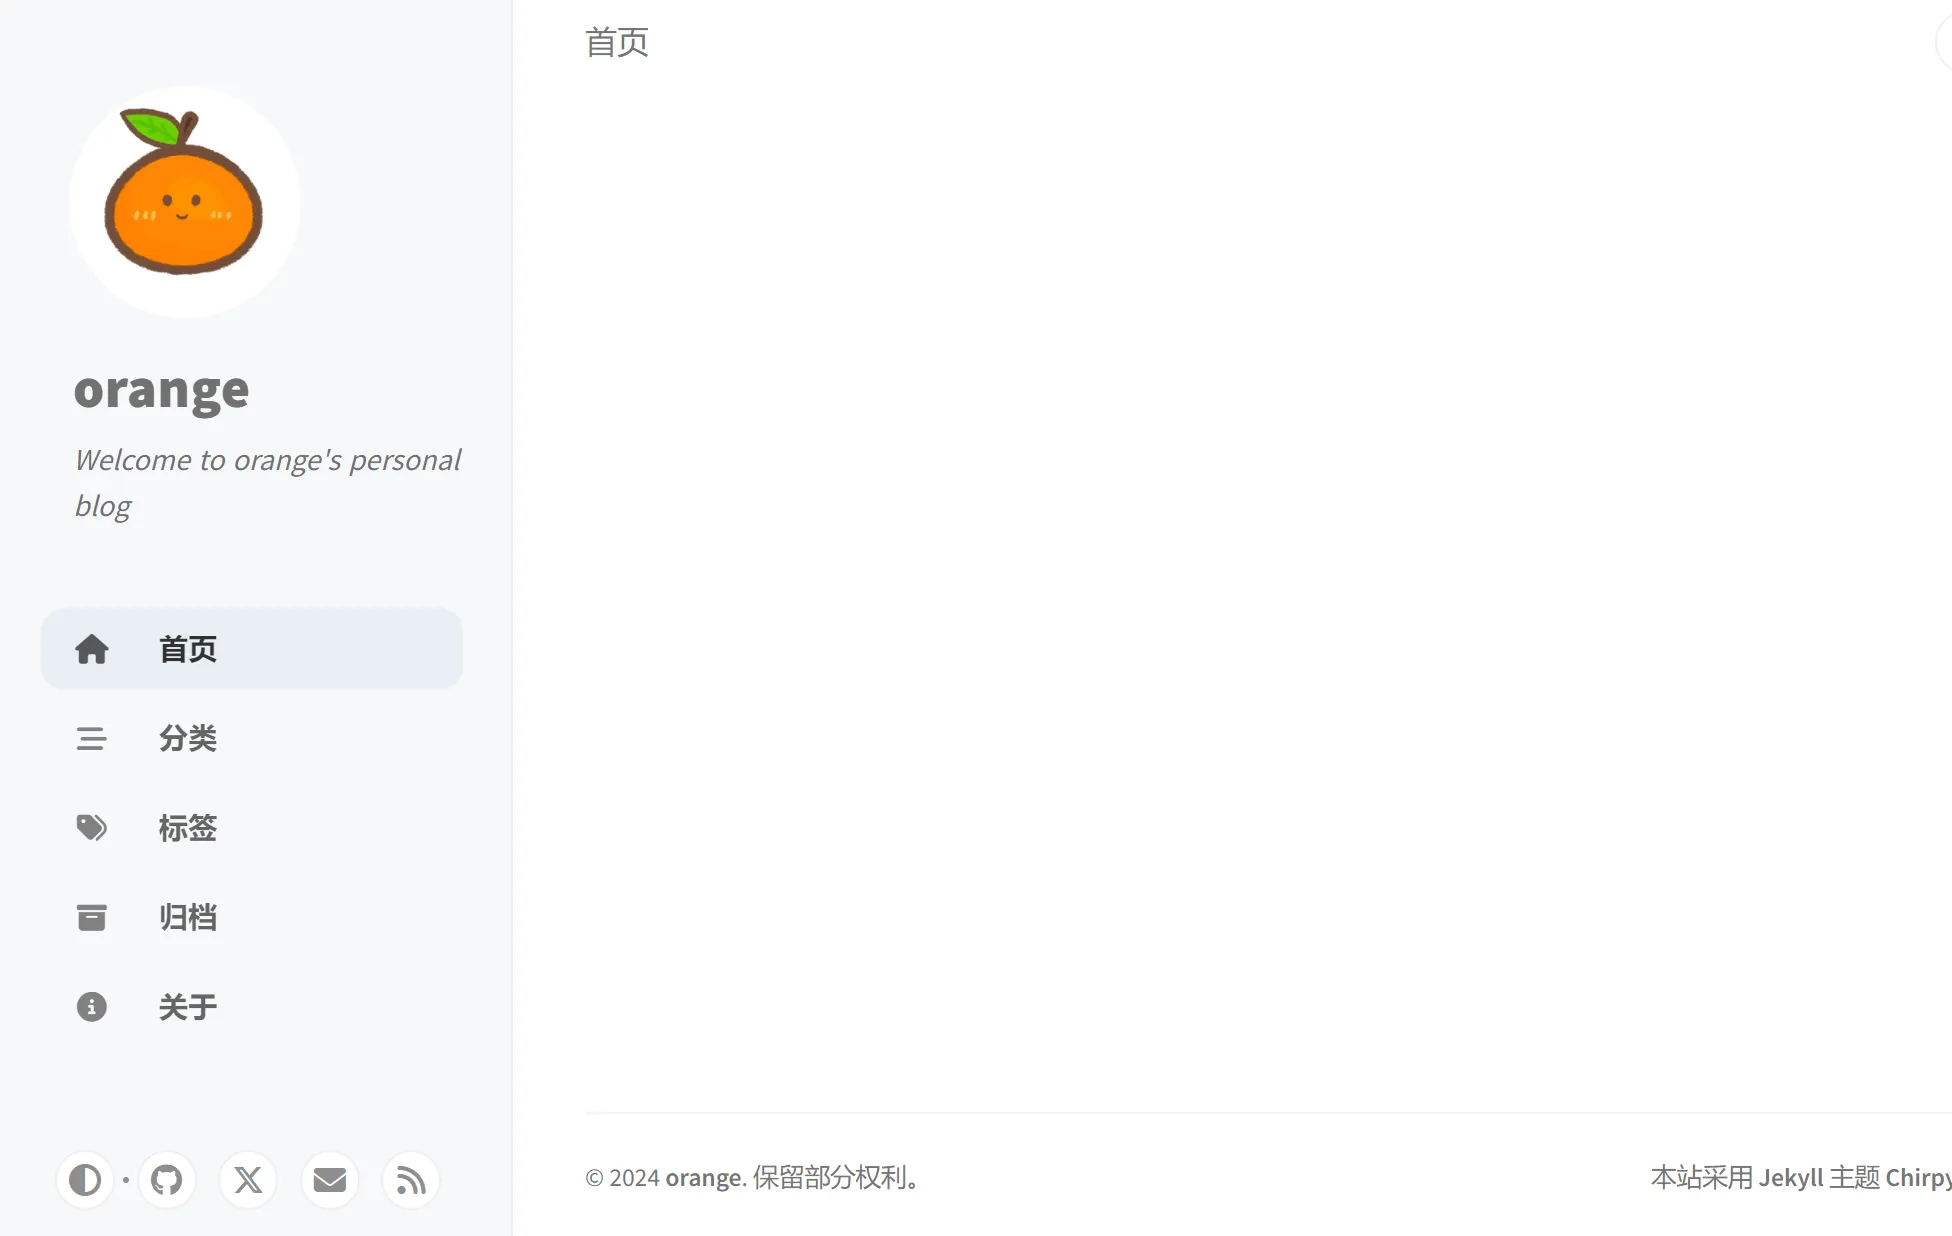
The result looks like this:
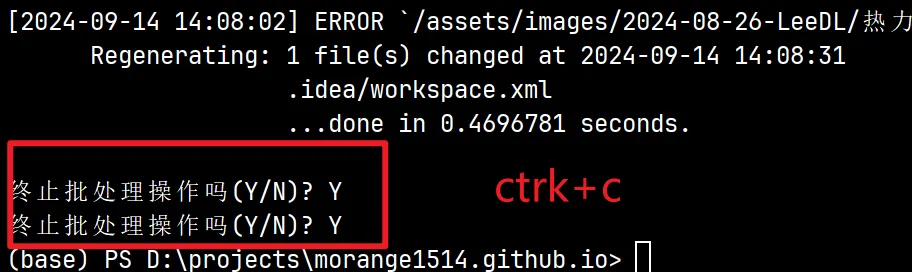
To stop it:
First press ctrl+c, then confirm twice.
Add posts
Add posts in the “_post” folder; there are requirements for both the file naming format and the header.
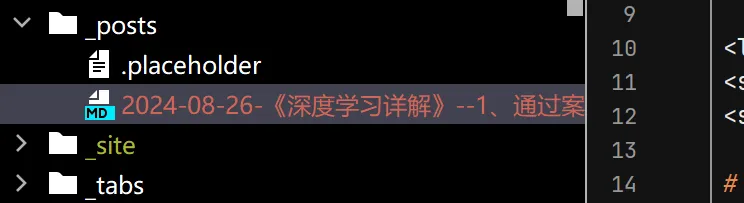
The post naming format is: YYYY-MM-DD-TITLE.md (note that it is a markdown file)
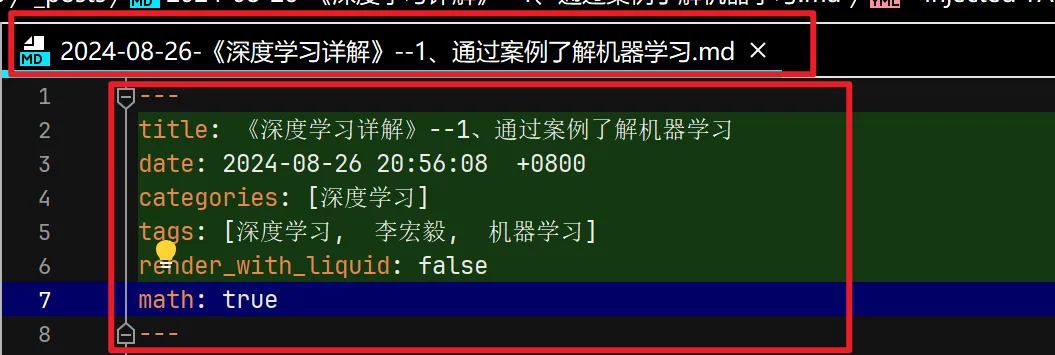
The header format is:
title: the post title
author: the author name
date: the project creation time
categories: the project categories, e.g. [Jekyll, GitHub]
tags: the project tags, e.g. [Jekyll, Github]
math: whether to display LaTeX formulas
……
Add others as needed; you can read the source code to see the corresponding configuration
4. Commit the changes
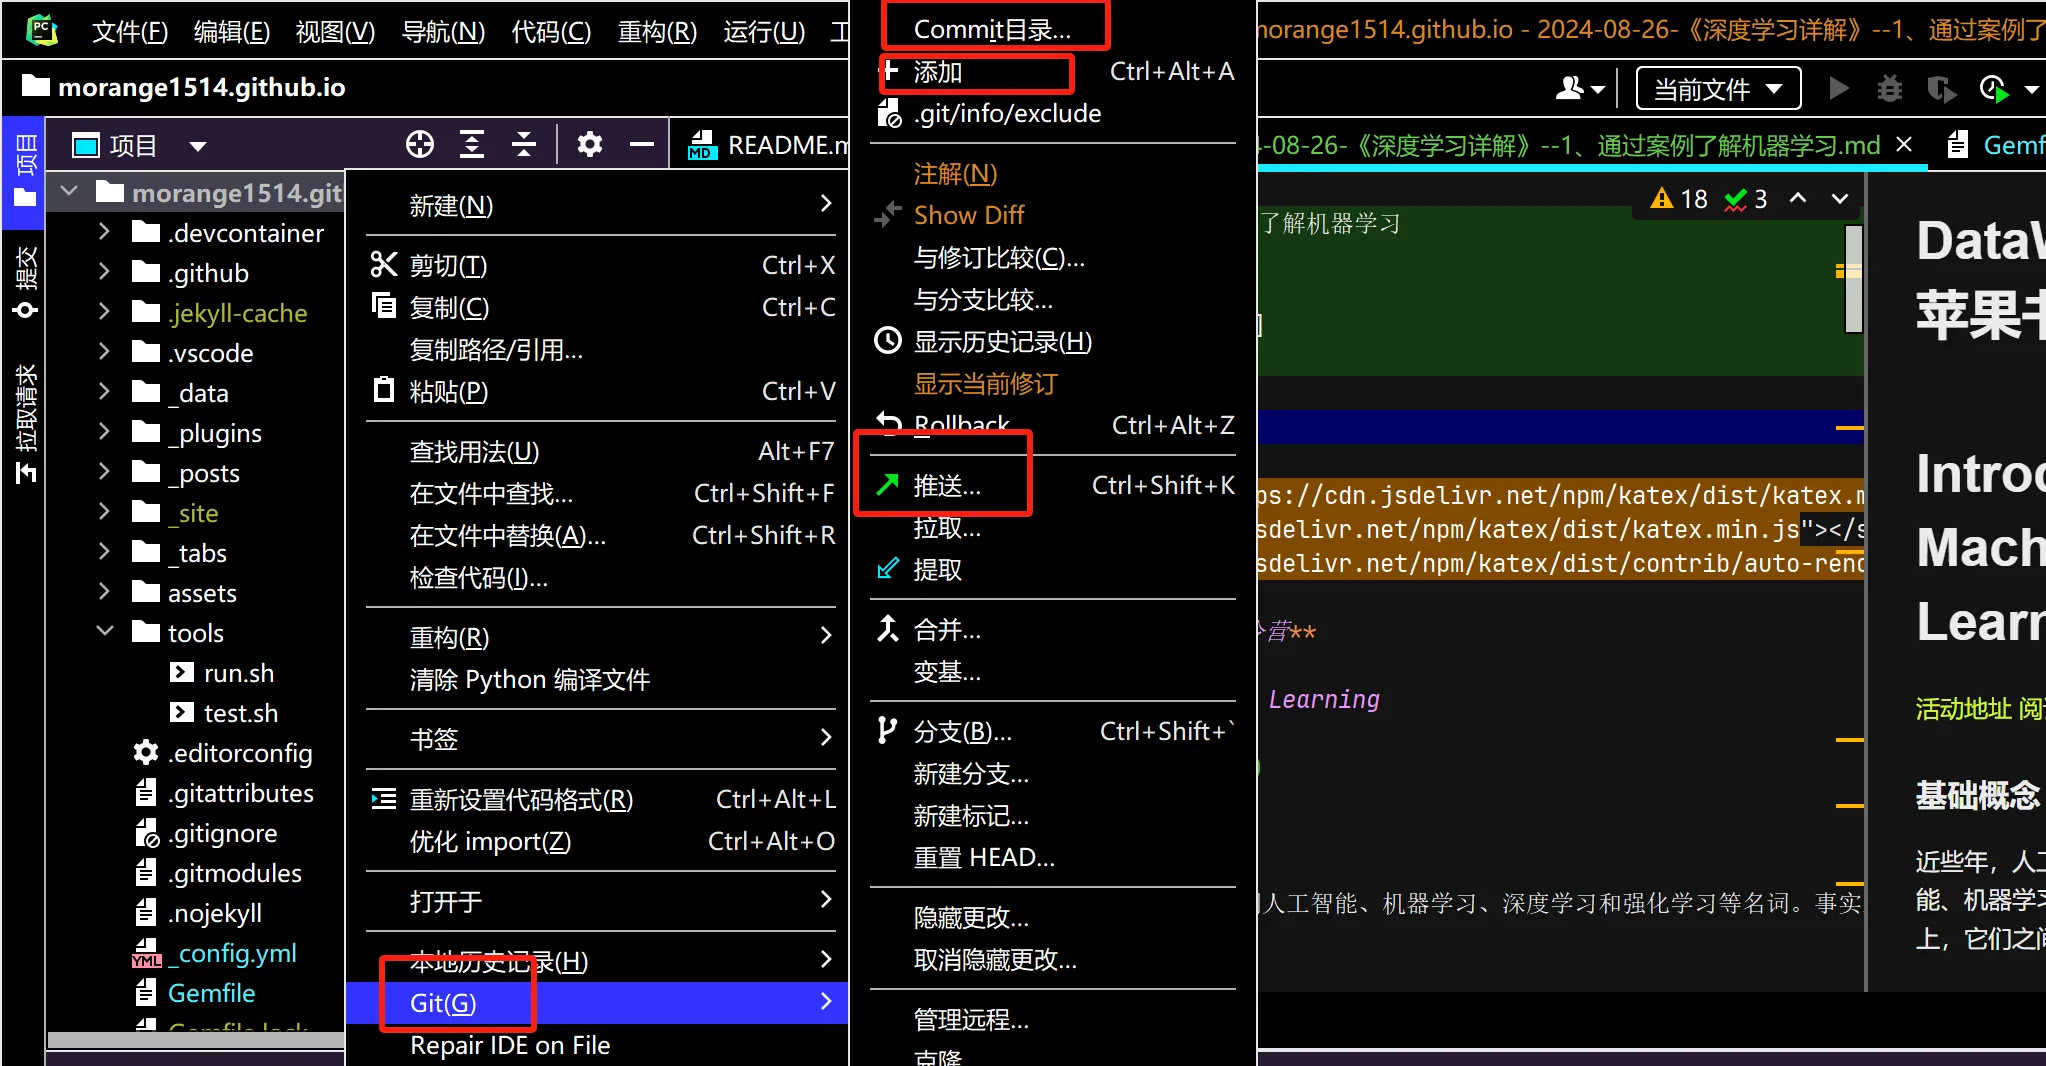
Committing the project is handled with git, in three main steps: add, commit, and push. Since PyCharm is used as the IDE, these can be done directly with a few clicks.
Right-click the project, choose “Git”, first click “Add”, then click “Commit Directory”, and finally push to update the content in the GitHub repository. Once the update is done, you can view the result at “https://username.github.io”.
After committing the update, the result is as follows:

5. Add a comment system
Several comment systems are configured in the template; this article uses “giscus”.
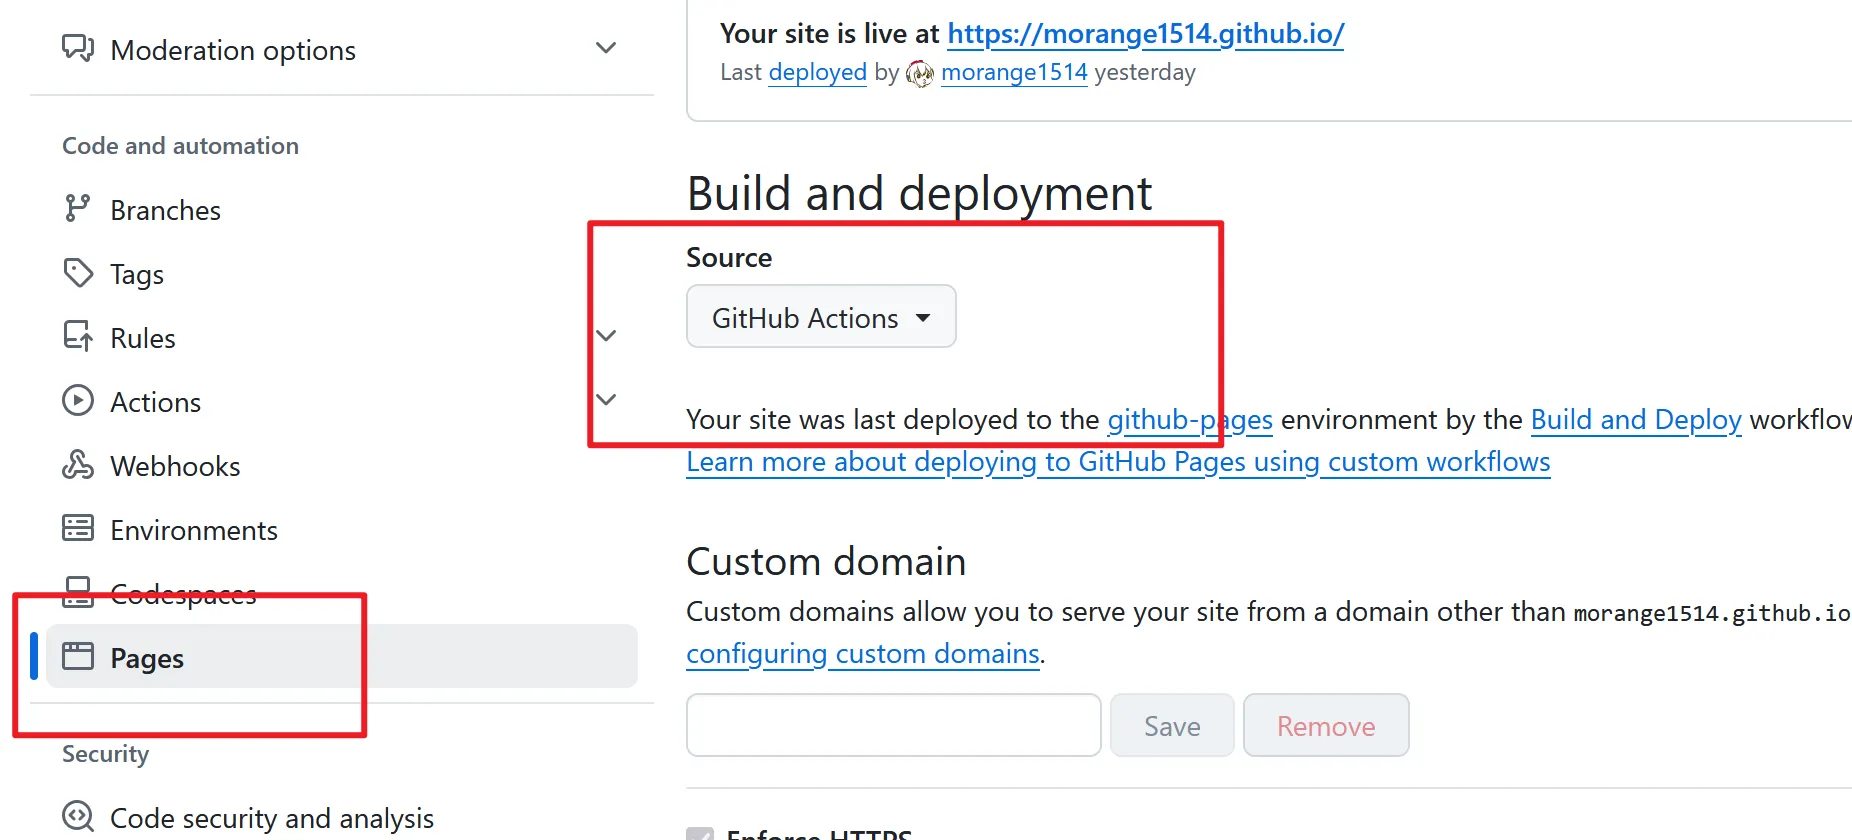
Before adding it, one configuration is needed: in “Pages”, change source to “GitHub Actions”.
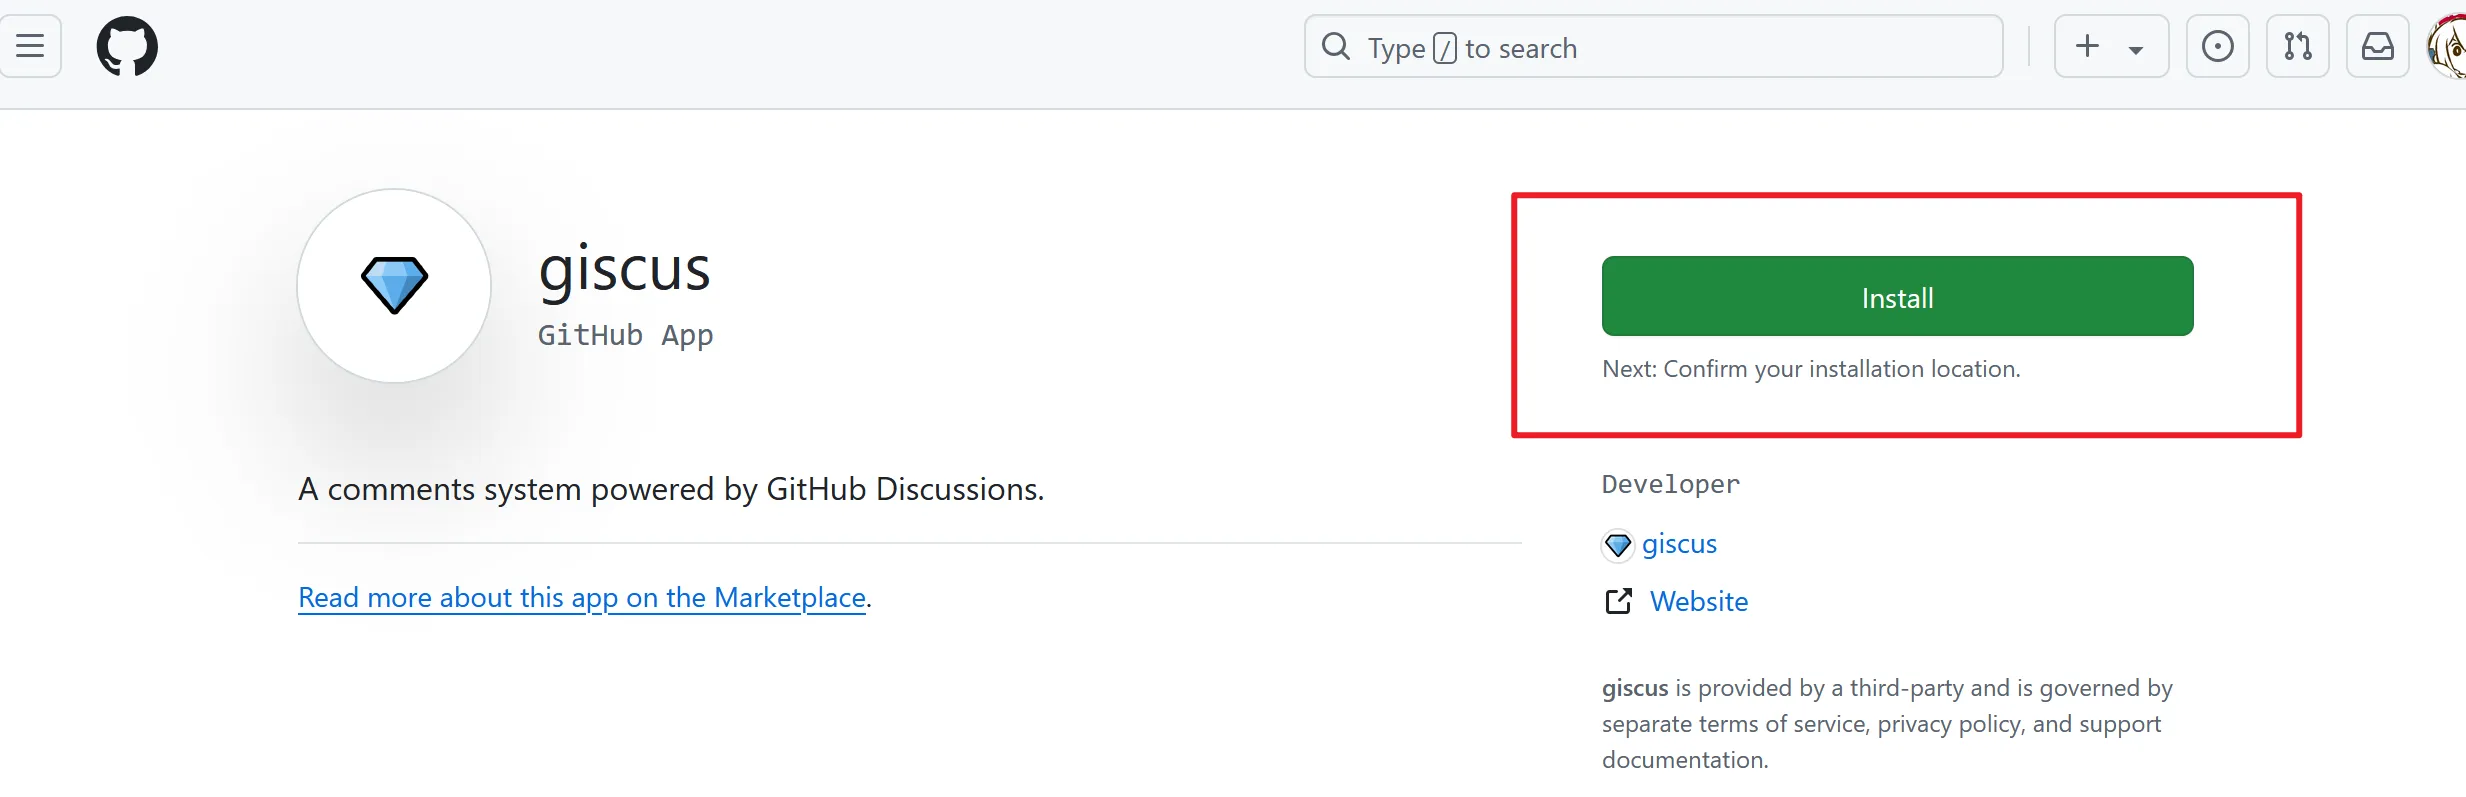
Install giscus
Just click install on giscus; GitHub authentication may be required; just follow the steps as prompted.
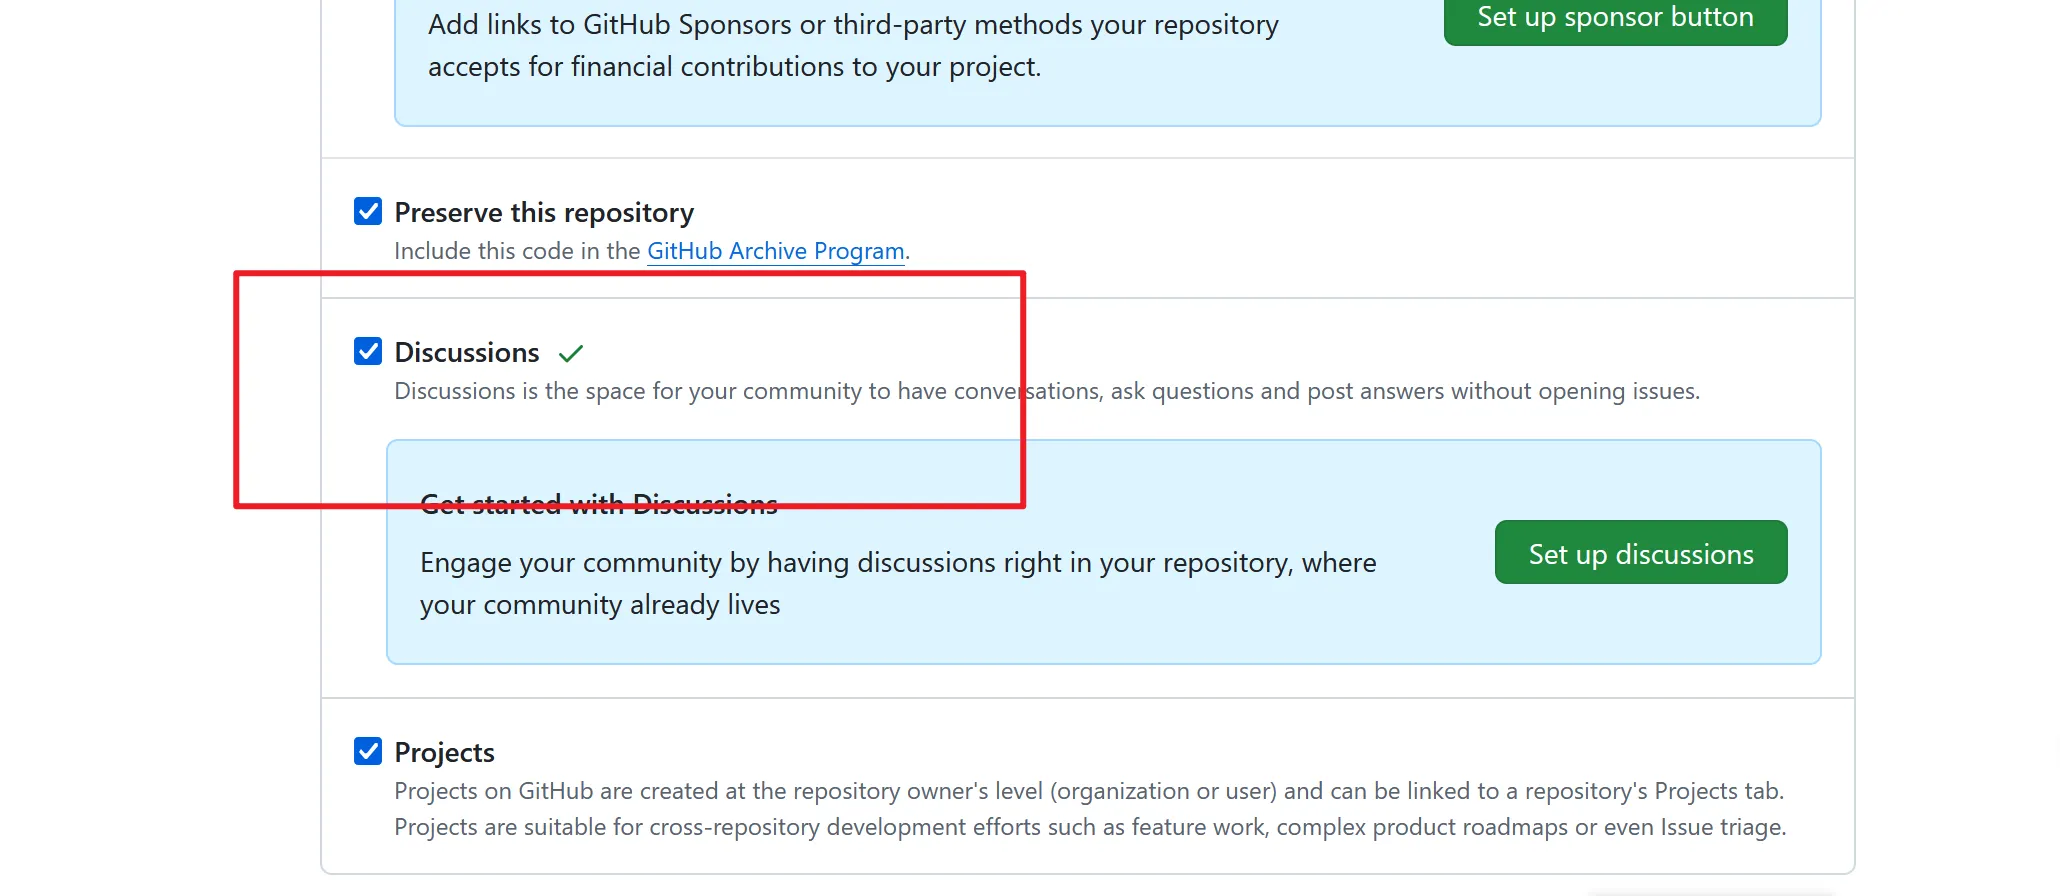
GitHub configuration
In the settings, set Discussions to true
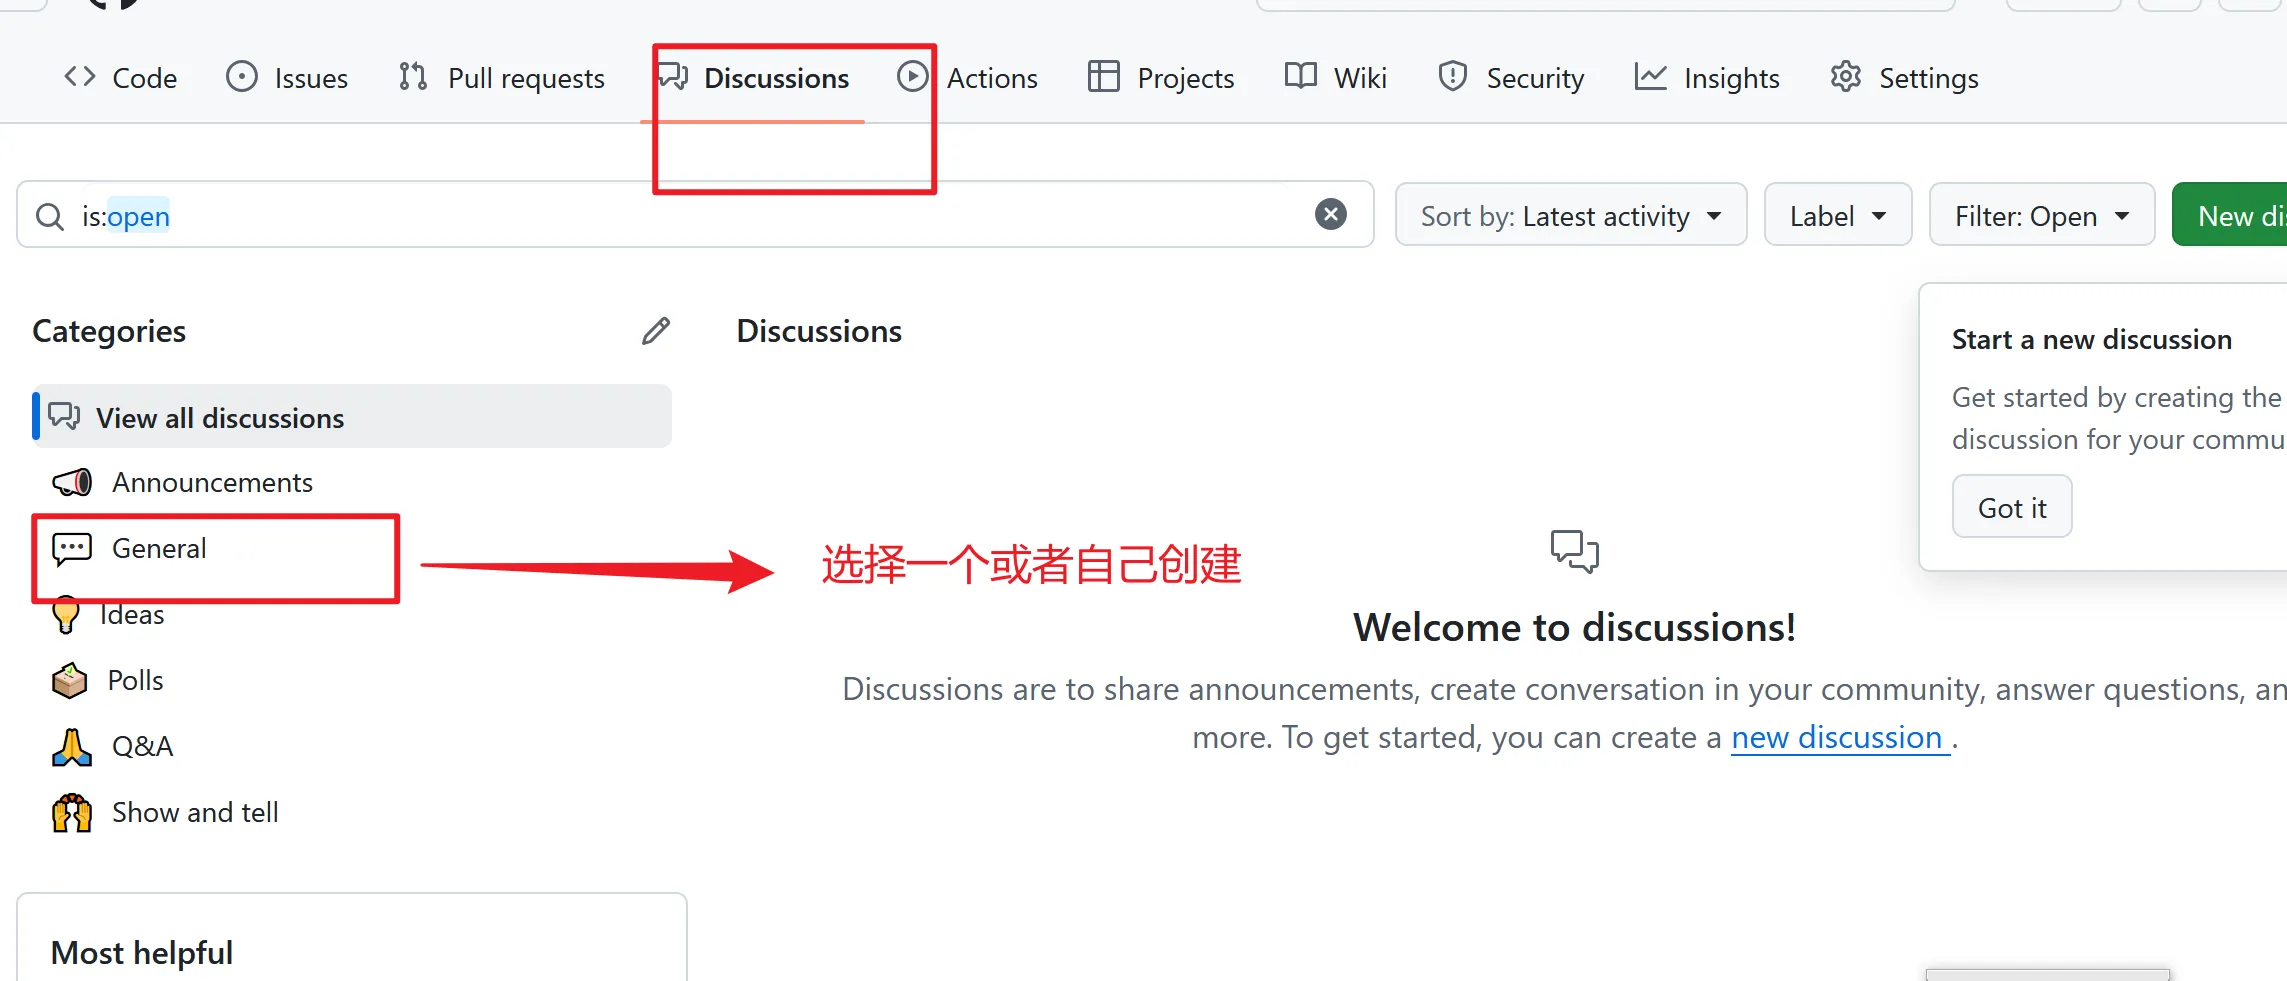
Open Discussions; you can select or create a label as the comment category name for the comment system. Here “General” is selected.
giscus configuration
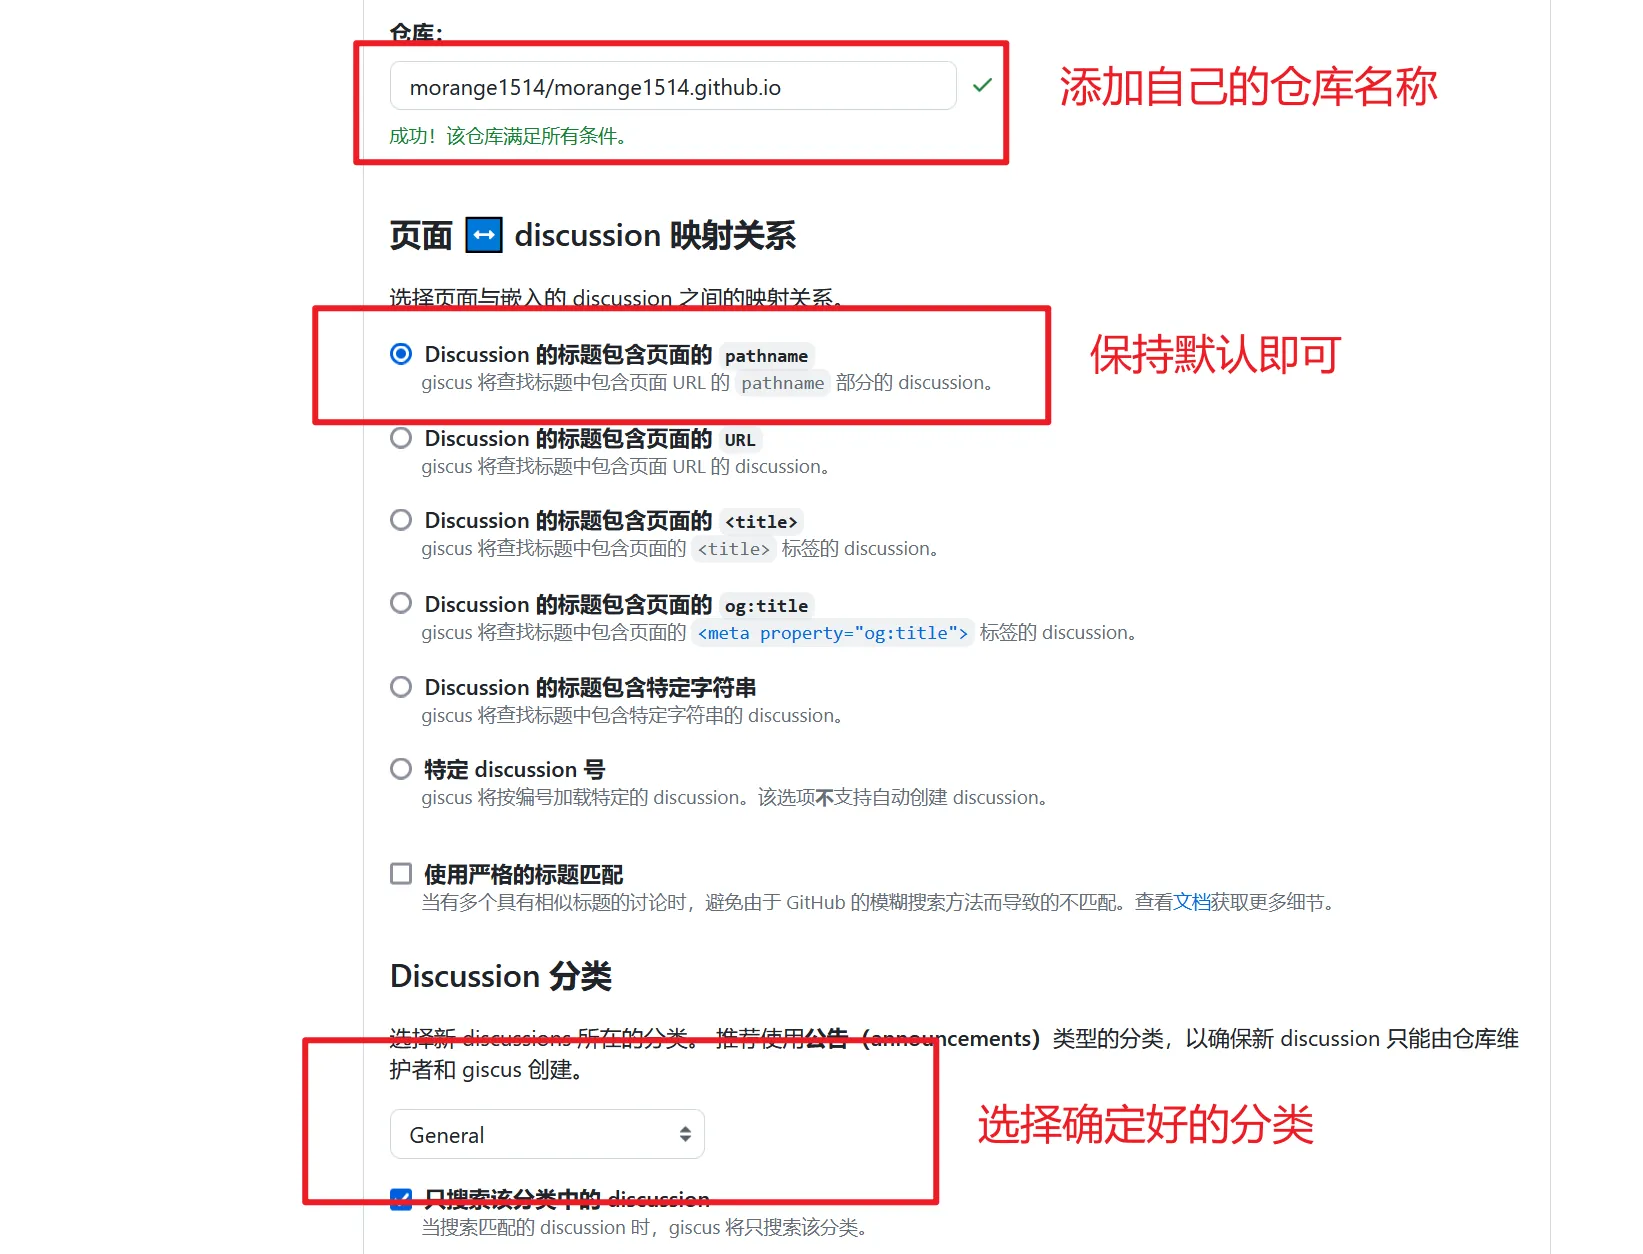
Configure it on giscus
- First configure the repository: username/username.github.io
- Then choose the mapping relationship; select the first one, the default is fine
- Choose the Discussion category; select the category you determined or created earlier
Configure the project files
After giscus is configured, it generates a dedicated id
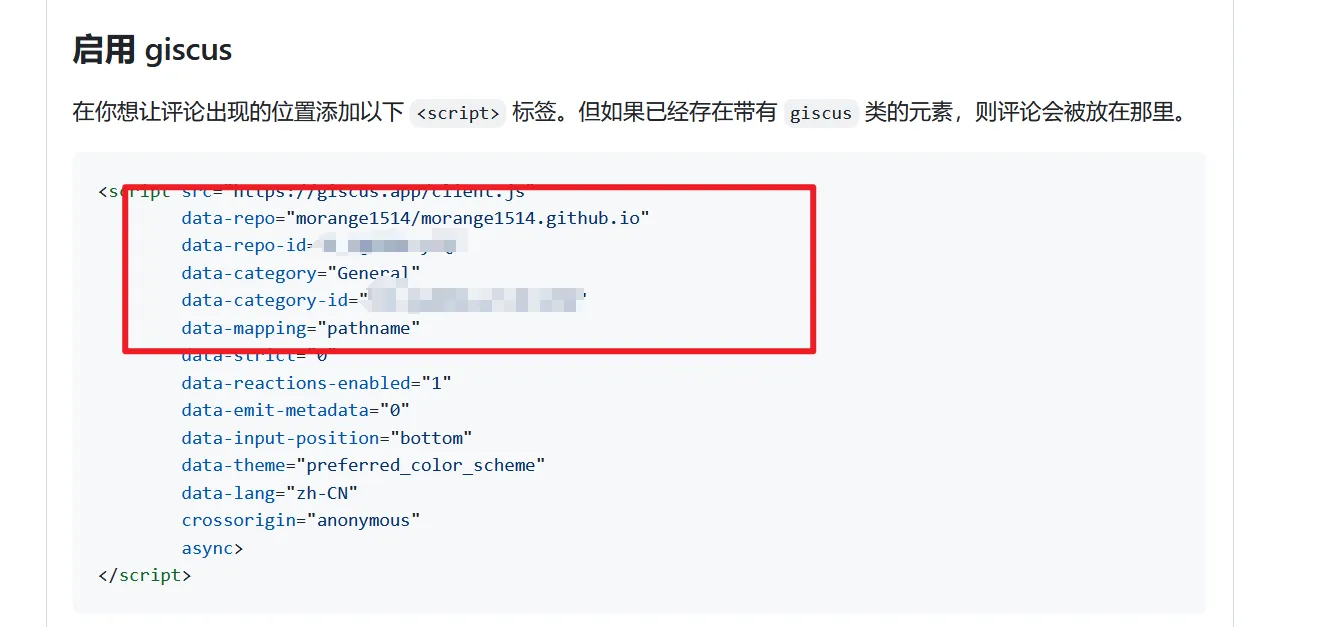
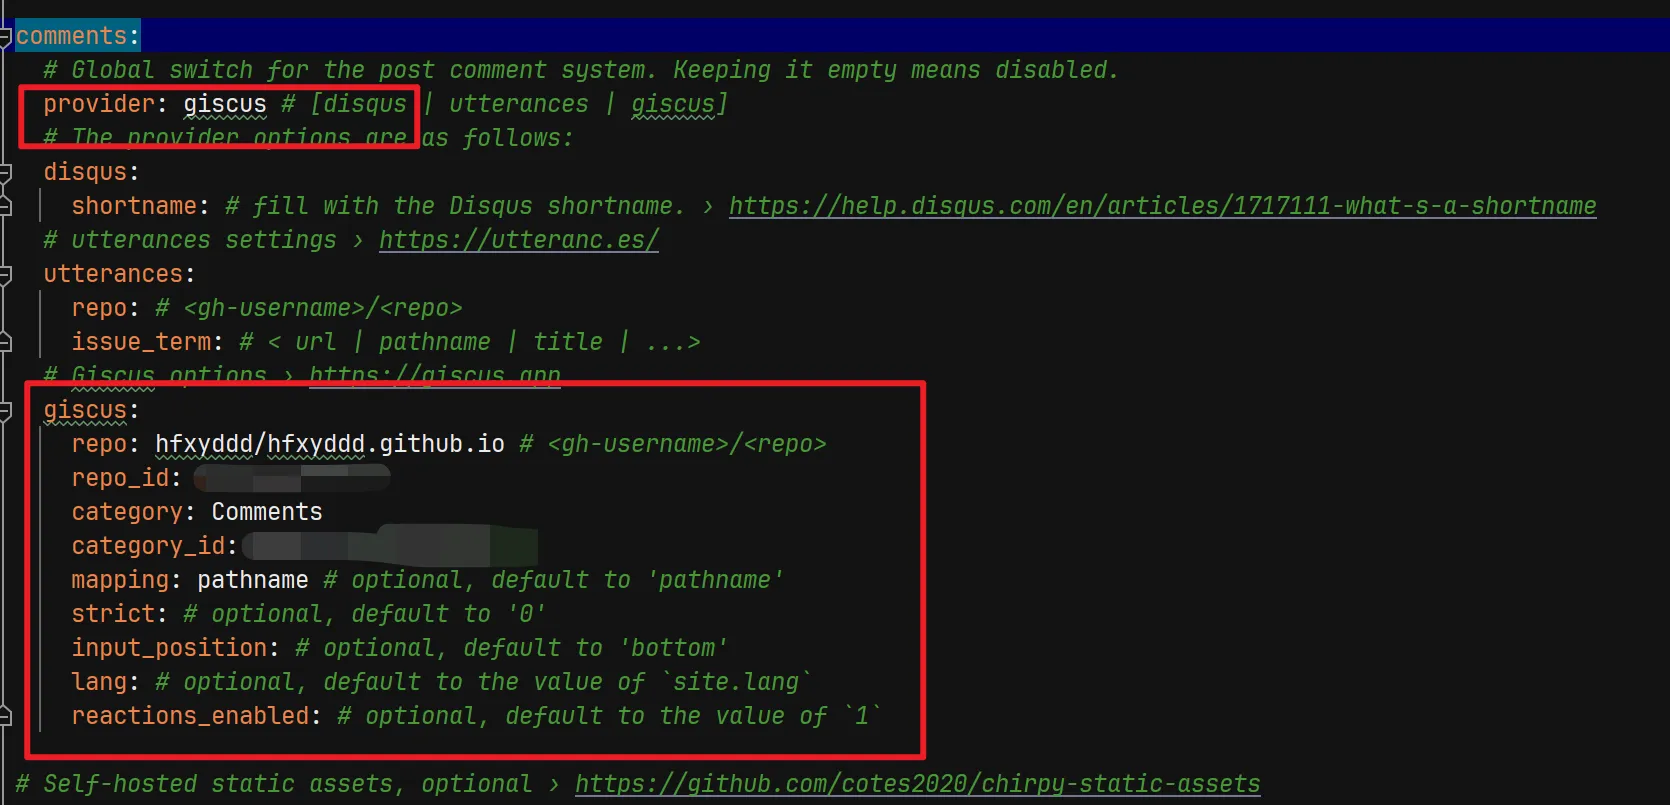
Make the corresponding configuration in the project’s “_config.yml” file
- provider: giscus
- giscus:
- repo: username/username.github.io
- repo_id: your own repo_id
- category: Comments
- category_id: your own category_id
- mapping: pathname
Testing the comment system
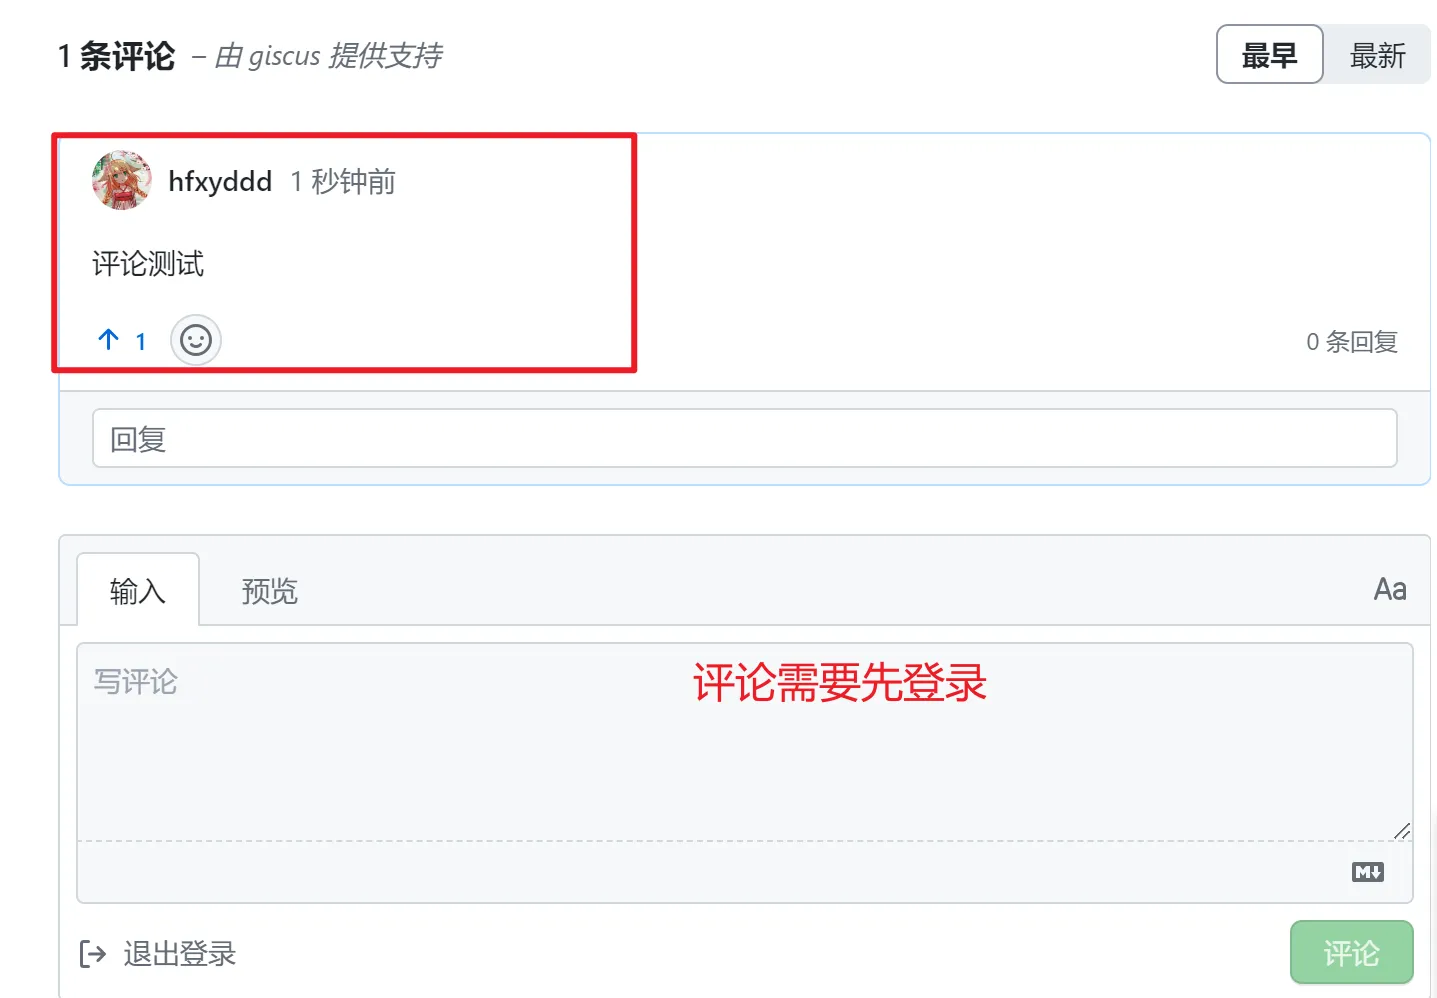
Commit the modified project, and the comment system will appear at the end of the article on the web page. You need to log in with GitHub before you can submit a comment.
6. Some problems encountered during creation and how to solve them
The author of the Jekyll template used in this article designed it very comprehensively, and we may run into many problems while using it. This section mainly records the problems encountered and their solutions.
Math formulas not displaying While writing a post you can use LaTeX to write formulas, and GitHub already supports displaying LaTeX formulas, but in the submitted article the formulas are still source code. Setting “math: true” in the header is enough. For similar problems you can check the source code. I had always thought the author had not added formula recognition, but after checking I learned that it was in fact implemented, and only needs to be set in the header. Source code address
The light and dark themes cannot be switched A required plugin is missing; you can check for yourself which one exactly — I forgot.
Plugin installation reports an error for wdm: the Gemfile specifies version 0.1.1, but during actual installation the “bundle” command installs version 0.2.0; just change the version number in the Gemfile. You can also refer to this method when other plugins report errors.
The project cannot recognize http links, probably for security reasons. Originally it was “[xxx] (http://xxx/xxx)”; the http protocol is not recognized, so just write the link directly, otherwise it will report an error in Actions after submission.