Introduction
go-zero is a web and rpc framework that integrates various engineering practices. Through resilient design, it ensures the stability of highly concurrent server-side services and has been thoroughly tested in real-world practice.
go-zero includes a minimalist API definition and a generation tool, goctl. From a defined api file, it can generate Go, iOS, Android, Kotlin, Dart, TypeScript, and JavaScript code with one click, and that code can run directly.
The go-zero framework makes it easy to achieve the stability needed to support a service with tens of millions of daily active users. It has built-in microservice governance capabilities such as cascading timeout control, rate limiting, adaptive circuit breaking, and adaptive load shedding, with no configuration or extra code required. Its microservice governance middleware can be seamlessly integrated into other existing frameworks. It provides minimalist API descriptions, one-click code generation for every client platform, automatic validation of the validity of client request parameters, and a large number of microservice governance and concurrency toolkits.
The go-zero framework offers powerful tooling support: writing as little code as possible, a minimalist interface, full compatibility with net/http, middleware support, easy extensibility, high performance, failure-oriented programming, and resilient design. It has built-in service discovery and load balancing, built-in rate limiting, circuit breaking, and load shedding that are triggered and recover automatically, automatic API parameter validation, cascading timeout control, automatic cache control, tracing, statistics and alerting, and more. It offers high-concurrency support, having reliably handled the daily traffic peaks during the pandemic.
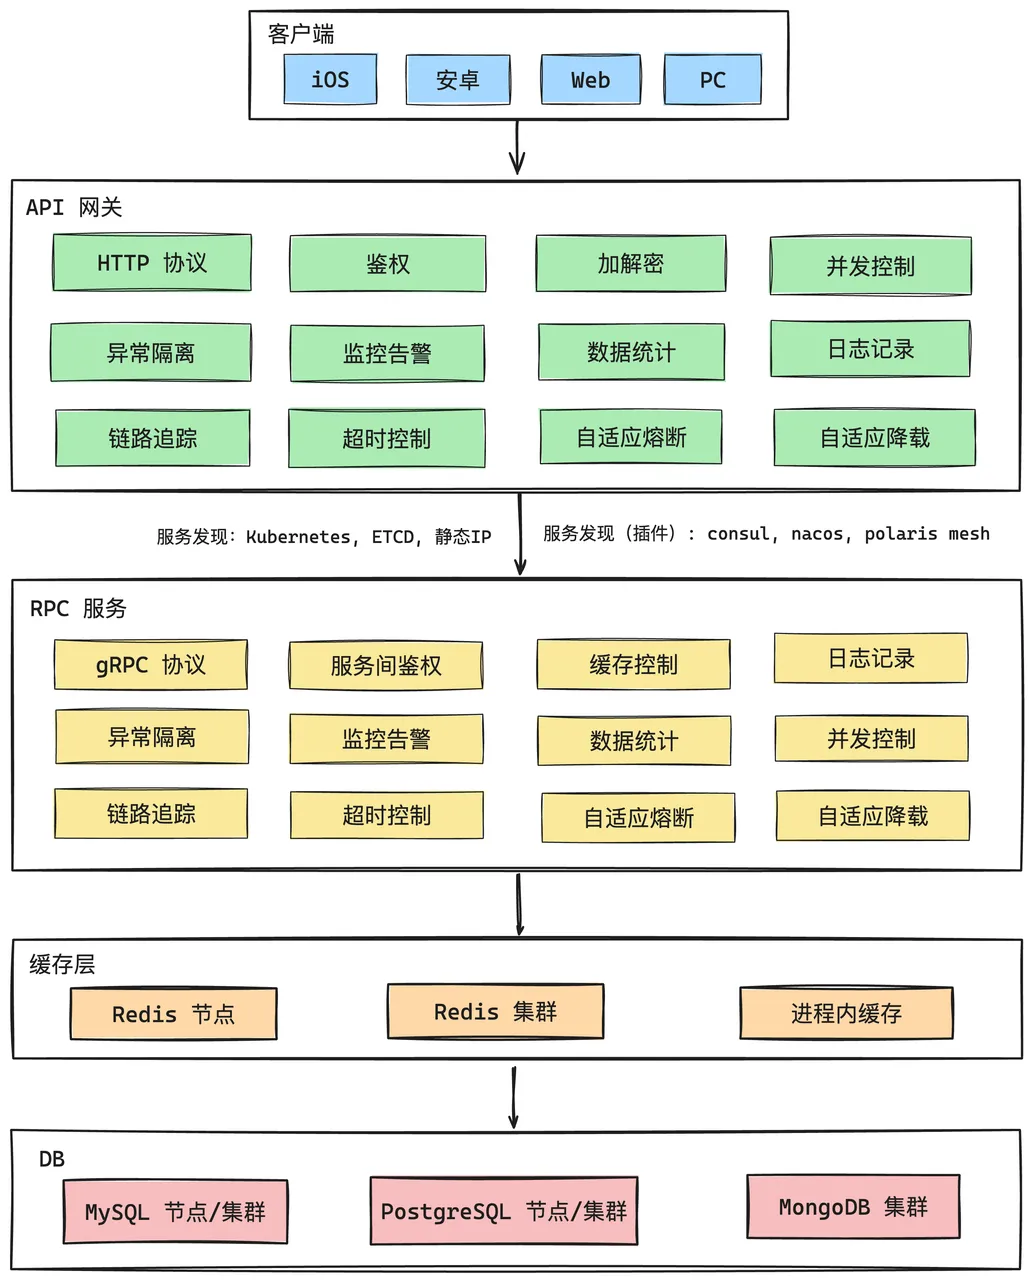
Below is the architecture diagram provided by the official documentation.
Installation and Quick Start
Installation
The commands here are mainly for installing go-zero, goctl, and protoc. You can refer to the official documentation: Quick Start
Note that Go must be installed first. For Go installation and configuration, see the blog post: Installing and using g
# go-zero安装
go get -u github.com/zeromicro/go-zero@latest
# goctl安装
go install github.com/zeromicro/go-zero/tools/goctl@latest
# protoc安装
goctl env check --install --verbose --force
Quick Start
Api demo
Here I created a folder, GoZeroDemo, to hold the code related to learning the go-zero microservice framework. Then I initialized the project and used goctl to automatically generate the files for a simple API.
# 创建并进入项目
mkdir GoZeroDemo && cd GoZeroDemo
# 初始化项目并命名
go mod init gozerodemo
# 使用goctl创建API服务
goctl api new greet
# 安装缺失的依赖
go mod tidy
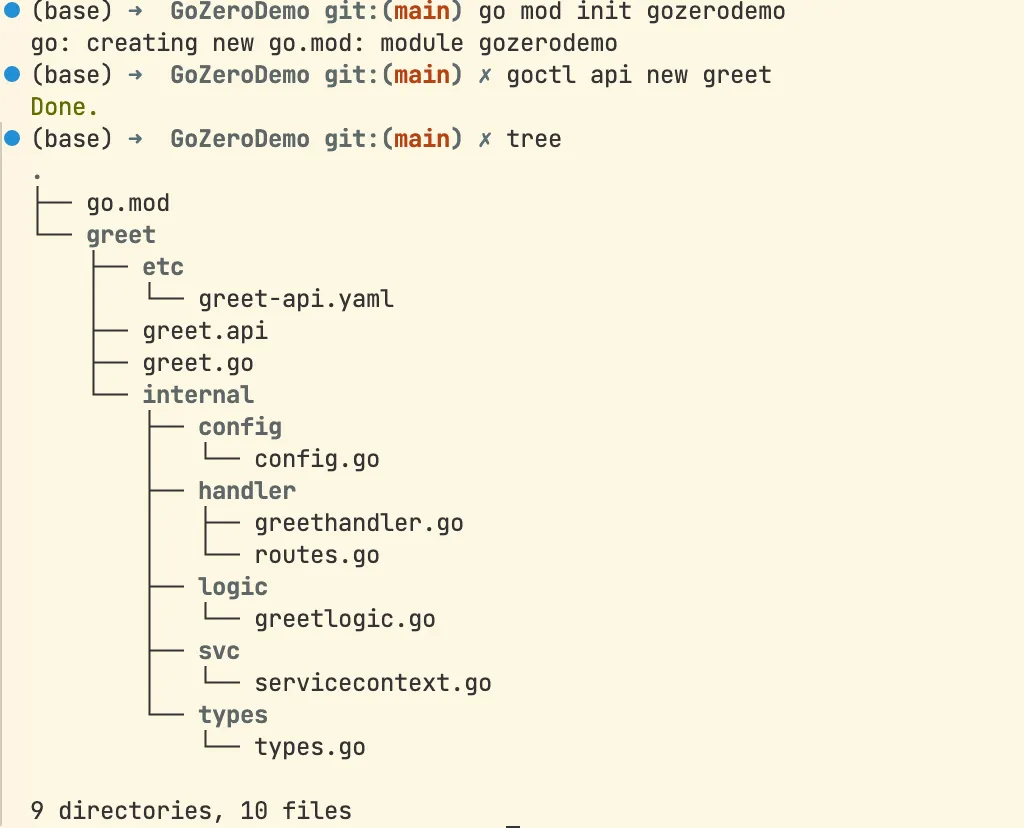
Below is the generated code skeleton, including configuration files, the main file, configuration definition files, network routing files, request logic files, business logic files, and business-related struct files, among others.
Then, following the official instructions, we implement Greet in greetlogic.go to do a simple Say Hello. The test result is shown below, and a simple monolithic service is now complete.
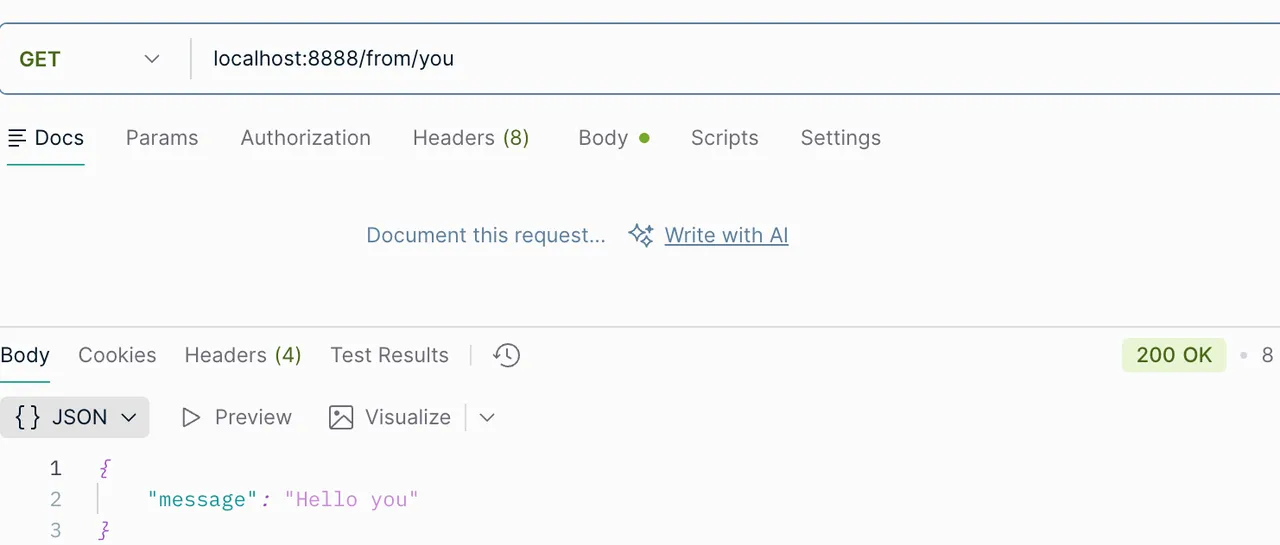
From this simple use of go-zero, we can see that the framework’s role is to generate the supporting code for you; you only need to complete the corresponding business logic.
gRPC demo
Continuing in the GoZeroDemo directory, create a gRPC service named aorange.
# 使用goctl创建RPC服务
goctl rpc new aorange
# 安装缺失的依赖
go mod tidy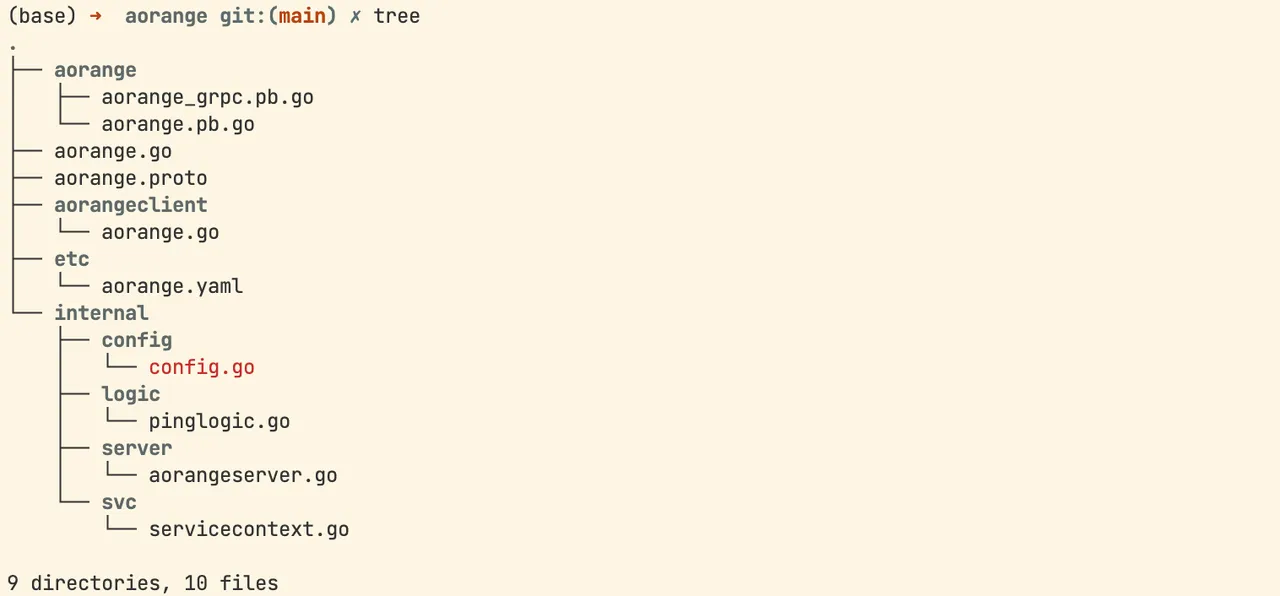
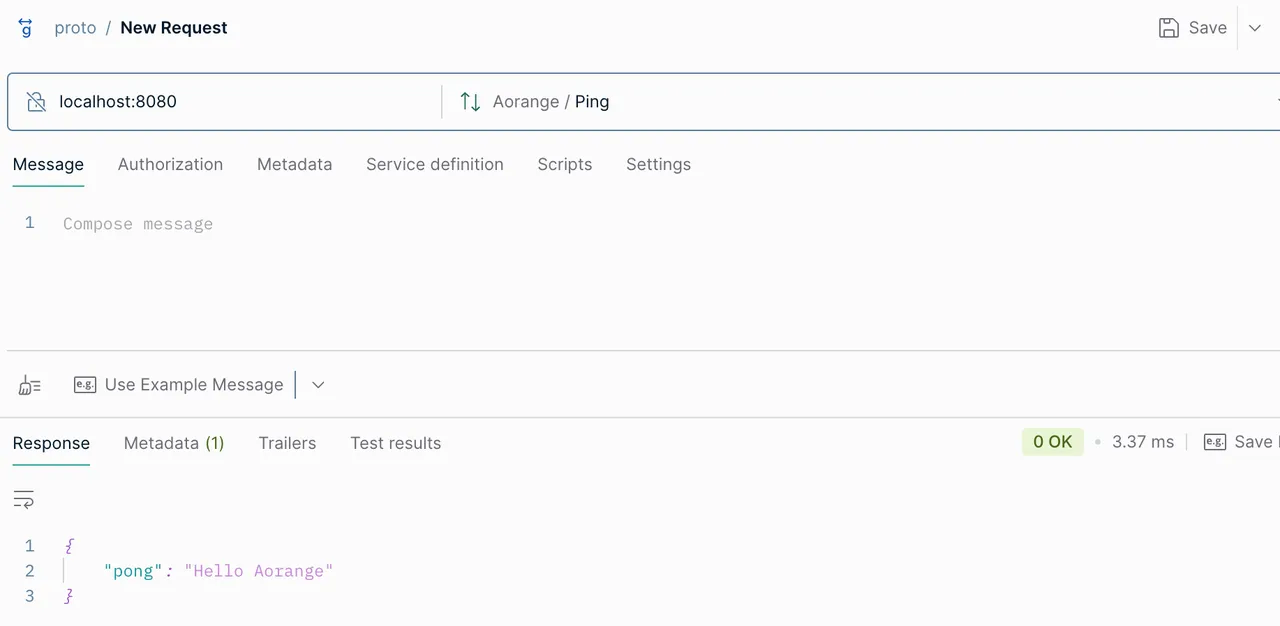
Then make a few simple changes and test them according to the documentation: gRPC-demo
MySQL
Create an sql file, then use goctl to generate the corresponding Golang files and operation methods. For details, see: mysql code generation
goctl model mysql ddl --src user.sql --dir .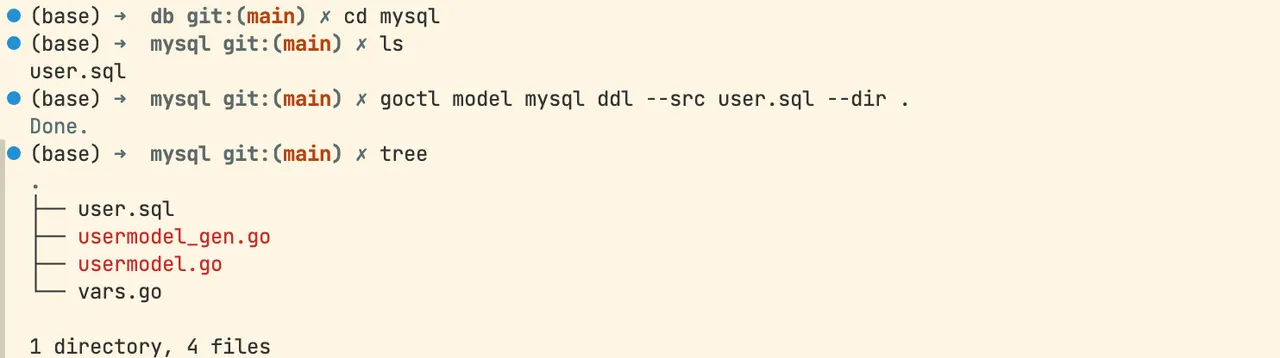
Mongo
Unlike mysql, mongo has no table creation statements, indexes, or other centralized, regular constraint information, so generating mongo code does not require information such as sql statements or database connections. For details, see: mongo code generation
goctl model mongo --type user --dir .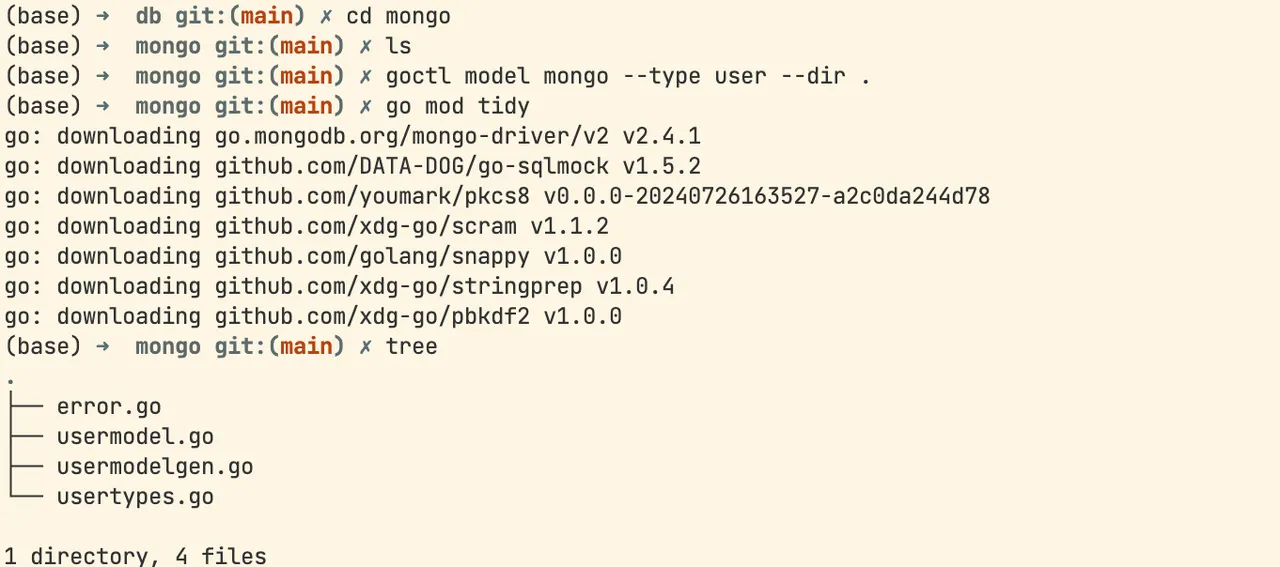
format
You can also use goctl for formatting. For details, see: api file formatting
goctl api format --dir demo.apiGoctl
Below are the commands and descriptions related to goctl. The ones we commonly use are api and rpc.
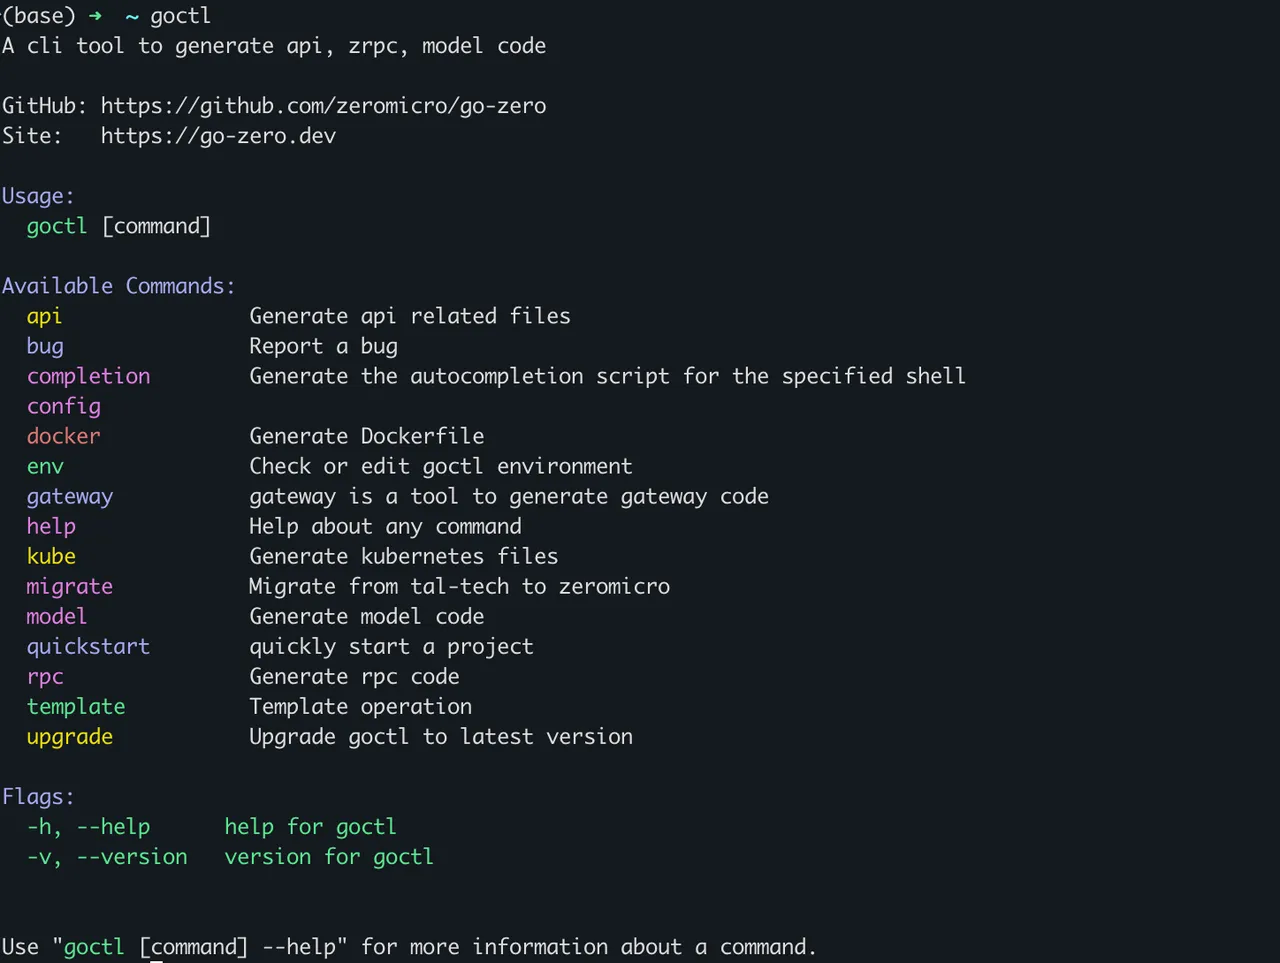
Api
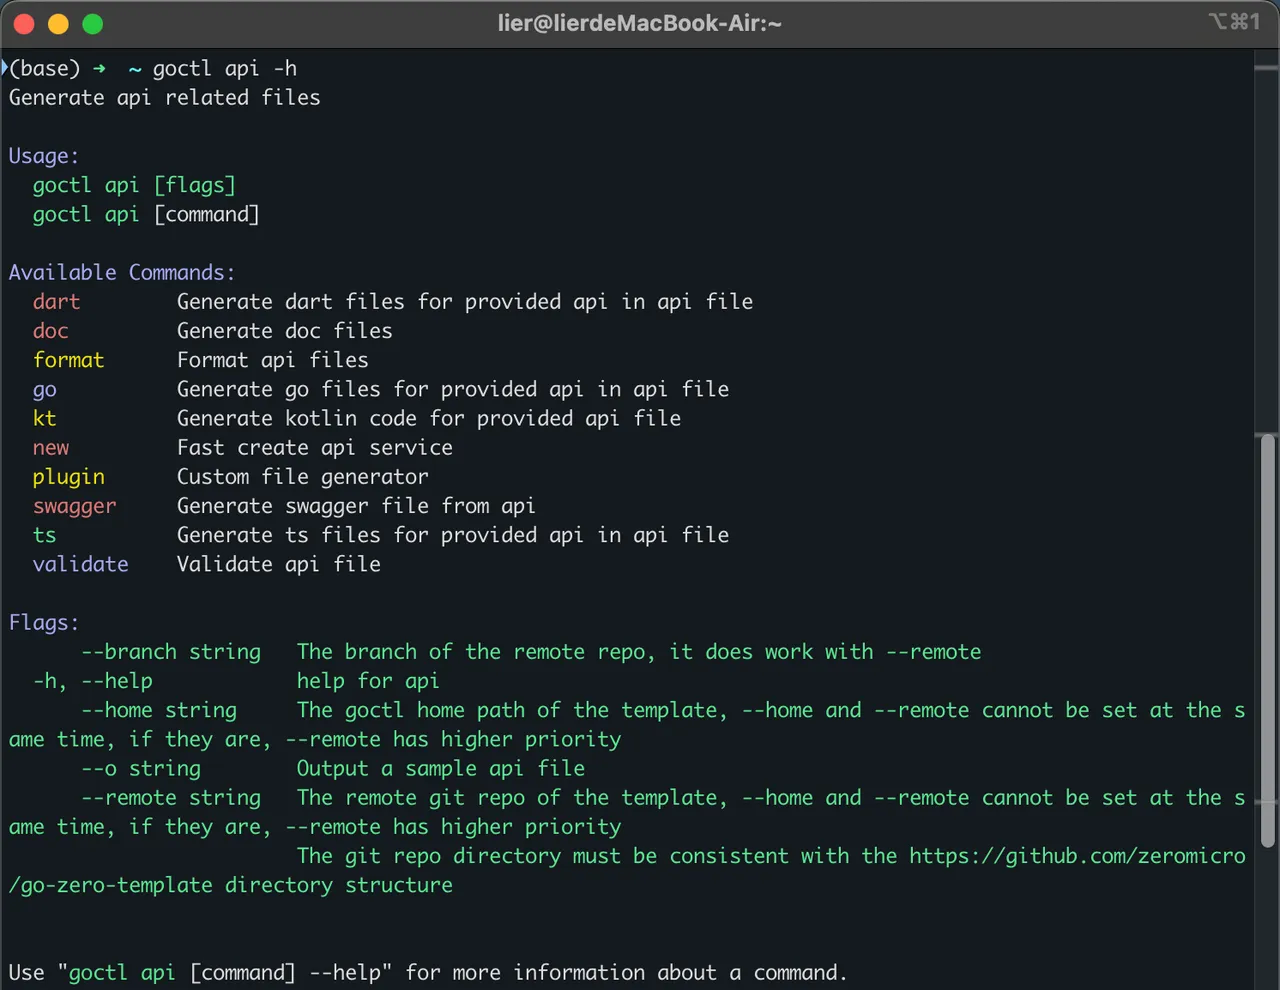
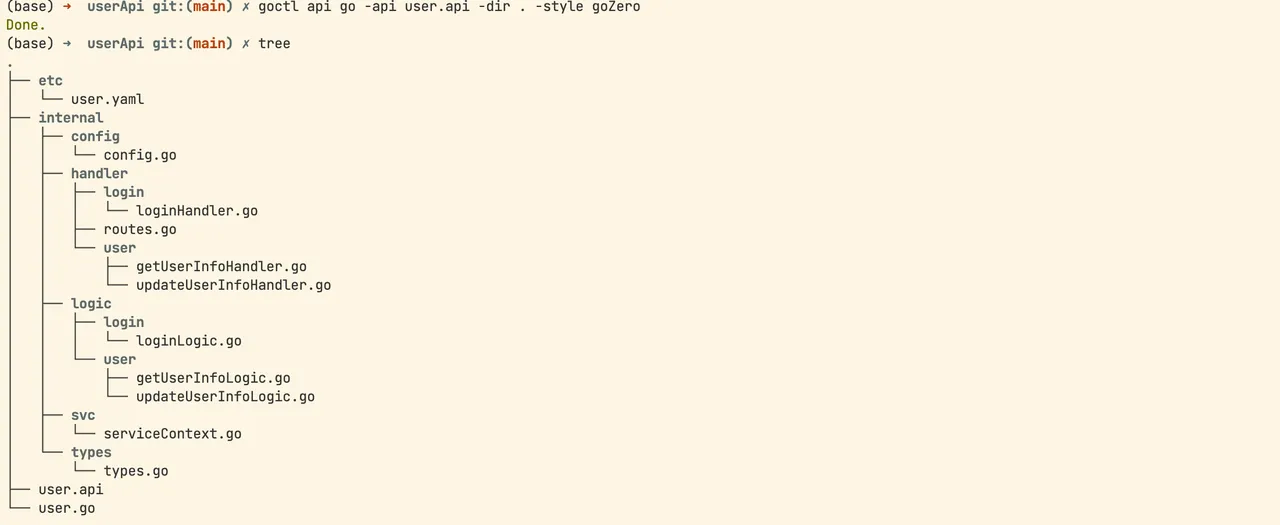
Referring to the official api example, we use goctl to create a service from an api file.
First, create the project folder and add user.api.
Then enter the command in the terminal.
goctl api go -api user.api -dir . -style goZerosyntax = "v1"
type (
// 定义登录接口的 json 请求体
LoginReq {
Username string `json:"username"`
Password string `json:"password"`
}
// 定义登录接口的 json 响应体
LoginResp {
Id int64 `json:"id"`
Name string `json:"name"`
Token string `json:"token"`
ExpireAt string `json:"expireAt"`
}
)
type (
// 定义获取用户信息的 json 请求体
GetUserInfoReq {
Id int64 `json:"id"`
}
// 定义获取用户信息的 json 响应体
GetUserInfoResp {
Id int64 `json:"id"`
Name string `json:"name"`
Desc string `json:"desc"`
}
// 定义更新用户信息的 json 请求体
UpdateUserInfoReq {
Id int64 `json:"id"`
Name string `json:"name"`
Desc string `json:"desc"`
}
)
// 定义 HTTP 服务
// @server 语法块主要用于控制对 HTTP 服务生成时 meta 信息,目前支持功能有:
// 1. 路由分组
// 2. 中间件声明
// 3. 路由前缀
// 4. 超时配置
// 5. jwt 鉴权开关
// 所有声明仅对当前 service 中的路由有效
@server (
// 代表当前 service 代码块下的路由生成代码时都会被放到 login 目录下
group: login
// 定义路由前缀为 "/v1"
prefix: /v1
)
// 微服务名称为 user,生成的代码目录和配置文件将和 user 值相关
service user {
// 定义 http.HandleFunc 转换的 go 文件名称及方法,每个接口都会跟一个 handler
@handler login
// 定义接口
// 请求方法为 post
// 路由为 /user/login
// 请求体为 LoginReq
// 响应体为 LoginResp,响应体必须有 returns 关键字修饰
post /user/login (LoginReq) returns (LoginResp)
}
// @server 语法块主要用于控制对 HTTP 服务生成时 meta 信息,目前支持功能有:
// 1. 路由分组
// 2. 中间件声明
// 3. 路由前缀
// 4. 超时配置
// 5. jwt 鉴权开关
// 所有声明仅对当前 service 中的路由有效
@server (
// 代表当前 service 代码块下的所有路由均需要 jwt 鉴权
// goctl 生成代码时会将当前 service 代码块下的接口
// 信息添加上 jwt 相关代码,Auth 值为 jwt 密钥,过期
// 等信息配置的 golang 结构体名称
jwt: Auth
// 代表当前 service 代码块下的路由生成代码时都会被放到 user 目录下
group: user
// 定义路由前缀为 "/v1"
prefix: /v1
)
// 注意,定义多个 service 代码块时,服务名称必须一致,因此这里的服务名称必须
// 和上文的 service 名称一样,为 user 服务。
service user {
// 定义 http.HandleFunc 转换的 go 文件名称及方法,每个接口都会跟一个 handler
@handler getUserInfo
// 定义接口
// 请求方法为 post
// 路由为 /user/info
// 请求体为 GetUserInfoReq
// 响应体为 GetUserInfoResp,响应体必须有 returns 关键字修饰
post /user/info (GetUserInfoReq) returns (GetUserInfoResp)
// 定义 http.HandleFunc 转换的 go 文件名称及方法,每个接口都会跟一个 handler
@handler updateUserInfo
// 定义接口
// 请求方法为 post
// 路由为 /user/info/update
// 请求体为 UpdateUserInfoReq
// 由于不需要响应体,因此可以忽略不写
post /user/info/update (UpdateUserInfoReq)
}
RPC
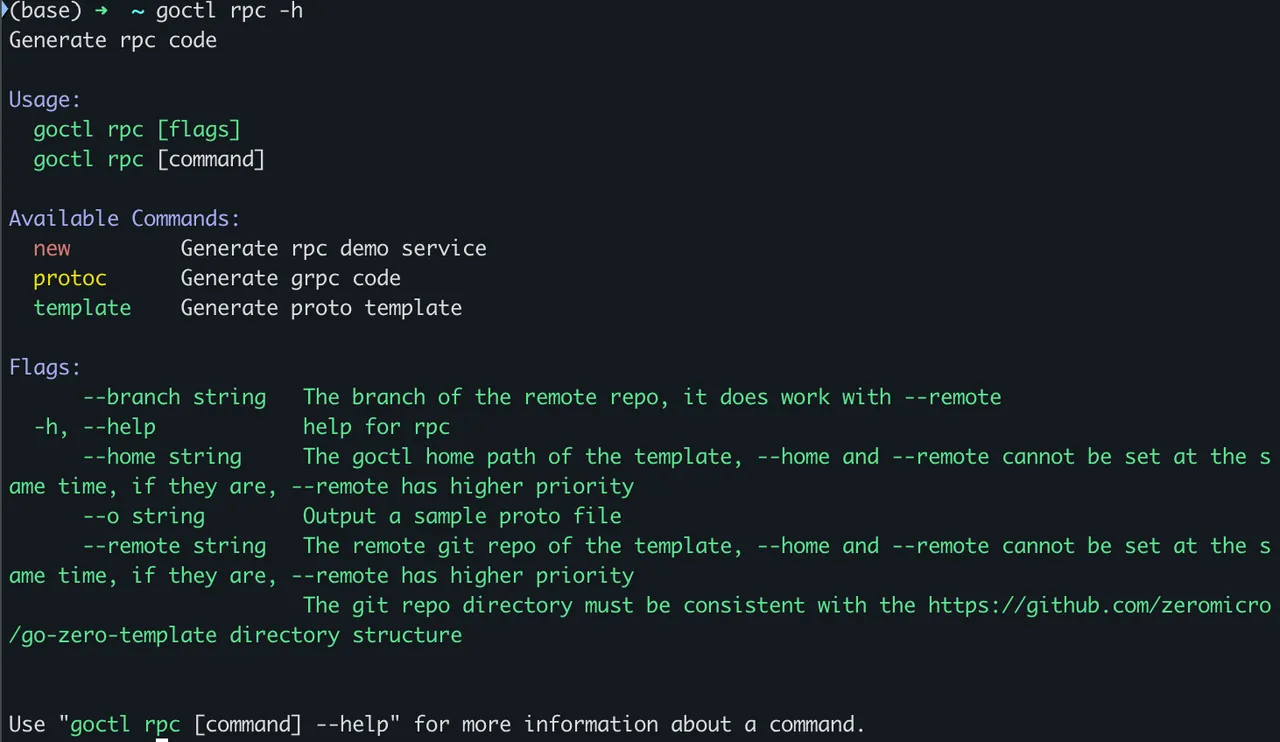
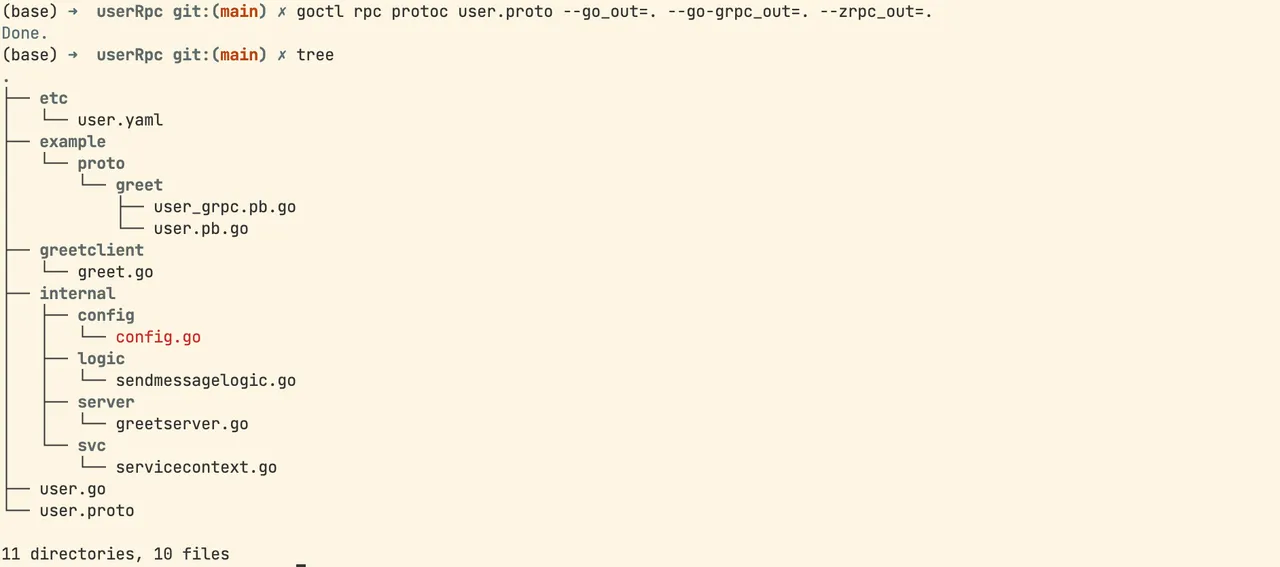
rpc follows the same approach.
The relevant commands and code are as follows:
goctl rpc protoc user.proto --go_out=. --go-grpc_out=. --zrpc_out=.// 声明 proto 语法版本,固定值
syntax = "proto3";
// proto 包名
package greet;
// 生成 golang 代码后的包名
option go_package = "example/proto/greet";
// 定义枚举
enum Status{
UNSPECIFIED = 0;
SUCCESS = 1;
FAILED = 2;
}
// 定义结构体
message Base{
int32 code = 1;
string msg = 2;
}
message SendMessageReq{
string message = 1;
}
message SendMessage{
// 使用枚举
Status status = 1;
// 数组
repeated string array = 2;
// map
map<string,int32> map = 3;
// 布尔类型
bool boolean = 4;
// 序列号保留
reserved 5;
}
message SendMessageResp{
Base base = 1;
SendMessage data = 2;
}
// 定义 Greet 服务
service Greet {
// 定义客户端流式 rpc
rpc SendMessage(stream SendMessageReq) returns (SendMessageResp);
}
Model
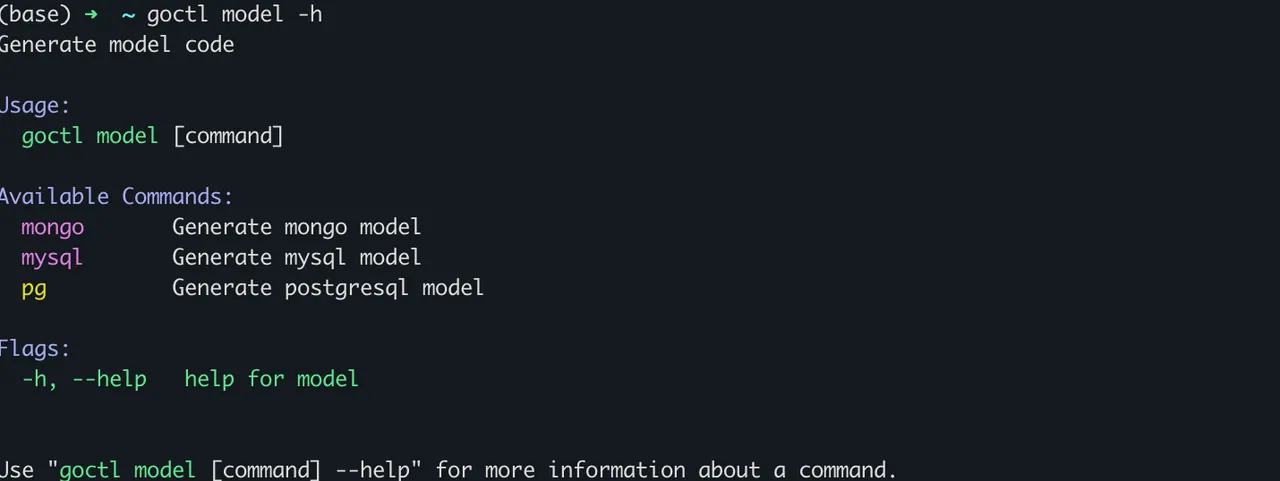
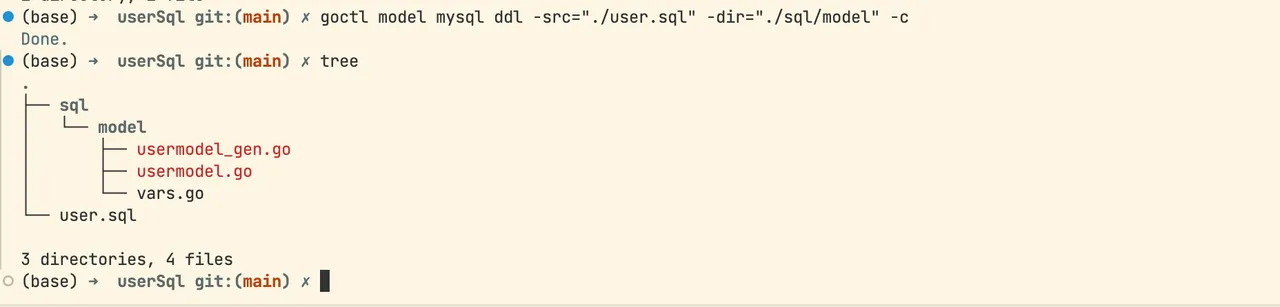
Taking SQL as an example, create an sql file and generate the related code with the following command.
goctl model mysql ddl -src"./user.sql" -dir="./sql/model" -c