
Project design
Overview
The project uses the go-zero framework to implement a simple user order system, including two microservices: the user service and the order service. Through the API endpoints, the two services’ endpoints can be called separately, and the user service exposes an RPC service interface for the order service to call. The screenshots below show my process.
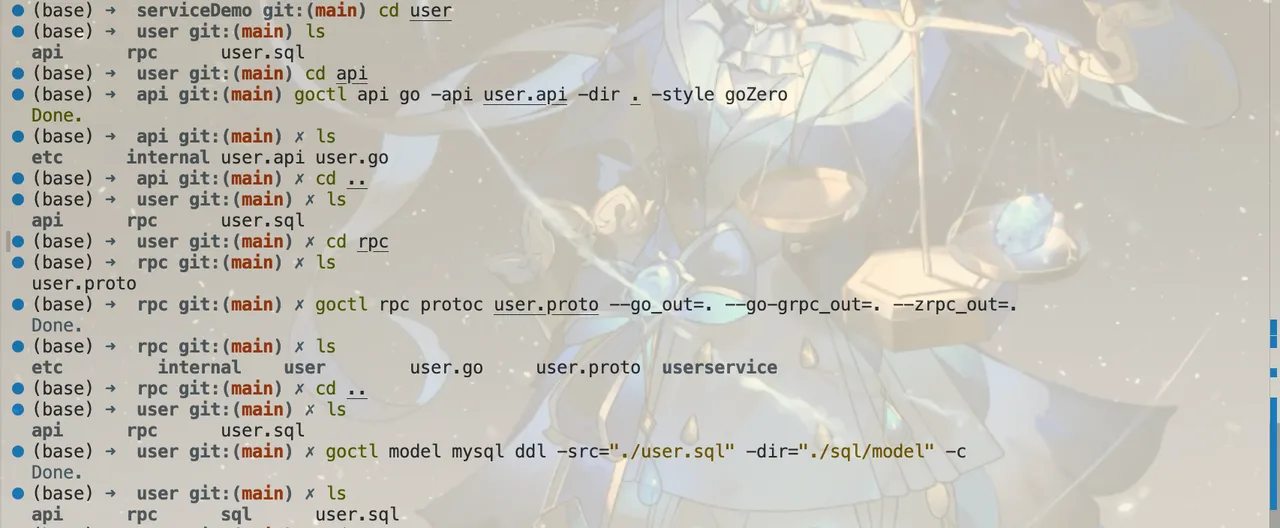
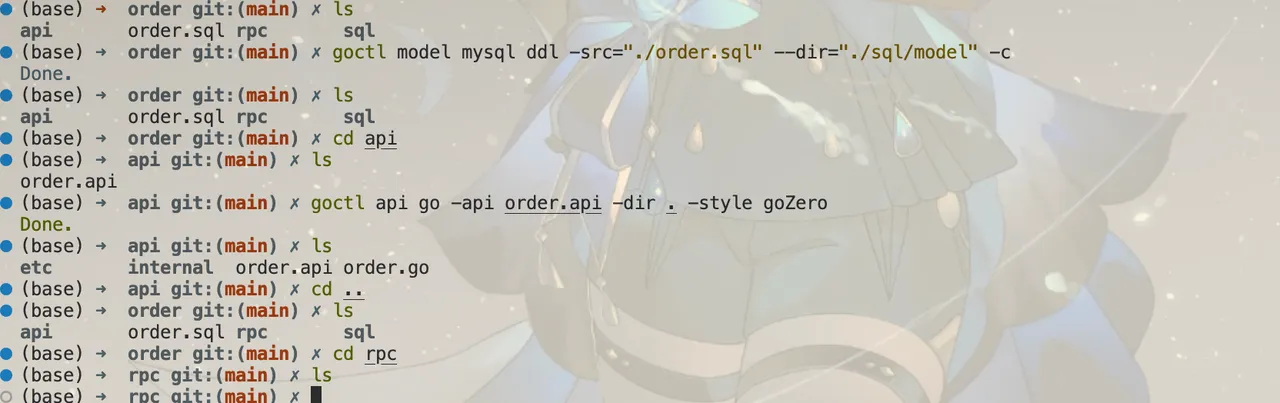
API
goctl commands
goctl api go -api user.api -dir . -style goZero
goctl api go -api order.api -dir . -style goZero
User
syntax = "v1"

// 进行项目的简单说明
info (
    title:   "实现简单的用户服务"
    author:  "aorangehc"
    date:    "2025年 11 月 11 日"
    version: "v1"
)

// 注册需要用户名、密码、手机号码,要做唯一性检测
type RegisterReq {
    UserName   string `json:"username"`
    Password   string `json:"password"`
    Repassword string `json:"re_password"`
    Mobile     string `json:"mobile"`
    Gender     int    `json:"gender,options=0|1|2,default=0"` // male|female|unknown
    NickName   string `json:"nickname"`
}

type RegisterResp {
    success bool   `json:"success"` // 注册是否成功
    Message string `json:"message"` // 注册报错信息
    Id      int64  `json:"id"` // 成功注册返回的 id
}

type LoginReq {
    UserName string `json:"username"`
    Password string `json:"password"`
}

type LoginResp {
    Message      string `json:"message"`
    AccessToken  string `json:"accessToken"`
    AccessExpire int64  `json:"accessExpire"`
    RefreshAfter int64  `json:"refreshAfter"`
}

type UserInfoReq {
    Id int64 `json:"id"`
}

type UserInfoResp {
    Id       int64  `json:"id"`
    Token    string `json:"token"`
    UserName string `json:"username"`
    Mobile   string `json:"mobile"`
    Gender   int    `json:"gender,options=0|1|2,default=0"` // male|female|unknown
    NickName string `json:"nickname"`
    CreateAt string `json:"createAt"` // 注册时间
    UpdateAt string `json:"updateAt"` // 最后更新时间
}

// 用户信息更新
type UserUpdateReq {
    Id       int64  `json:"id"`
    UserName string `json:"username"`
    Password string `json:"password"`
    Mobile   string `json:"mobile"`
    Gender   int    `json:"gender,options=0|1|2,default=0"` // male|female|unknown
    NickName string `json:"nickname"`
}

type UserUpdateResp {
    success bool   `json:"success"`
    Message string `json:"message"` // 更新报错信息
}

// 定义用户服务的 Api
@server (
    prefix: api
)
service user-api {
    @handler register
    post /user/register (RegisterReq) returns (RegisterResp)

    @handler login
    post /user/login (LoginReq) returns (LoginResp)
}

@server (
    prefix: api
    jwt:    Auth
)
service user-api {
    @handler userInfo // 获取用户信息
    get /user/:id (UserInfoReq) returns (UserInfoResp)
}
Order
syntax = "v1"

info (
    title:   "订单服务简单 demo"
    author:  "aorangehc"
    date:    "2025年 11 月 11 日"
    version: "v1"
)

// 创建订单
type CreateReq {
    UserId  int64 `json:"userId"`
    GoodsId int64 `json:"goodsId"`
    Num     int64 `json:"num"`
    Amount  int64 `json:"amount"`
}

type CreateResp {
    OrderSn string `json:"orderSn"`
}

// 查看订单详情
type DetailReq {
    OrderSn string `json:"orderSn"`
}

type DetailResp {
    OrderSn  string `json:"orderSn"`
    UserId   int64  `json:"userId"`
    GoodsId  int64  `json:"goodsid"`
    Num      int64  `json:"num"`
    Amount   int64  `json:"amount"`
    Status   int64  `json:"status"`
    CreateAt string `json:"createAt"`
}

// 删除订单
type DeleteReq {
    userId  int64  `json:"userId"`
    OrderSn string `json:"orderSn"`
}

type DeleteResp {
    success bool   `json:"success"`
    Message string `json:"message"`
}

service order-api {
    @handler create
    post /api/order/create (CreateReq) returns (CreateResp)

    @handler detail
    get /api/order/:orderSn (DetailReq) returns (DetailResp)

    @handler delete
    delete /api/order/delete (DeleteReq) returns (DeleteResp)
}
RPC
goctl commands
goctl rpc protoc user.proto --go_out=. --go-grpc_out=. --zrpc_out=.User
// 暴露一个 user 服务对外接口,获取用户信息

syntax = "proto3";

option go_package = "./user";

// 定义请求结构体
message GetUserInfoRequest {
    int64 user_id = 1; // 用户ID
}

// 定义响应结构体
message GetUserInfoResponse {
    int64 user_id = 1; // 用户ID
    string user_name = 2; // 用户名
    int64 gender = 3; // 用户性别
}

// 定义 UserService 服务
service UserService {
    // 获取用户信息
    rpc GetUserInfo(GetUserInfoRequest) returns (GetUserInfoResponse);
}
MySQL
goctl commands
goctl model mysql ddl -src="./user.sql" -dir="./sql/model"
goctl model mysql ddl -src="./order.sql" --dir="./sql/model"
User
CREATE TABLE user (
    id bigint AUTO_INCREMENT,
    name varchar(255) NULL COMMENT '用户名',
    password varchar(255) NOT NULL DEFAULT '' COMMENT '密码',
    mobile varchar(255) NOT NULL DEFAULT '' COMMENT '手机号码',
    gender char(10) NOT NULL DEFAULT 'male' COMMENT '性别,male|female|unknown',
    nickname varchar(255) NULL DEFAULT '' COMMENT '昵称',
    type tinyint(1) NULL DEFAULT 0 COMMENT '用户类型, 0:普通用户,1:VIP用户,用于测试golang关键字',
    create_at timestamp NULL,
    update_at timestamp NULL DEFAULT CURRENT_TIMESTAMP ON UPDATE CURRENT_TIMESTAMP,
    UNIQUE mobile_index (mobile),
    UNIQUE name_index (name),
    PRIMARY KEY (id)
) ENGINE = InnoDB COLLATE utf8mb4_general_ci COMMENT '用户表';
Order
CREATE TABLE `order` (
    `order_sn` VARCHAR(64) NOT NULL COMMENT '订单号',
    `user_id` BIGINT NOT NULL DEFAULT 0 COMMENT '用户ID',
    `goods_id` BIGINT NOT NULL DEFAULT 0 COMMENT '商品ID',
    `num` BIGINT NOT NULL DEFAULT 0 COMMENT '数量',
    `amount` BIGINT NOT NULL DEFAULT 0 COMMENT '金额',
    `status` INT NOT NULL DEFAULT 0 COMMENT '状态',
    `create_at` DATETIME DEFAULT CURRENT_TIMESTAMP COMMENT '创建时间',
    `delete_at` DATETIME DEFAULT NULL COMMENT '删除时间',
    PRIMARY KEY (`order_sn`)
) ENGINE=InnoDB COLLATE utf8mb4_general_ci COMMENT='订单表';
MySQL configuration and model operations
The initial project structure has been set up. Next we configure the database; here we start from scratch and use Docker to create the tables. The relevant commands are below.
Creating the MySQL database and tables
# 使用 docker 拉取 docekr 的镜像
docker pull mysql:8.0

# 使用镜像创建容器
docker run -d --name testMySQl \ # 容器名称
  -e MYSQL_ROOT_PASSWORD=123456 \ # 数据库密码
  -e MYSQL_DATABASE=goframework \ # 数据库名称
  -p 3307:3306 \ # 容器内 3306 端口映射到 3307,因为我的 3306 被占用了
  -v $PWD/mysql-data:/var/lib/mysql \ # 将存储映射到外部
  mysql:8.0 --default-authentication-plugin=mysql_native_password

# 进入容器
docker exec -it testMySQl /bin/sh

# 进入数据库
mysql -uroot -p123456

# 看一下已有的数据库
show databases;

# 创建一个数据库
create database user_order;

# 使用数据库
use user_order;;

# 看一下表
show tables;

# 创建一个用户表
CREATE TABLE `user` (
    id bigint AUTO_INCREMENT,
    name varchar(255) NULL COMMENT '用户名',
    password varchar(255) NOT NULL DEFAULT '' COMMENT '密码',
    mobile varchar(255) NOT NULL DEFAULT '' COMMENT '手机号码',
    gender char(10) NOT NULL DEFAULT 'male' COMMENT '性别,male|female|unknown',
    nickname varchar(255) NULL DEFAULT '' COMMENT '昵称',
    type tinyint(1) NULL DEFAULT 0 COMMENT '用户类型, 0:普通用户,1:VIP用户,用于测试golang关键字',
    create_at timestamp NULL,
    update_at timestamp NULL DEFAULT CURRENT_TIMESTAMP ON UPDATE CURRENT_TIMESTAMP,
    UNIQUE mobile_index (mobile),
    UNIQUE name_index (name),
    PRIMARY KEY (id)
) ENGINE = InnoDB COLLATE utf8mb4_general_ci COMMENT '用户表';

# 创建订单表
CREATE TABLE `order` (
    `order_sn` VARCHAR(64) NOT NULL COMMENT '订单号',
    `user_id` BIGINT NOT NULL DEFAULT 0 COMMENT '用户ID',
    `goods_id` BIGINT NOT NULL DEFAULT 0 COMMENT '商品ID',
    `num` BIGINT NOT NULL DEFAULT 0 COMMENT '数量',
    `amount` BIGINT NOT NULL DEFAULT 0 COMMENT '金额',
    `status` INT NOT NULL DEFAULT 0 COMMENT '状态',
    `create_at` DATETIME DEFAULT CURRENT_TIMESTAMP COMMENT '创建时间',
    `delete_at` DATETIME DEFAULT NULL COMMENT '删除时间',
    PRIMARY KEY (`order_sn`)
) ENGINE=InnoDB COLLATE utf8mb4_general_ci COMMENT='订单表';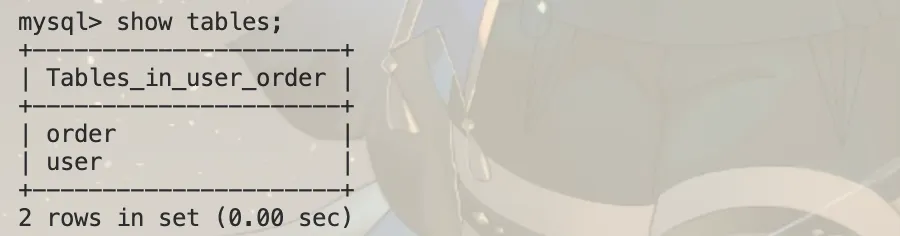
Connecting the project to the database
- First modify the configuration file and add the database-related configuration.
root:123456@tcp(127.0.0.1:3307)/user_order?charset=utf8mb4&parseTime=True&loc=Local
├─┘└──┘└┘└────┘└──┘└─────┘└───────┘└───────┘└────┘
用户名 密码 协议 主机地址 端口 数据库名 字符集 时间解析 时区-
Then modify the configuration information in the yaml file, writing in the concrete configuration.
-
Add the database-related configuration in servicecontext, and connect to the database tables.
-
Implement it in the registration logic, adding the data-writing logic.
Then test, writing data
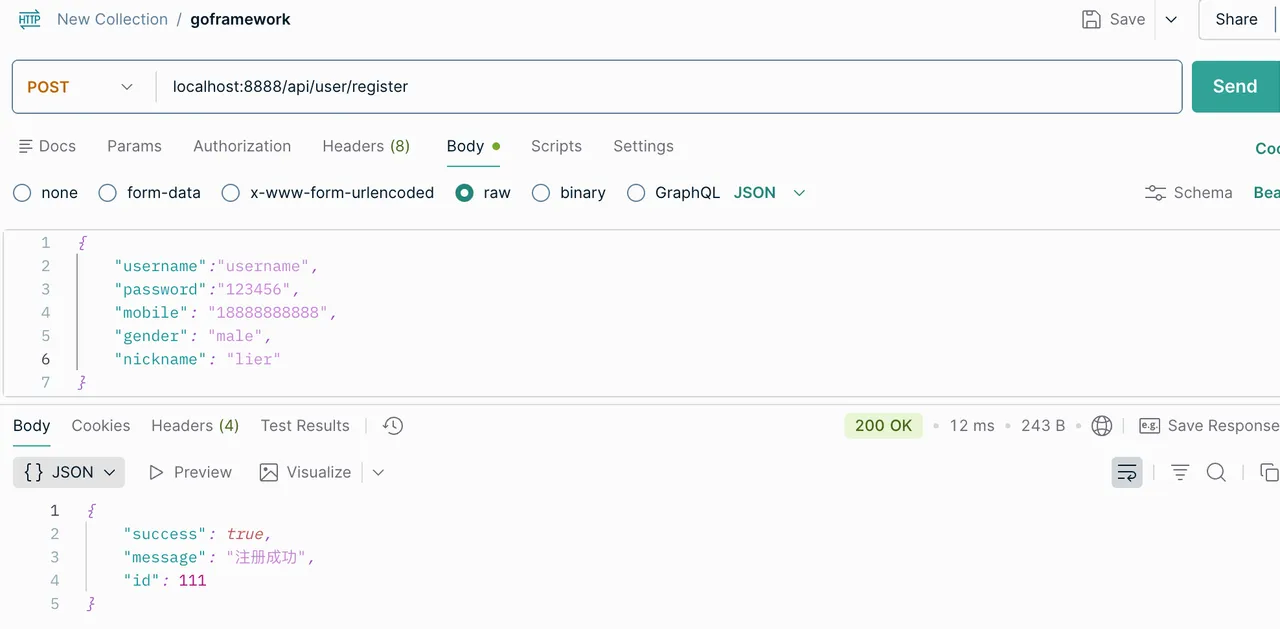

Registration
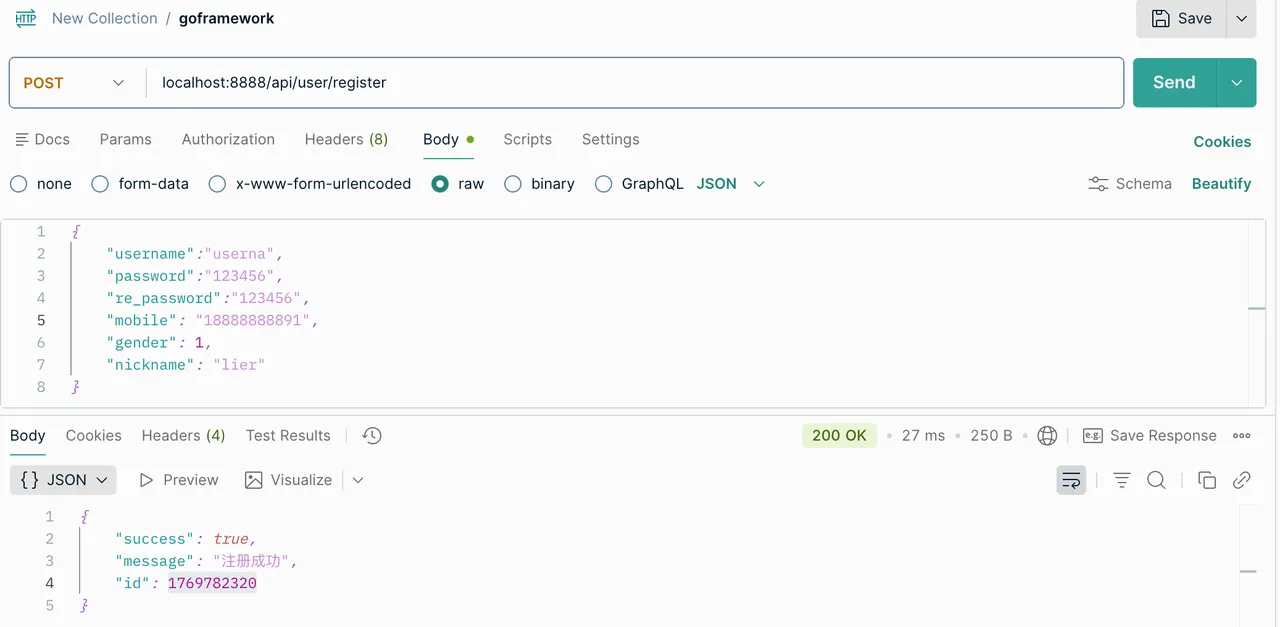
Previously we implemented simple database operations; now we start implementing a simple registration feature.
-
Parameter validation (validate the legality of the parameters, check whether they are empty, and also confirm the two password entries —)
-
Confirming data uniqueness (check whether the data already exists in the database)
-
Encryption with salt (use md5 for encryption and salting)
// 加密加盐
    h := md5.New()
    h.Write([]byte(req.Password))
    h.Write(secret)
    passwordStr := hex.EncodeToString(h.Sum(nil))
Below is the effect verification.
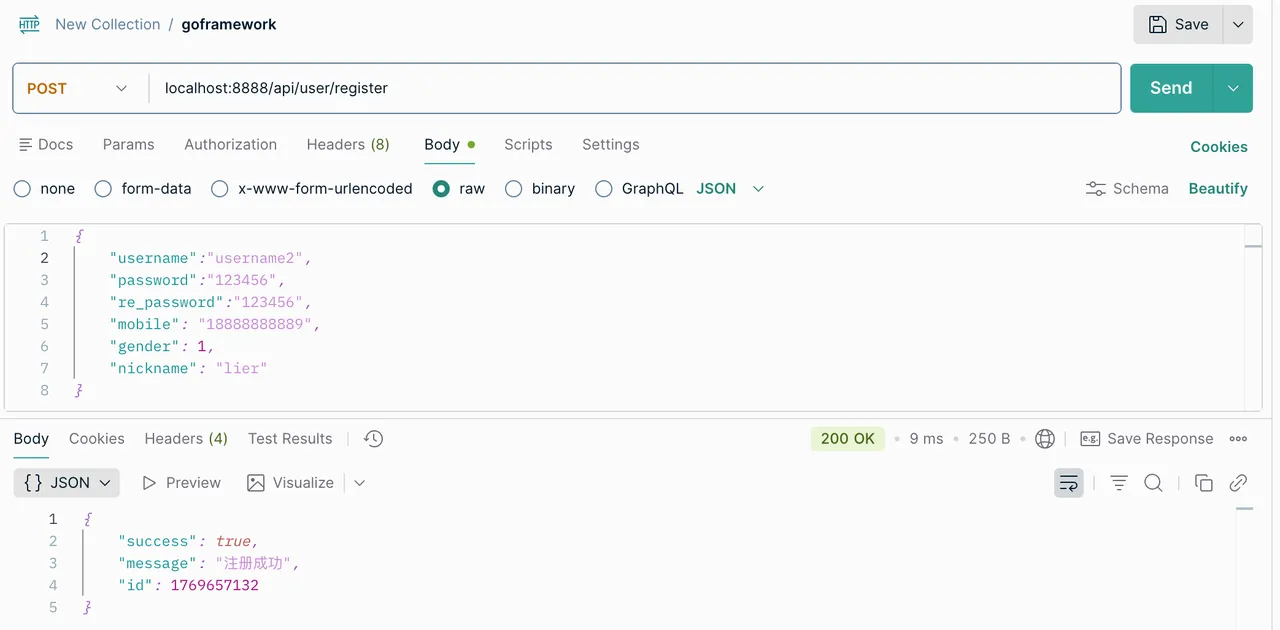
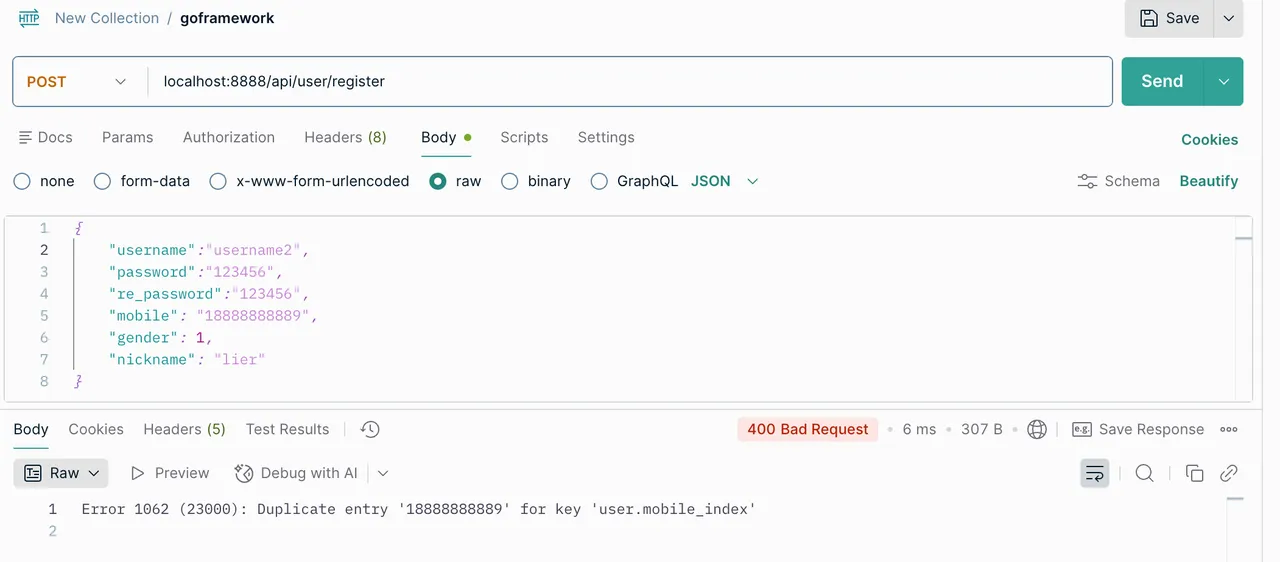
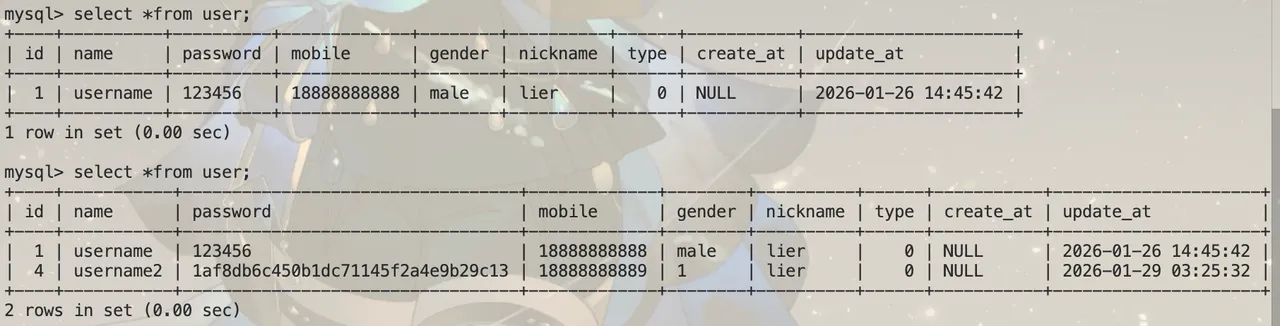
Caching
go-zero caching
First, a word about caching. Simply put, caching means storing in advance data that may be needed next time, so that when it is needed next time there is no need to search for it slowly again; it can effectively improve loading speed and user experience.
In our daily lives, browsers generally cache web pages when loading them, so the first load is usually very slow. I once encountered a situation where a web page deployed on GitHub Pages would keep caching the data from the first load; it was very strange, and the problem was only solved after making a separate setting in the browser.
In e-commerce or application scenarios, data that is read very frequently, expensive to compute, infrequently changed, or needs a fast response is cached — both to reduce costs and to improve efficiency.
The most commonly used database for caching is Redis, and Redis is also gradually iterating to adapt to more caching scenarios.
In go-zero, the use of caching can be configured through the “-c” parameter. We will implement simple caching in the current user order system; first use the command below to generate the caching-related code.
goctl model mysql ddl -src="./user.sql" --dir="./sql/cachemodel" -cBelow is a comparison of the code with and without caching.
// 有缓存
func (m *defaultUserModel) FindOneByMobile(ctx context.Context, mobile string) (*User, error) {
    userMobileKey := fmt.Sprintf("%s%v", cacheUserMobilePrefix, mobile)
    var resp User
    err := m.QueryRowIndexCtx(ctx, &resp, userMobileKey, m.formatPrimary, func(ctx context.Context, conn sqlx.SqlConn, v any) (i any, e error) {
        query := fmt.Sprintf("select %s from %s where `mobile` = ? limit 1", userRows, m.table)
        if err := conn.QueryRowCtx(ctx, &resp, query, mobile); err != nil {
            return nil, err
        }
        return resp.Id, nil
    }, m.queryPrimary)
    switch err {
    case nil:
        return &resp, nil
    case sqlc.ErrNotFound:
        return nil, ErrNotFound
    default:
        return nil, err
    }
}

//无缓存
func (m *defaultUserModel) FindOneByMobile(ctx context.Context, mobile string) (*User, error) {
    var resp User
    query := fmt.Sprintf("select %s from %s where `mobile` = ? limit 1", userRows, m.table)
    err := m.conn.QueryRowCtx(ctx, &resp, query, mobile)
    switch err {
    case nil:
        return &resp, nil
    case sqlx.ErrNotFound:
        return nil, ErrNotFound
    default:
        return nil, err
    }
}
Now that there is a caching requirement, we need to configure the cache database.
- First look at the generated usermodel.go file with caching and dig into the design of the data structures. We can find that the configuration type we need is the new version’s cache.CacheConf, and digging further, the needed parameters are in RedisConf — this is what we need to set in the yaml file.
// NewUserModel returns a model for the database table.
func NewUserModel(conn sqlx.SqlConn, c cache.CacheConf, opts ...cache.Option) UserModel {
    return &customUserModel{
        defaultUserModel: newUserModel(conn, c, opts...),
    }
}


type (
    // A ClusterConf is the config of a redis cluster that used as cache.
    ClusterConf []NodeConf

    // A NodeConf is the config of a redis node that used as cache.
    NodeConf struct {
        redis.RedisConf
        Weight int `json:",default=100"`
    }
)

type (
    // A RedisConf is a redis config.
    RedisConf struct {
        Host     string
        Type     string `json:",default=node,options=node|cluster"`
        User     string `json:",optional"`
        Pass     string `json:",optional"`
        Tls      bool   `json:",optional"`
        NonBlock bool   `json:",default=true"`
        // PingTimeout is the timeout for ping redis.
        PingTimeout time.Duration `json:",default=1s"`
    }

    // A RedisKeyConf is a redis config with key.
    RedisKeyConf struct {
        RedisConf
        Key string
    }
)-
Then modify config.go and the yaml file for a simple configuration.
-
And then it is done — the framework implements all the rest for you.
Using Redis with Docker
# 拉取镜像
docker pull redis:8
# 创建容器
docker run -d --name testRedis -p 6379:6379 redis:8
# 进入容器
docker exec -it testRedis redis-cli
# 看一下keys
keys cache:user:name:*
# 退出
exit
Testing
Combined with Postman testing, we found that searches gradually get added to the cache.
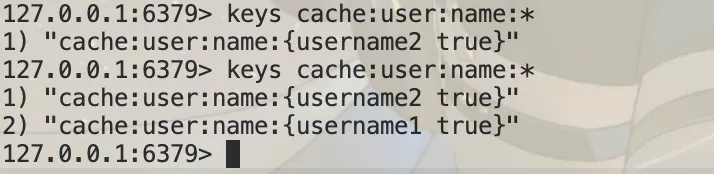
This is only a simple usage; in reality Redis’s functionality and scope of application are very broad.
Logging
go-zero’s log configuration items are embedded in the default config struct. Below is its complete design; we create Log in the yaml file and configure the following parameters.
# 配置
Log:
  ServiceName: user-api-srv
  Mode: file
  Encoding: json
  Path: logs
  Level: info
  Stat: true
type (
// A LogConf is a logging config.
LogConf struct {
// ServiceName represents the service name.
ServiceName string `json:",optional"`
// Mode represents the logging mode, default is `console`.
// console: log to console.
// file: log to file.
// volume: used in k8s, prepend the hostname to the log file name.
Mode string `json:",default=console,options=[console,file,volume]"`
// Encoding represents the encoding type, default is `json`.
// json: json encoding.
// plain: plain text encoding, typically used in development.
Encoding string `json:",default=json,options=[json,plain]"`
// TimeFormat represents the time format, default is `2006-01-02T15:04:05.000Z07:00`.
TimeFormat string `json:",optional"`
// Path represents the log file path, default is `logs`.
Path string `json:",default=logs"`
// Level represents the log level, default is `info`.
Level string `json:",default=info,options=[debug,info,error,severe]"`
// MaxContentLength represents the max content bytes, default is no limit.
MaxContentLength uint32 `json:",optional"`
// Compress represents whether to compress the log file, default is `false`.
Compress bool `json:",optional"`
// Stat represents whether to log statistics, default is `true`.
Stat bool `json:",default=true"`
// KeepDays represents how many days the log files will be kept. Default to keep all files.
// Only take effect when Mode is `file` or `volume`, both work when Rotation is `daily` or `size`.
KeepDays int `json:",optional"`
// StackCooldownMillis represents the cooldown time for stack logging, default is 100ms.
StackCooldownMillis int `json:",default=100"`
// MaxBackups represents how many backup log files will be kept. 0 means all files will be kept forever.
// Only take effect when RotationRuleType is `size`.
// Even though `MaxBackups` sets 0, log files will still be removed
// if the `KeepDays` limitation is reached.
MaxBackups int `json:",default=0"`
// MaxSize represents how much space the writing log file takes up. 0 means no limit. The unit is `MB`.
// Only take effect when RotationRuleType is `size`
MaxSize int `json:",default=0"`
// Rotation represents the type of log rotation rule. Default is `daily`.
// daily: daily rotation.
// size: size limited rotation.
Rotation string `json:",default=daily,options=[daily,size]"`
// FileTimeFormat represents the time format for file name, default is `2006-01-02T15:04:05.000Z07:00`.
FileTimeFormat string `json:",optional"`
// FieldKeys represents the field keys.
FieldKeys fieldKeyConf `json:",optional"`
}
fieldKeyConf struct {
// CallerKey represents the caller key.
CallerKey string `json:",default=caller"`
// ContentKey represents the content key.
ContentKey string `json:",default=content"`
// DurationKey represents the duration key.
DurationKey string `json:",default=duration"`
// LevelKey represents the level key.
LevelKey string `json:",default=level"`
// SpanKey represents the span key.
SpanKey string `json:",default=span"`
// TimestampKey represents the timestamp key.
TimestampKey string `json:",default=@timestamp"`
// TraceKey represents the trace key.
TraceKey string `json:",default=trace"`
// TruncatedKey represents the truncated key.
TruncatedKey string `json:",default=truncated"`
}
)You can use the following interface to record logs.
type Logger interface {
    Debug(...any)
    Debugf(string, ...any)
    Debugv(any)
    Debugw(string, ...LogField)
    Error(...any)
    Errorf(string, ...any)
    Errorv(any)
    Errorw(string, ...LogField)
    Info(...any)
    Infof(string, ...any)
    Infov(any)
    Infow(string, ...LogField)
    Slow(...any)
    Slowf(string, ...any)
    Slowv(any)
    Sloww(string, ...LogField)
    WithCallerSkip(skip int) Logger
    WithContext(ctx context.Context) Logger
    WithDuration(d time.Duration) Logger
    WithFields(fields ...LogField) Logger
}
A quick test.

login and userInfo APIs
Mainly completing the logic in these two files.
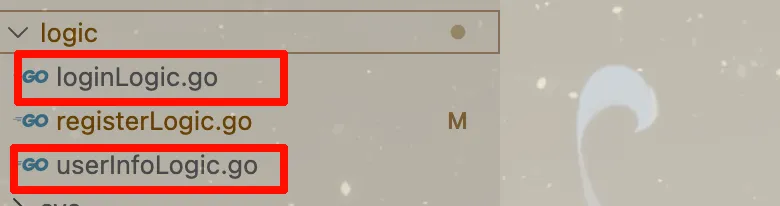
A simple implementation in the project; refer to the project code for details, click to go directly.
Below are the tests:
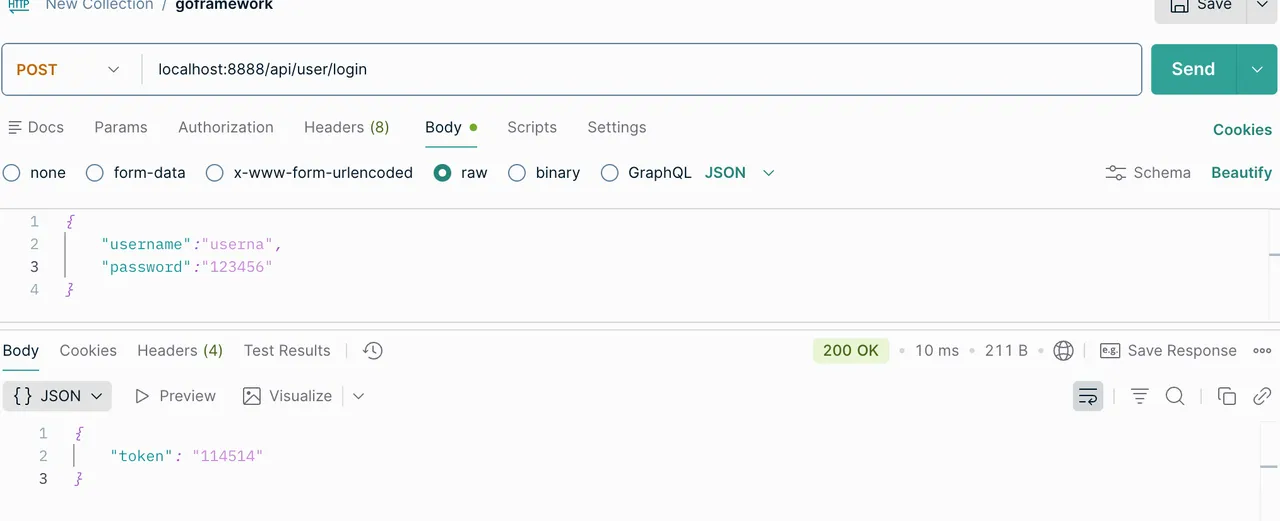
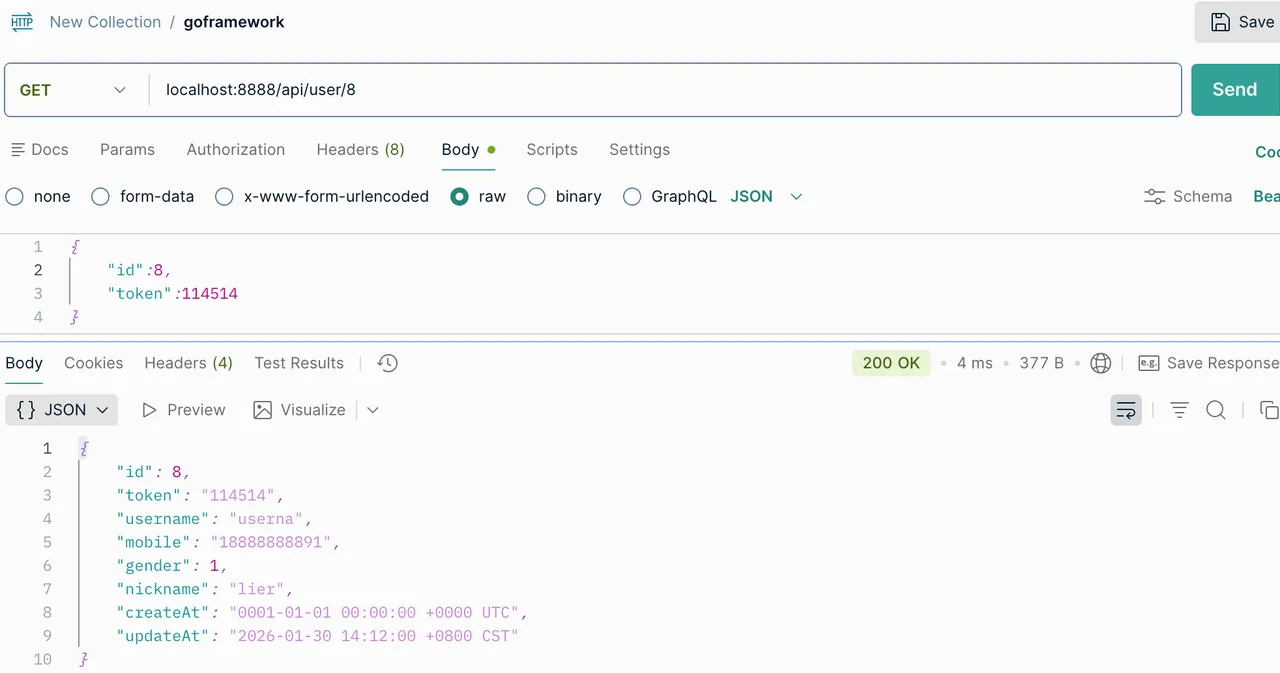
However, there are still many errors in the project, for example a problem with writing the id, which involves an issue with the database configuration.
JWT authentication
Main JWT flow
The user detail endpoint can only be accessed after logging in.
-
After the user logs in successfully -> JSON Web Token (JWT) -> the frontend saves the token, sends it along on every subsequent call to the backend, and continues to verify it.
-
The backend needs an authentication interface, usually implemented in the form of middleware that parses the token in the request header.
-
Successful parsing means a logged-in user.
-
Failed parsing means a user who is not logged in or whose session has expired.
-
Refresh token
Simple implementation and testing
Use github.com/golang-jwt/jwt/v4 to implement JWT authentication.
There is also a rather important question: where is the JWT token stored? It is stored in the project’s context, and we can retrieve the value from the context.
token := l.ctx.Value("userId")Generate a token.
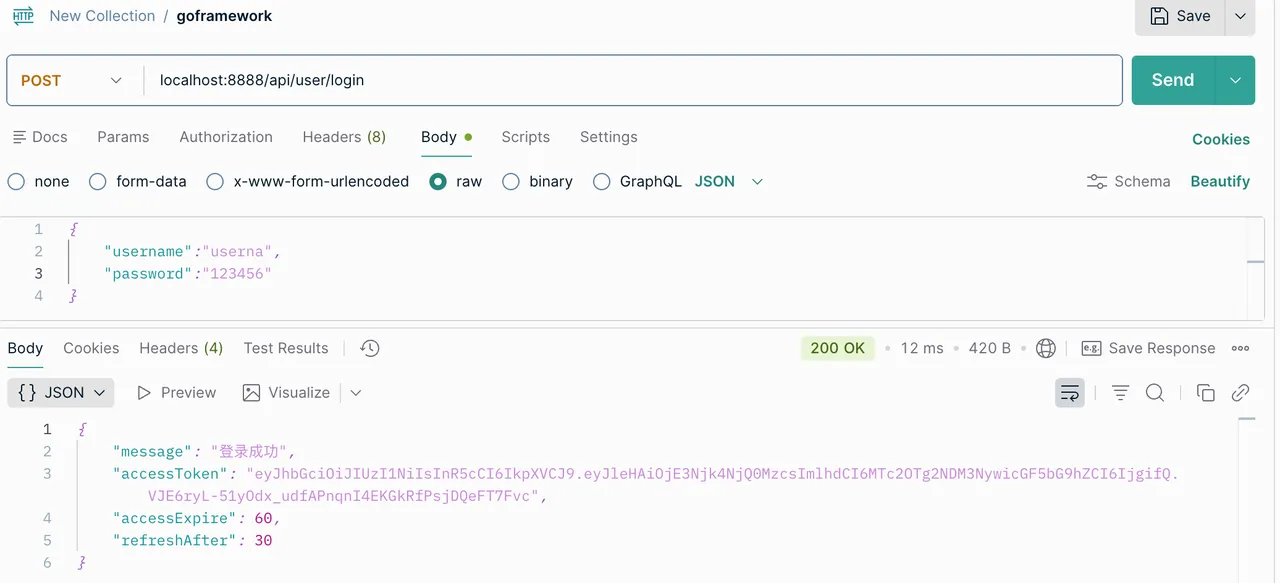
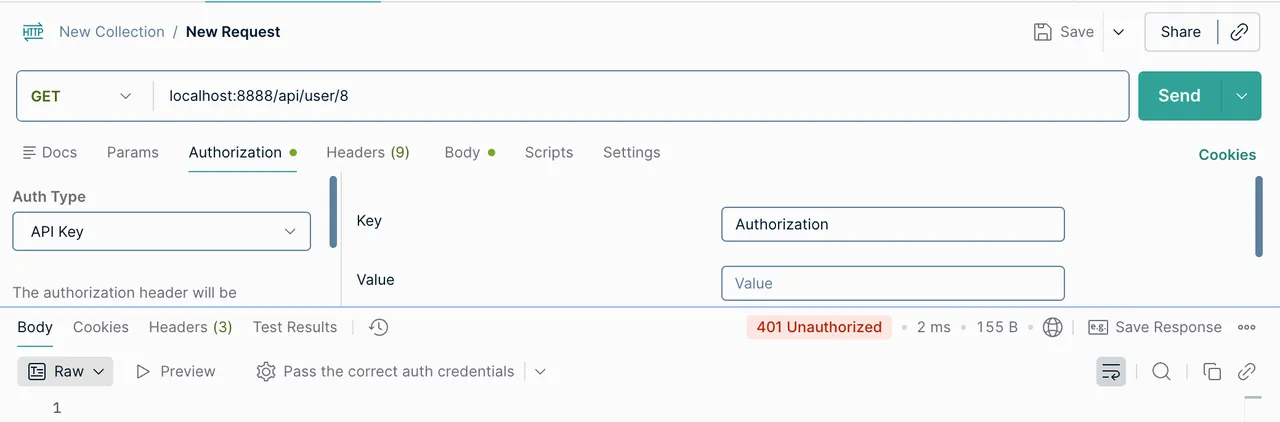
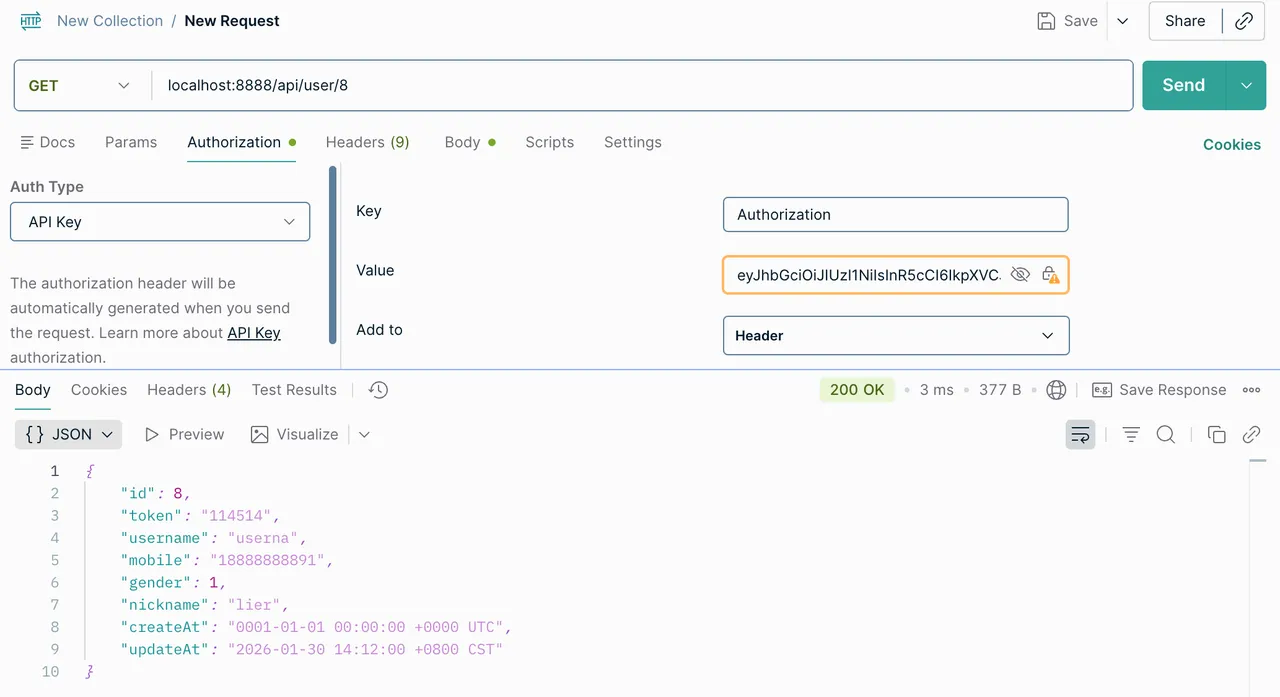
Test the results both without a token and after adding a token; note that it will time out, because 60 seconds was set earlier.
Middleware
Route middleware: add middleware only to some routes, such as authentication, performance monitoring, and so on.
Global middleware: used for everything.
Middleware from other services can also be called through closures.
Defining middleware
We can define it directly in the api file, through middleware.
syntax = "v1"

// 进行项目的简单说明
info (
    title:   "实现简单的用户服务"
    author:  "aorangehc"
    date:    "2025年 11 月 11 日"
    version: "v1"
)

// 注册需要用户名、密码、手机号码,要做唯一性检测
type RegisterReq {
    UserName   string `json:"username"`
    Password   string `json:"password"`
    Repassword string `json:"re_password"`
    Mobile     string `json:"mobile"`
    Gender     int    `json:"gender,options=0|1|2,default=0"` // male|female|unknown
    NickName   string `json:"nickname"`
}

type RegisterResp {
    success bool   `json:"success"` // 注册是否成功
    Message string `json:"message"` // 注册报错信息
    Id      int64  `json:"id"` // 成功注册返回的 id
}

type LoginReq {
    UserName string `json:"username"`
    Password string `json:"password"`
}

type LoginResp {
    Message      string `json:"message"`
    AccessToken  string `json:"accessToken"`
    AccessExpire int64  `json:"accessExpire"`
    RefreshAfter int64  `json:"refreshAfter"`
}

type UserInfoReq {
    Id int64 `json:"id"`
}

type UserInfoResp {
    Id       int64  `json:"id"`
    Token    string `json:"token"`
    UserName string `json:"username"`
    Mobile   string `json:"mobile"`
    Gender   int    `json:"gender,options=0|1|2,default=0"` // male|female|unknown
    NickName string `json:"nickname"`
    CreateAt string `json:"createAt"` // 注册时间
    UpdateAt string `json:"updateAt"` // 最后更新时间
}

// 用户信息更新
type UserUpdateReq {
    Id       int64  `json:"id"`
    UserName string `json:"username"`
    Password string `json:"password"`
    Mobile   string `json:"mobile"`
    Gender   int    `json:"gender,options=0|1|2,default=0"` // male|female|unknown
    NickName string `json:"nickname"`
}

type UserUpdateResp {
    success bool   `json:"success"`
    Message string `json:"message"` // 更新报错信息
}

// 定义用户服务的 Api
@server (
    prefix: api
)
service user-api {
    @handler register
    post /user/register (RegisterReq) returns (RegisterResp)

    @handler login
    post /user/login (LoginReq) returns (LoginResp)
}

@server (
    prefix:     api
    jwt:        Auth
    middleware: Cost // 耗时统计的一个中间件
)
service user-api {
    @handler userInfo // 获取用户信息
    get /user/:id (UserInfoReq) returns (UserInfoResp)

    @handler userUpdate // 更新用户信息
    post /user/update (UserUpdateReq) returns (UserUpdateResp)
}
Demo and testing
After updating the api file, update the project with goctl, then complete the implementation.
GoZeroDemo/serviceDemo/user/api/internal/middleware/costMiddleware.go中的 Handle 方法
GoZeroDemo/serviceDemo/user/api/internal/svc/serviceContext.go中增加 Cost的注册
Then we run the project for testing, and it prints the elapsed time.

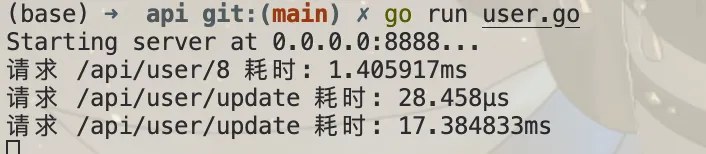
Implementing a simple global middleware.

RPC service and calls
RPC service implementation flow
-
Write the rpc file
-
goctl generates the project files
-
Modify the configuration struct and the related files
-
Complete the project content
-
Modify the context file
-
Complete the RPC business logic
-
-
Test, using Postman to test the functionality
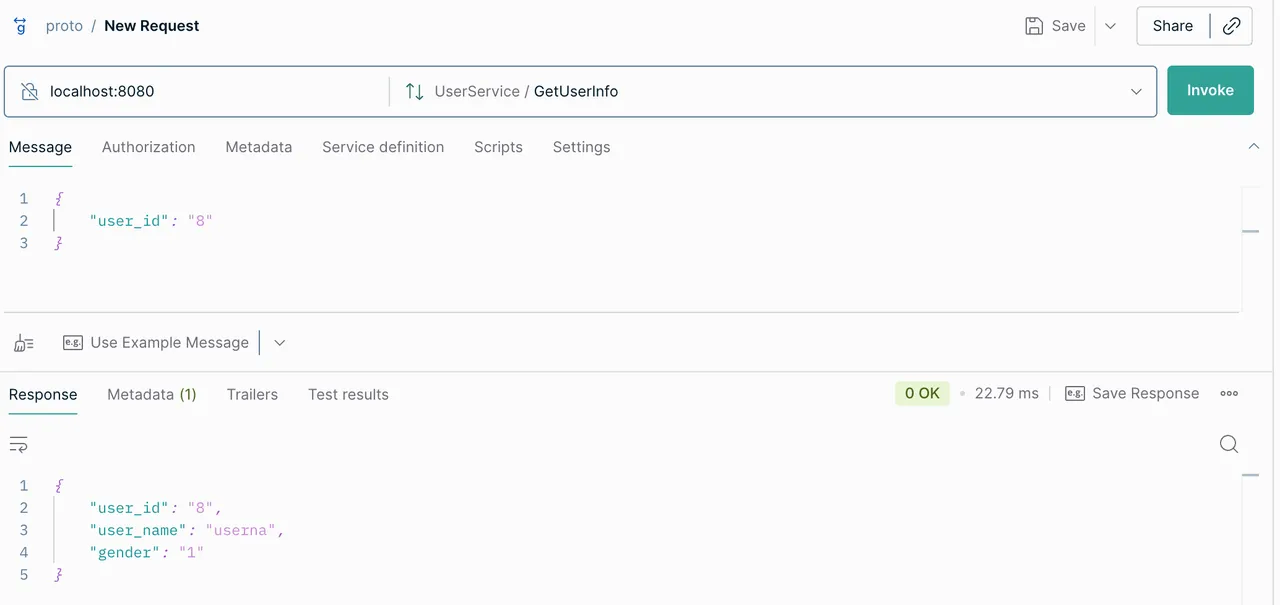
RPC calls
Making RPC calls in go-zero basically involves the following process.
-
First configure the yaml file and the config file
-
Then set up the database connection and RPC configuration in the context file
-
After that, make the RPC call in the logic file
Below are the test results.
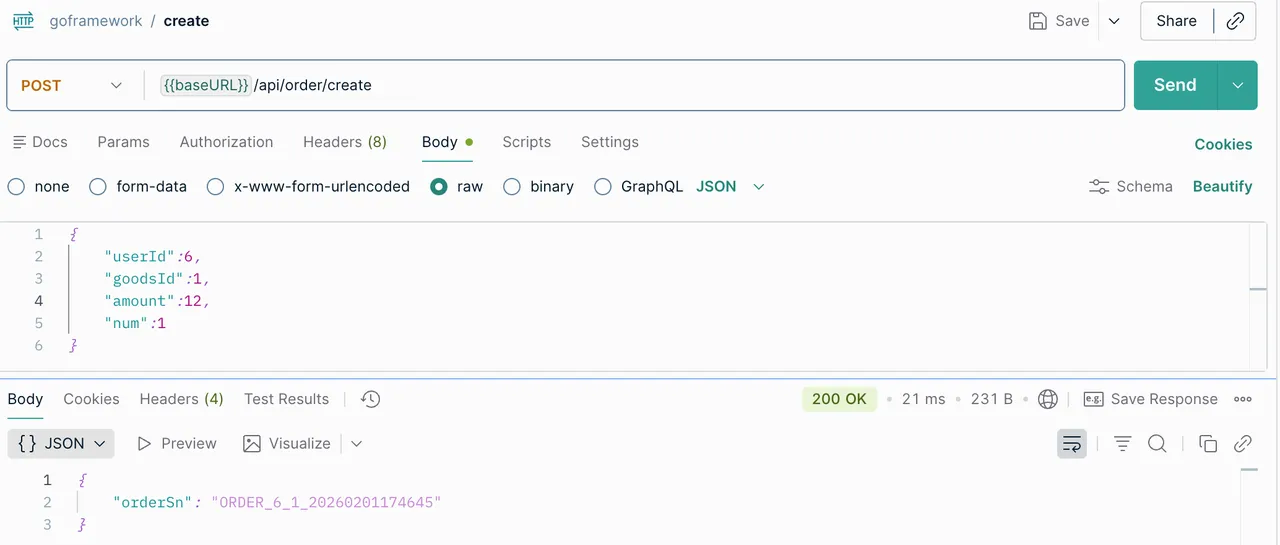
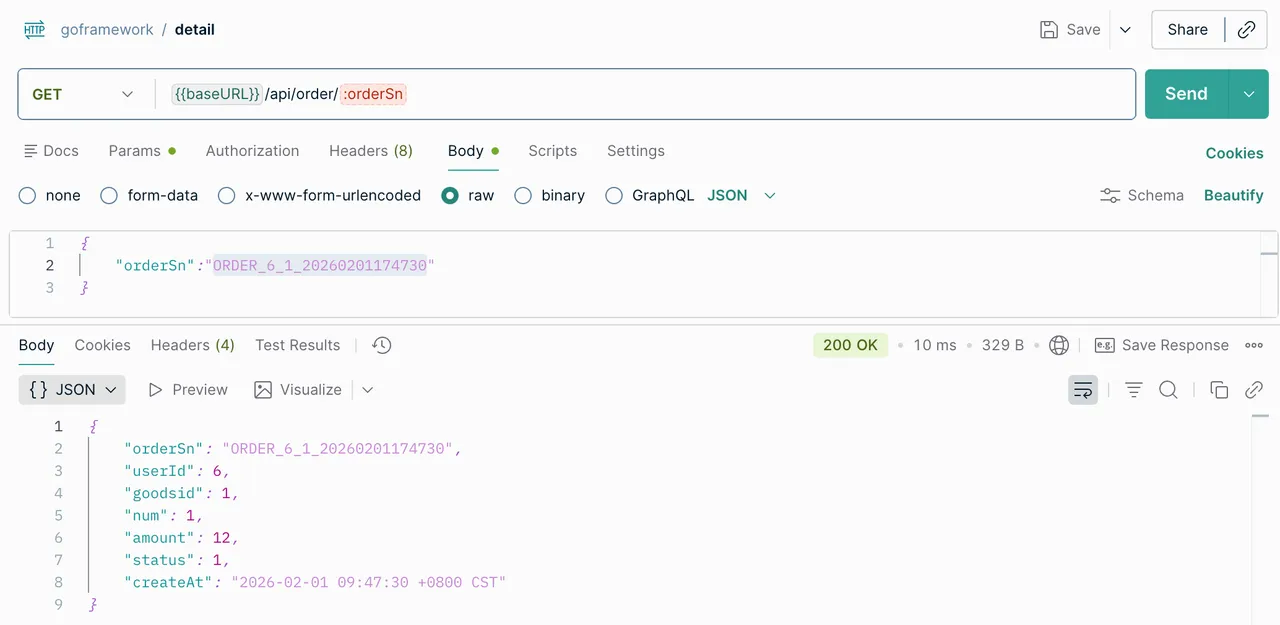
Create an order
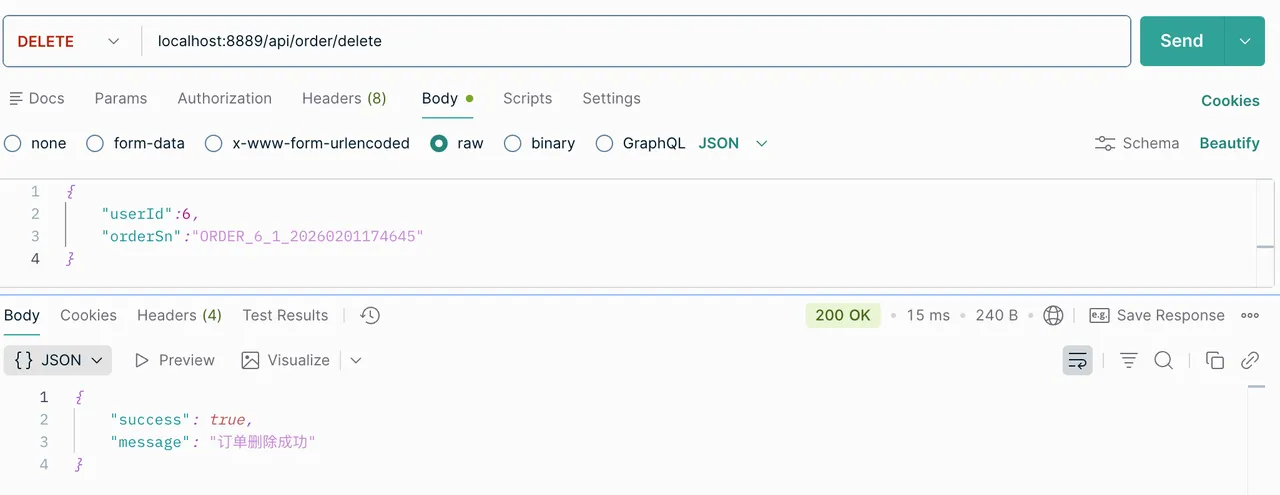
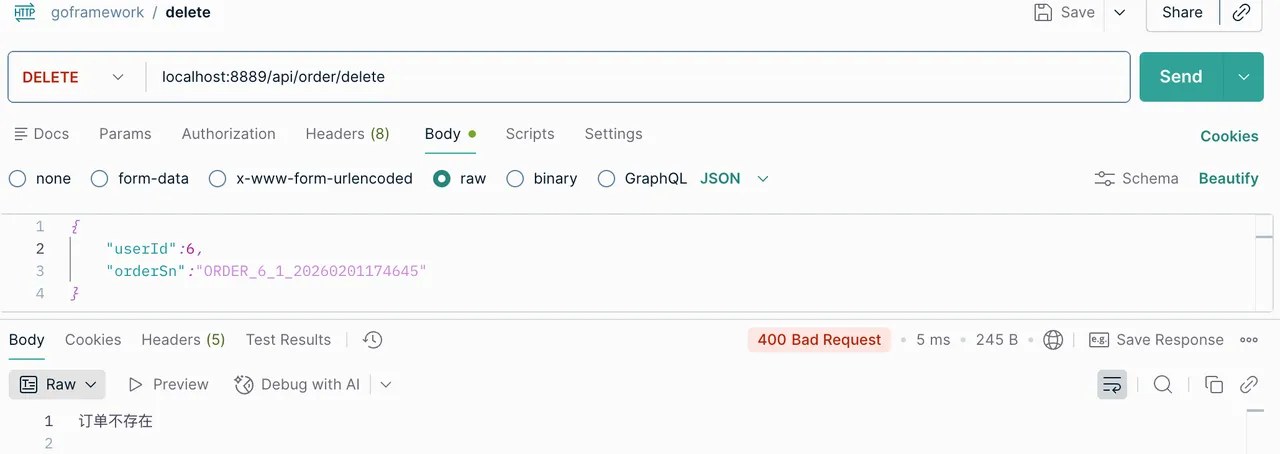
Testing the order deletion feature
Get order information
Registry — Consul
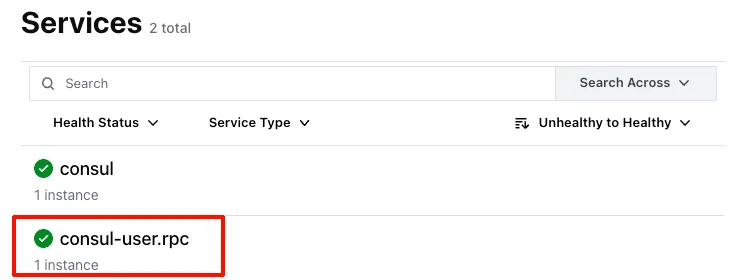
Originally Etcd was used as the registry; it is to be changed to Consul, starting Consul with Docker.
-
Modify the configuration files yaml and config.go, commenting out the original etcd
-
Register the service with Consul when starting the service
-
The service discovery side also needs configuration changes
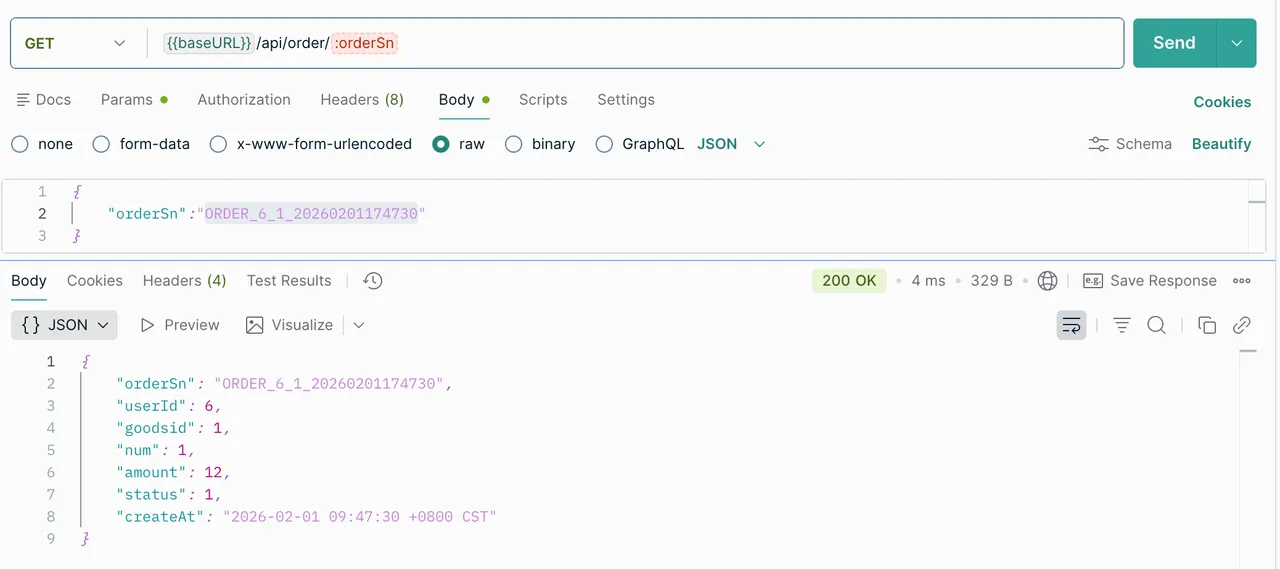
Then start the service for testing, and the test succeeded.

Passing metadata in RPC calls
metadata = the waybill (the information stuck on a parcel: who sent it, whom it is sent to, whether it is fragile). It can include:
-
Authentication token (Token): a JWT Token, used to prove who you are.
-
Trace ID: used to trace which microservices this request passed through (for example x-request-id).
-
Client information: such as User-Agent, or the client version number.
-
Timeout control: tell the server that if it has not finished processing within 1 second, do not process it.
RPC interceptors
Interceptor = security screener / sorting center (before the parcel actually reaches the recipient, first check the waybill, or disinfect the parcel)
Attach “context” information.
It is a kind of hook mechanism (Hook). It allows you to insert a piece of common logic code before the request is sent out (client side) or before/after the request is processed (server side).
Its core purpose is to separate common logic from the business code (the idea of AOP, aspect-oriented programming). It can be used for:
-
Authentication: before entering the business logic, check whether there is a Token in the Metadata and whether the Token is correct. If it does not match, intercept and return directly; the business logic does not need to write any judgment code at all.
-
Logging: record “who called which interface at what time, and how long it took”.
-
Error handling: uniformly catch exceptions and convert them into standard error codes.
-
Rate limiting / circuit breaking: check whether there are too many requests, and intercept directly if there are too many.
Client interceptor
Write the interceptor in the context file, then add it to the RPC service discovery.
Points to note:
-
When to store metadata
-
How to store it
-
How the interceptor passes values through context
Server interceptor
Register the interceptor before starting the RPC service.
Implement the interceptor’s business logic.
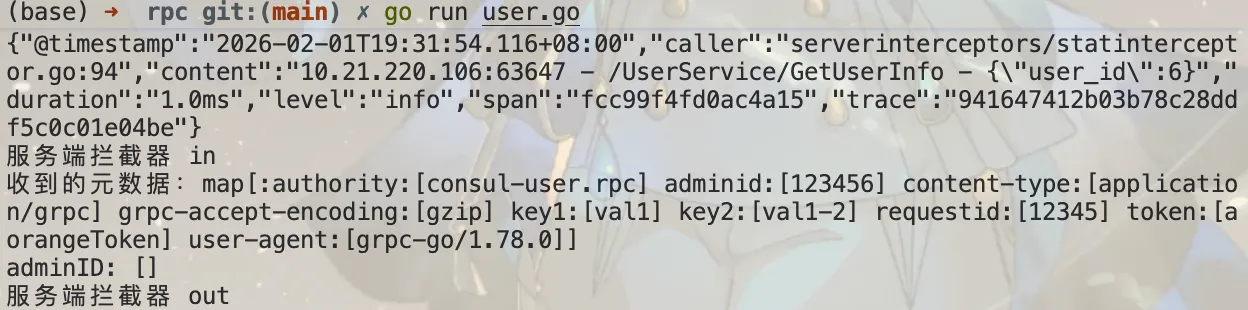
How the server retrieves data from metadata.
Testing
After a simple test, the server receives the metadata from the client and performs verification.
Error handling
You can define custom error types to produce more comprehensive output.
-
Define a custom-format error
-
Use the defined errors as needed in the business code
-
Tell the go-zero framework that we have a custom error type to be handled
Below are the test results.
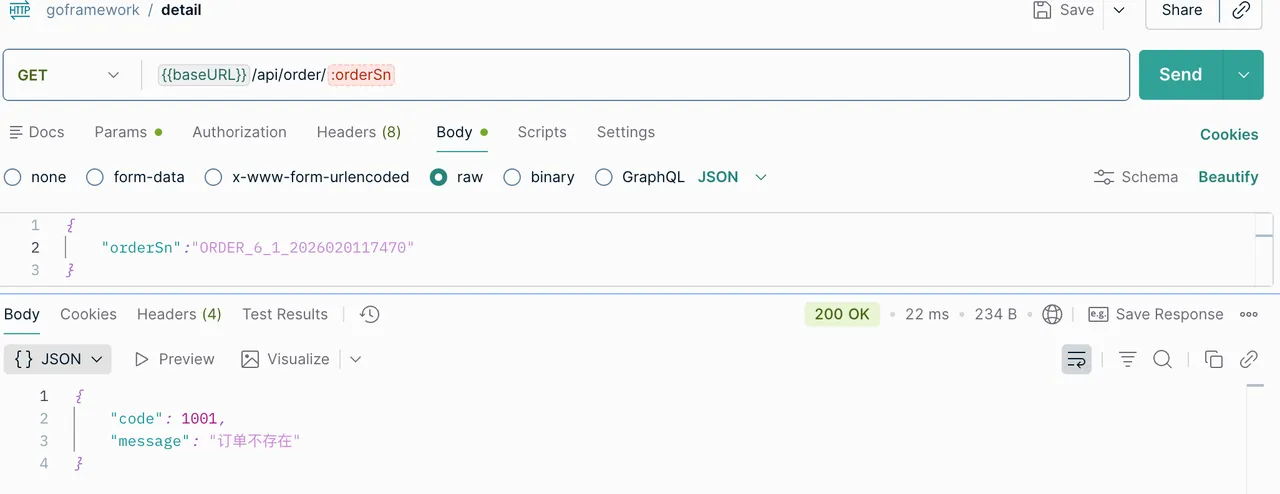
Modifying templates to generate custom code
See template customization and goctl template.
The role of templates: generating project code — when the goctl command generates code, it generates the code based on templates.
The main commands for modifying templates:
goctl template clean # 用于删除持久化在本地的模板文件。
goctl template init # 用于初始化模板,会将模板文件存储到本地。
goctl template revert # 用于回滚某个分类下的指定的模板文件。
goctl template update # 用于更新某个分类下的所有模板文件。
This way you can see a .goctl folder in the specified directory, storing tpl files. We can modify the file contents to customize the generated project files.